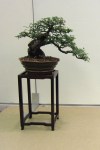
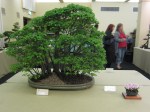
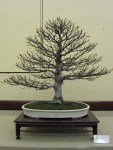
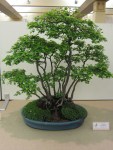
The following trident maple was ground grown by a friend. Since digging it up I have slowly been preparing it for its future life as bonsai.

One of the things I wanted to do this year was to set a first branch in an area where there was no branching.  I used a rough version of approach grafting which I hope to explain below.

Now the method I am using is not as exacting as it could be. The reason for this is the species I am using (Trident Maple). Tridents are very fast growing and forgiving. They also fuse very quickly which is the trait I am hoping to take advantage of in this instance.

Making the cut.

Approach grafting is a fairly straight forward technique. I wrote about it in regards to conifers in two parts HERE and HERE. To approach graft conifers you have to be fairly exact when lining up the cambium layers. Using the below variation you can be a bit less exact if using thin barked deciduous trees.

The finished cut.

Firstly you cut a channel roughly the width and depth of the whip you wish to graft.

The pinned whip.

You then insert the whip and secure it in place so that as it grows it is forced to grow into the cut channel, during which time it grows together with the trunk, fuses and makes the graft.

Hammer time.

In this example I used map pins to secure the graft. I find that the round surface of the pins heads does less damage to the growing and thickening whip than using square-headed pins or those with sharper edges.

The second pin secured.

In this case two pins were used to secure the whip. As Trident maples grow quickly and have relatively thin bark the whip and cut channel should graft together in a relatively short time as they heal and thicken. What is good about this technique is you can use very young whips as you do not need to expose the cambium layer. By not having to expose the cambium layer you avoid having to expose a large percentage of the cambium in the form of a wound and therefore increase the chance of the whip surviving and growing strongly.

Sealed, wired and ready to grow.

After setting the graft I like to lightly wire the whip and direct the tip upwards to ensure it will grow both strongly and leave the graft site at a desired angle.

This graft will be left to grow for the season so it can thicken, fuse and graft itself onto the trunk. I will cut it off the parent whip once I can see a difference in thickness between either side of the graft site. As the graft begins to take it should start to draw sap from the trunk and become noticeably thicker from the graft site onwards.

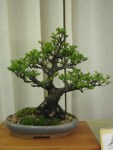
After I finished placing the graft on the trident maple I decided it was also a good time to clean up a graft on a Chinese Quince from last season. If you look closely you can see the difference in thickness between the grafted branch and the stub that use to be connected to the parent whip.

A successful graft

You can just see the stub below the branch junction where the whip was cut once it had taken.

Stub removed.

I like to leave the stub on for a while until I see the graft growing strongly. I think keeping wounds away from the graft site at least until you are sure the graft is successful is a good idea.

Sealed and finished.

To complete the process it is as simple as cleaning up the stub from where the whip was once attached and sealing the wound. Once the wounds heal and the graft grows for a season or two it will become increasingly difficult to tell that it was a grafted branch.

It is a very simple process all in all and one I use quite often. It can be used with a range of thin barked deciduous trees that show signs of fusing easily. It is an easy technique to do and most of the time returns great results. Some example species to try might be, Trident Maple, Japanese Maple, Chinese Quince, ficus species and other species with similar bark traits.

While at a local show one tree caught my eye. It was a Maritime Pine or Pinus pinaster. It had great movement and some really interesting features that made it great bonsai material.

We don’t see a whole lot of maritime pines in Australia but after spending my time looking over this tree I think I would like to find one for my own collection.

The bark was fantastic and old and had deep cracks through the red/orange coloured plates which was very similar to the bark on some collected trees I had seen in Japan. This really gave it the appearance of a very old tree.

The fissured bark

The tree also had very interesting movement in the upper sections of the bonsai.

The twisting trunk

You can start to see the red colour in the bark.

What was really interesting about this tree was around the back of the trunk where there was an old shari. Around the edge of the shari some strange blobs had formed which almost looked like fingers or melting candle wax.

A thumb with finger nail perhaps?

The thumb above with some more fingers growing further down the trunk.

The one factor letting down this species would probably be the needles. They are very course and quite long. These long course needles had me thinking of images of what a tree like this could look like after a few years grafting either Japanese black, or Japanese Red Pine foliage onto the fantastic trunk and base.

The whole tree complete with difficult to photograph background.

A nice tree I would love to have on my bench. It is an interesting species I will be keeping an eye out for one in the future.

Is anyone growing this species? I would love to hear about it and or any species specific techniques you use.

Just thought I would share a couple of pictures from a recent show. The show was put on by the Bonsai Society of Victoria and much like other years it was well worth attending. What I found interesting this year was that there were a number of groups on display. It seems that recently, groups have fallen a little out of favor so it was good to see some nice old examples represented.

Pictures of a couple of trees below.

Sold. Japanese black pine shohin.

Last night I sold the above pine. I had been torn as to whether or not to sell this tree for about a year. Small black pines are hard to come by in Australia.

This morning when I went out to water and it was confirmed that it was a good decision. I moved my trees a little to fill in the space it had left and I didn’t miss it at all. In fact of all the trees I have sold I have never missed one. Now this is not because they were not good trees. Each one had been grown because it had good qualities or good potential, but for what ever reason they had stopped speaking to me. In this case it was a casuality of trying to cut down my collection a little so I can dedicate more time to refining each of my remaining trees.

I have also sold trees that I had sentimental attachment to aswell. I sold the first tree I grew a number of years ago. It was not a particularly good tree but for what ever reason I felt attached to it as it had been my first bonsai. It was a difficult decision to sell it but once it had sold I didn’t ever regret it or really even think of it again.

Which I guess brings me to my point, sometimes one of the best ways to improve your collection is to sell those trees that either have lesser promise in your collection or those that you are no longer enthusiastic about working up to a higher level. Once sold i am sure you will not regret it or even think twice about the decision. Not only will you be left with a better average level of bonsai in your collection but you may also be able to spend the sales proceeds on better bonsai or stock.

I have a pretty busy week ahead so I though I would just post a quick picture of a tree a came across a few weekends ago growing in a national park. Its form reminded me of many of the collected Junipers you see from overseas. Enjoy.


Luckily collecting is banned in national parks so people will be able to enjoy this trees form in its natural location.

I had some time this weekend to work on one of my pines. This time i chose to re-wire a small Japanese black pine (Pinus thunbergii).

The tree in question had belonged to a member of one of the clubs I belong to. When i received the tree it was estimated to be around 30 years old. It had been a nice little tree, but the last few years before I received the tree it had become leggy and some wire had also been left in the apex which had caused some large swelling and scarring. As a result, I had to prune most of the branches back quite hard and also remove the damaged section of the apex and upper trunk which essentially shortened the tree by a third.

The first wiring happened in March 2009.

One of the first wirings. Before and after, March 2009.

The little pine responded well to heavy feeding and was re-potted into a better mix. It budded back quite well and was ready for another light wiring by April of 2010.

After wiring the tips out. April, 2010.

As you can see the apex still needs a lot of developement. After cutting the damaged upper trunk off in 2009, I had then had to re-build the apex from a single branch. It is a slow process to rebuild a crown but this little pine responded well and produced a number of buds where i needed them.

The tree slowly coming to shape. Pre-wire, first branch and then secondary branches wired.

Every year the ramification increases and I am able to remove problem branches and replace them with better growth. The apex has now taken shape and now needs to increase its ramification to fill out its silhouette.

After the latest wiring.

Looking at the above picture the shape of the tree becomes clearer, but i think it still has a way to go. I like the long first branch, but am still toying up whether or not to break the foliage mass up into a couple of pads or keep it as a single mass. This years wiring was not the final wiring the tree will see and was done to achieve two things. The first was to start to set the form of the branches a little closer to how I imagine their final positions and also to let more light into the interiors of the structure. By letting more light into the interior I should be able to strengthen weak inner buds and also encourage further back budding.

I hope that in a couple more seasons I should be able to even out the foliage density and have the tree ready for show.

Just a few pics from around the garden. Spring has come early this year and nearly all my trees are starting to move. It’s an exciting time of year.

A trident begins to leaf out.

Flower buds swell on a flowering quince.

A Chinese quince almost fully in leaf.

A shohin Red pine's candles begin to extend.

Spring is certainly around the corner and all my trees seem to know about it. They are for the most part starting to swell their buds. As a result I have been re-potting. I re-potted one of my trident maples a couple of days ago to get it ready for the springs growth and thought I would share some pics of the process.

The bottom side of the rootball before and after the work.

Surface roots combed out.

Once the roots are all in order you can continue to pot up the tree. In this case it went back into the same pot.

Re-potted.

Another year and another re-potting…..

The longer I am involved with bonsai the more my tastes change and develop.

Below is a Japanese black pine that I have been growing for a couple of years. It’s not a classic beauty but I was drawn to its strangeness and the challenges it presented in regards to styling it. I enjoy the challenge of difficult material. Quite often you have to think outside the square a little in order to get a pleasing result and often the bonsai that are transformed from this unusual material often posses something that makes you look twice at them and linger to explore their curves, movement and styling.

Before the work.

Now this tree had been styled once before, but I had never been entirely happy with the result. I had styled the first branch as just that, a branch. initially this branch was a sacrifice branch, grown to thicken the trunk and when I came to style the tree there was something about it that appealed to me. I had spent all the time since then looking at the tree on my benches trying to work out why it didn’t quite sit right with my eye. I realised this was a simple question for most people because I had many people suggest to just cut it off. I thought about that this time around but decided that I could have another shot at things and try to make the bonsai work with the large first branch.

My new approach was to style the branch more like a trunk. I guess the idea is that the main branch got so strong that it started to turn up and form a trunk in its own right.

After a quick wire and the addition of a couple of guy wires.

Now as you are probably aware by looking at the above photo that this bonsai has a long way to go but at least now I feel this new structure is something that the tree can grow into and fill out to form an interesting, convincing bonsai.

Now I am sure that I will get suggestions for the rest of this trees life to cut off the first branch. As this tree is, it doesn’t fit the normal image of bonsai.

I have often found that the bonsai that are a little out of the ordinary are the ones that I end up remembering and that I return to at shows to have a second look at.

Just for interest purposes I photoshopped the branch off.

The offending branch virtually removed.

Looking at the above comparison it becomes obvious that this is not the right direction to take this pine in at the moment. The removed branch would reveal a straight trunk and leave behind a mediocre branch and canopy structure. If I was to cut off the branch I cannot see the tree staying in my collection for long.


The tree I worked on this weekend was a corky bark elm. It’s a tree a friend grew and I purchased from him a year or so ago.

The tree as I received it.

When i bought the tree, the trunk was  covered in moss and the branch structure was difficult to see through the foliage. Once it was home, the first step was to prune the tree and clean the trunk and root base.

After a prune and clean up.

After cleaning the trunk and nebari and giving the foliage a good prune a few things became obvious. Firstly the tree had a good nebari thanks to the work my friend did while developing the stock. The trunk on the other hand was not bad but had a gentil curve in it which for some reason seemed awkward. The branch locations were ok but would require a fair amount of work to form an upright tree.

Un-potted

A season passed and I finally got around to re-potting. Re-potting was my chance to change the planting angle of the tree and really think towrads the future of the tree.

An Option?

I had toyed with the idea of making this tree a semi cascade while it was potted but once I bare-rooted the tree and tried it in a few semi-cascade positions I wasn’t entirely convinced. I spent some time tilting the tree this way and that, changing fronts, imagining grafted branches until I finally settled on a design.

Cambium layer exposed.

I pruned a few branches and also exposed some cambium in a couple of areas. The tree was to become a raft. Elms root very well but I felt a few areas of exposed cambium could only help speed rooting along the trunk up. I also put a couple bits of wire on the main branches to set the basic structure of the tree.

The final outcome.

This is a fairly one way solution. In order to get the trunk to lie over I have had to cut off half of the nebari making standing the tree up in the future not really an option. That said I am sure you would agree that this clump or turtle back style transformation is definitely one that has improved the tree for the better. The tree has a long way to go and it will be interesting to see how the corky bark copes with the close soil contact, that said I think that in the future it will grow into an interesting tree. Depending on how it leafs out, I will most probably give it a prune and full wire some time in mid summer. Hopefully by this time next year it will have rooted enough along the trunk to get it into a more shallow pot and really start its journey as a bonsai.

Enter your email address to subscribe to this blog and receive notifications of new posts by email.

Join 688 other subscribers

Contact me

nichigobonsai***gmail.com

Note: to use email address, substitute *** with @