
You are currently browsing the tag archive for the ‘shohin’ tag.
This little lump of wood is something that has been sitting on my benches for a number of years. I’ve been slowly building branch density and roots having arrived in my garden shortly after it was collected.

Chunky Nugget!
With my re-potting supplies delayed due to a Covid19 lock-down I had some spare time and gave it a quick first style. I need to next go through my pots and find something that might fit it when i do get around to re-potting.

It obviously needs a fair amount of more tweaking but I will likely leave that until I get it into a more suitable pot. That said and looking at these photos I can see that the apex is bothering me and will likely need adjusting regardless.
Both my bonsai and personal life have been busy of late. I am fortunate that this year I have been invited to demonstrate and run workshops across Australia for local club, groups and the AABC National Convention. On top of this travel I just begun winter styling of clients trees. It looks like I will have a fairly full book of client trees, workshops and demonstrations that combined with a young child, a house half way through renovations and a full-time job doesn’t leave a lot of time to work my own collections.
Today’s post is actually about a tree I worked on a year ago whilst in japan.
It was a small shimpaku juniper that Oyakata asked me to wire and style prior to taking it to auction the following day to be sold.

Prior to the work
I initially wanted to tilt the tree to the right so that the first bend would come in contact with the soil giving the appearance of a much larger trunk but Oyakata didn’t want to re-pot as the auction was so close and as a result we utilised the existing angle and front.
It turned out to be a fairly straight forward re-style and Oyakata told me it sold well at the auction.
Post work.
Looking back on trees like this it really gives me the incentive to start growing my own material to this standard. I now have a backyard big enough to experiment with a whole lot more stock so I am looking forward to starting this process off this year. Who knows, in ten years time I might have a whole lot of these ready for display………..
The tree I worked on this weekend was a corky bark elm. It’s a tree a friend grew and I purchased from him a year or so ago.

The tree as I received it.
When i bought the tree, the trunk was covered in moss and the branch structure was difficult to see through the foliage. Once it was home, the first step was to prune the tree and clean the trunk and root base.

After a prune and clean up.
After cleaning the trunk and nebari and giving the foliage a good prune a few things became obvious. Firstly the tree had a good nebari thanks to the work my friend did while developing the stock. The trunk on the other hand was not bad but had a gentil curve in it which for some reason seemed awkward. The branch locations were ok but would require a fair amount of work to form an upright tree.

Un-potted
A season passed and I finally got around to re-potting. Re-potting was my chance to change the planting angle of the tree and really think towrads the future of the tree.

An Option?
I had toyed with the idea of making this tree a semi cascade while it was potted but once I bare-rooted the tree and tried it in a few semi-cascade positions I wasn’t entirely convinced. I spent some time tilting the tree this way and that, changing fronts, imagining grafted branches until I finally settled on a design.

Cambium layer exposed.
I pruned a few branches and also exposed some cambium in a couple of areas. The tree was to become a raft. Elms root very well but I felt a few areas of exposed cambium could only help speed rooting along the trunk up. I also put a couple bits of wire on the main branches to set the basic structure of the tree.

The final outcome.
This is a fairly one way solution. In order to get the trunk to lie over I have had to cut off half of the nebari making standing the tree up in the future not really an option. That said I am sure you would agree that this clump or turtle back style transformation is definitely one that has improved the tree for the better. The tree has a long way to go and it will be interesting to see how the corky bark copes with the close soil contact, that said I think that in the future it will grow into an interesting tree. Depending on how it leafs out, I will most probably give it a prune and full wire some time in mid summer. Hopefully by this time next year it will have rooted enough along the trunk to get it into a more shallow pot and really start its journey as a bonsai.
I am still slowly working through my collection and preparing for winter. This weekend this Chinese elm was cleaned up along with a couple of other trees.

Before the work.
The tree I worked on had recently undergone a re-style. Upon re-potting last year I also decided to change front slightly. This required a bit of pruning. As I began to prune I realised that the initial branch structure had been grown too quickly and lazily on my part. Many branches were too thick, had little taper and had messy structure. I decided that the change in front would also be a good time to re-structure the ramification so I pruned hard.

The same tree a year or two ago prior to re-styling.
Re-styling an established tree can be a hard step to take but ultimately having this tree go backwards for a couple of years will mean that in the future it will be a much better tree. Luckily chinese elms are strong growers and rebuilding the ramification should be a fairly quick process.
The work I did this time around was mainly removing leaves that had not yet fallen off and cleaning the trunk of moss and also cleaning up the soil surface.

The soil and trunk need a clean up.
Keeping your bonsai clean of moss and fallen leaves and other debris achieves a few things. First, it makes the tree look better which I always find makes me take better care of it. I also find that doing work that makes you look closely at your trees you become more familiar with them and it often reveals what future work will need to be done in coming seasons. The last thing a good clean often does is it reduces the hiding places for pest insects and places for their eggs.

A large caterpillar that was living under the moss growing on the trunk.
After a general clean I pruned the long growth and then sprayed with lime sulphur.

After the work.
All the tree needs now is a wiring and a re-pot sometime prior to spring. I am toying with the idea of lengthening the canopy on the left side and possibly growing a low branch from the left side of the hollow. I guess I will grow one and see how it goes next season, i can always cut it off if it doesnt work out.
I am pretty happy with the pot it is in at the moment. I was never really 100% on the last oval pot and feel this one suits it a lot better.
The pot is a production Reiho. Reiho is one of my favorite production potters from Tokoname. Although the photos don’t really capture it, the pot really changes moods depending on the sun. Sometimes in low light it looks almost black, and then in full sun it turns to an almost ultra marine blue. you can kind of see it by comparing the colour in the first pic with that of the soil surface photos. Hopefully next season I will get some good colour on the tree so I can see the yellow leaves set off against the dark blue fo the pot.
Kojou-en is located in Kyoto about 800m to the west of Toji Temple. The Toji Temple can be easily reached by bus or by a moderate walk from the Kyoto JR station.
Kojou-en is one of the nurseries I had been meaning to visit for a long time. I first visited here in 2007 but the nursery was closed. Since then i have been wanting to come back and see the bonsai that I glimpsed through the fence.
The day i chose to visit this trip was also not ideal. Kyoto received a huge dump of snow during the corse of the day and as a result most of the bonsai were shut up in enclosures protecting them from the cold. I did get to see a few of the bonsai but I think a 3rd trip will have to be in order to see the nursery in the full.

Snow fell heavily all day and by the evening around 20cm had fallen. According to the owner of the nursery this was quite unusual for Kyoto.

The fromt gate. Kojou-en is located in amoungst many residential buildings. It can be a little hard to locate the first time.
Kojou-en is known for its shohin bonsai, in fact there were no bonsai other than shohin in the nursery. They also had a nice range of shohin pots that were also for sale.

Some of the nice shohin that I was able to photograph.

Huge bases in tiny pots.

More bonsai sheltering inside their winter enclosures.
Kojou-en is well worth the visit and it is easily included in a Kyoto sight-seeing day. I will definitely be back to take it all in next time and hopefully my luck will be a little better than my last two visits.
If you would like to see more photos from this visit have a look HERE at my other blog.
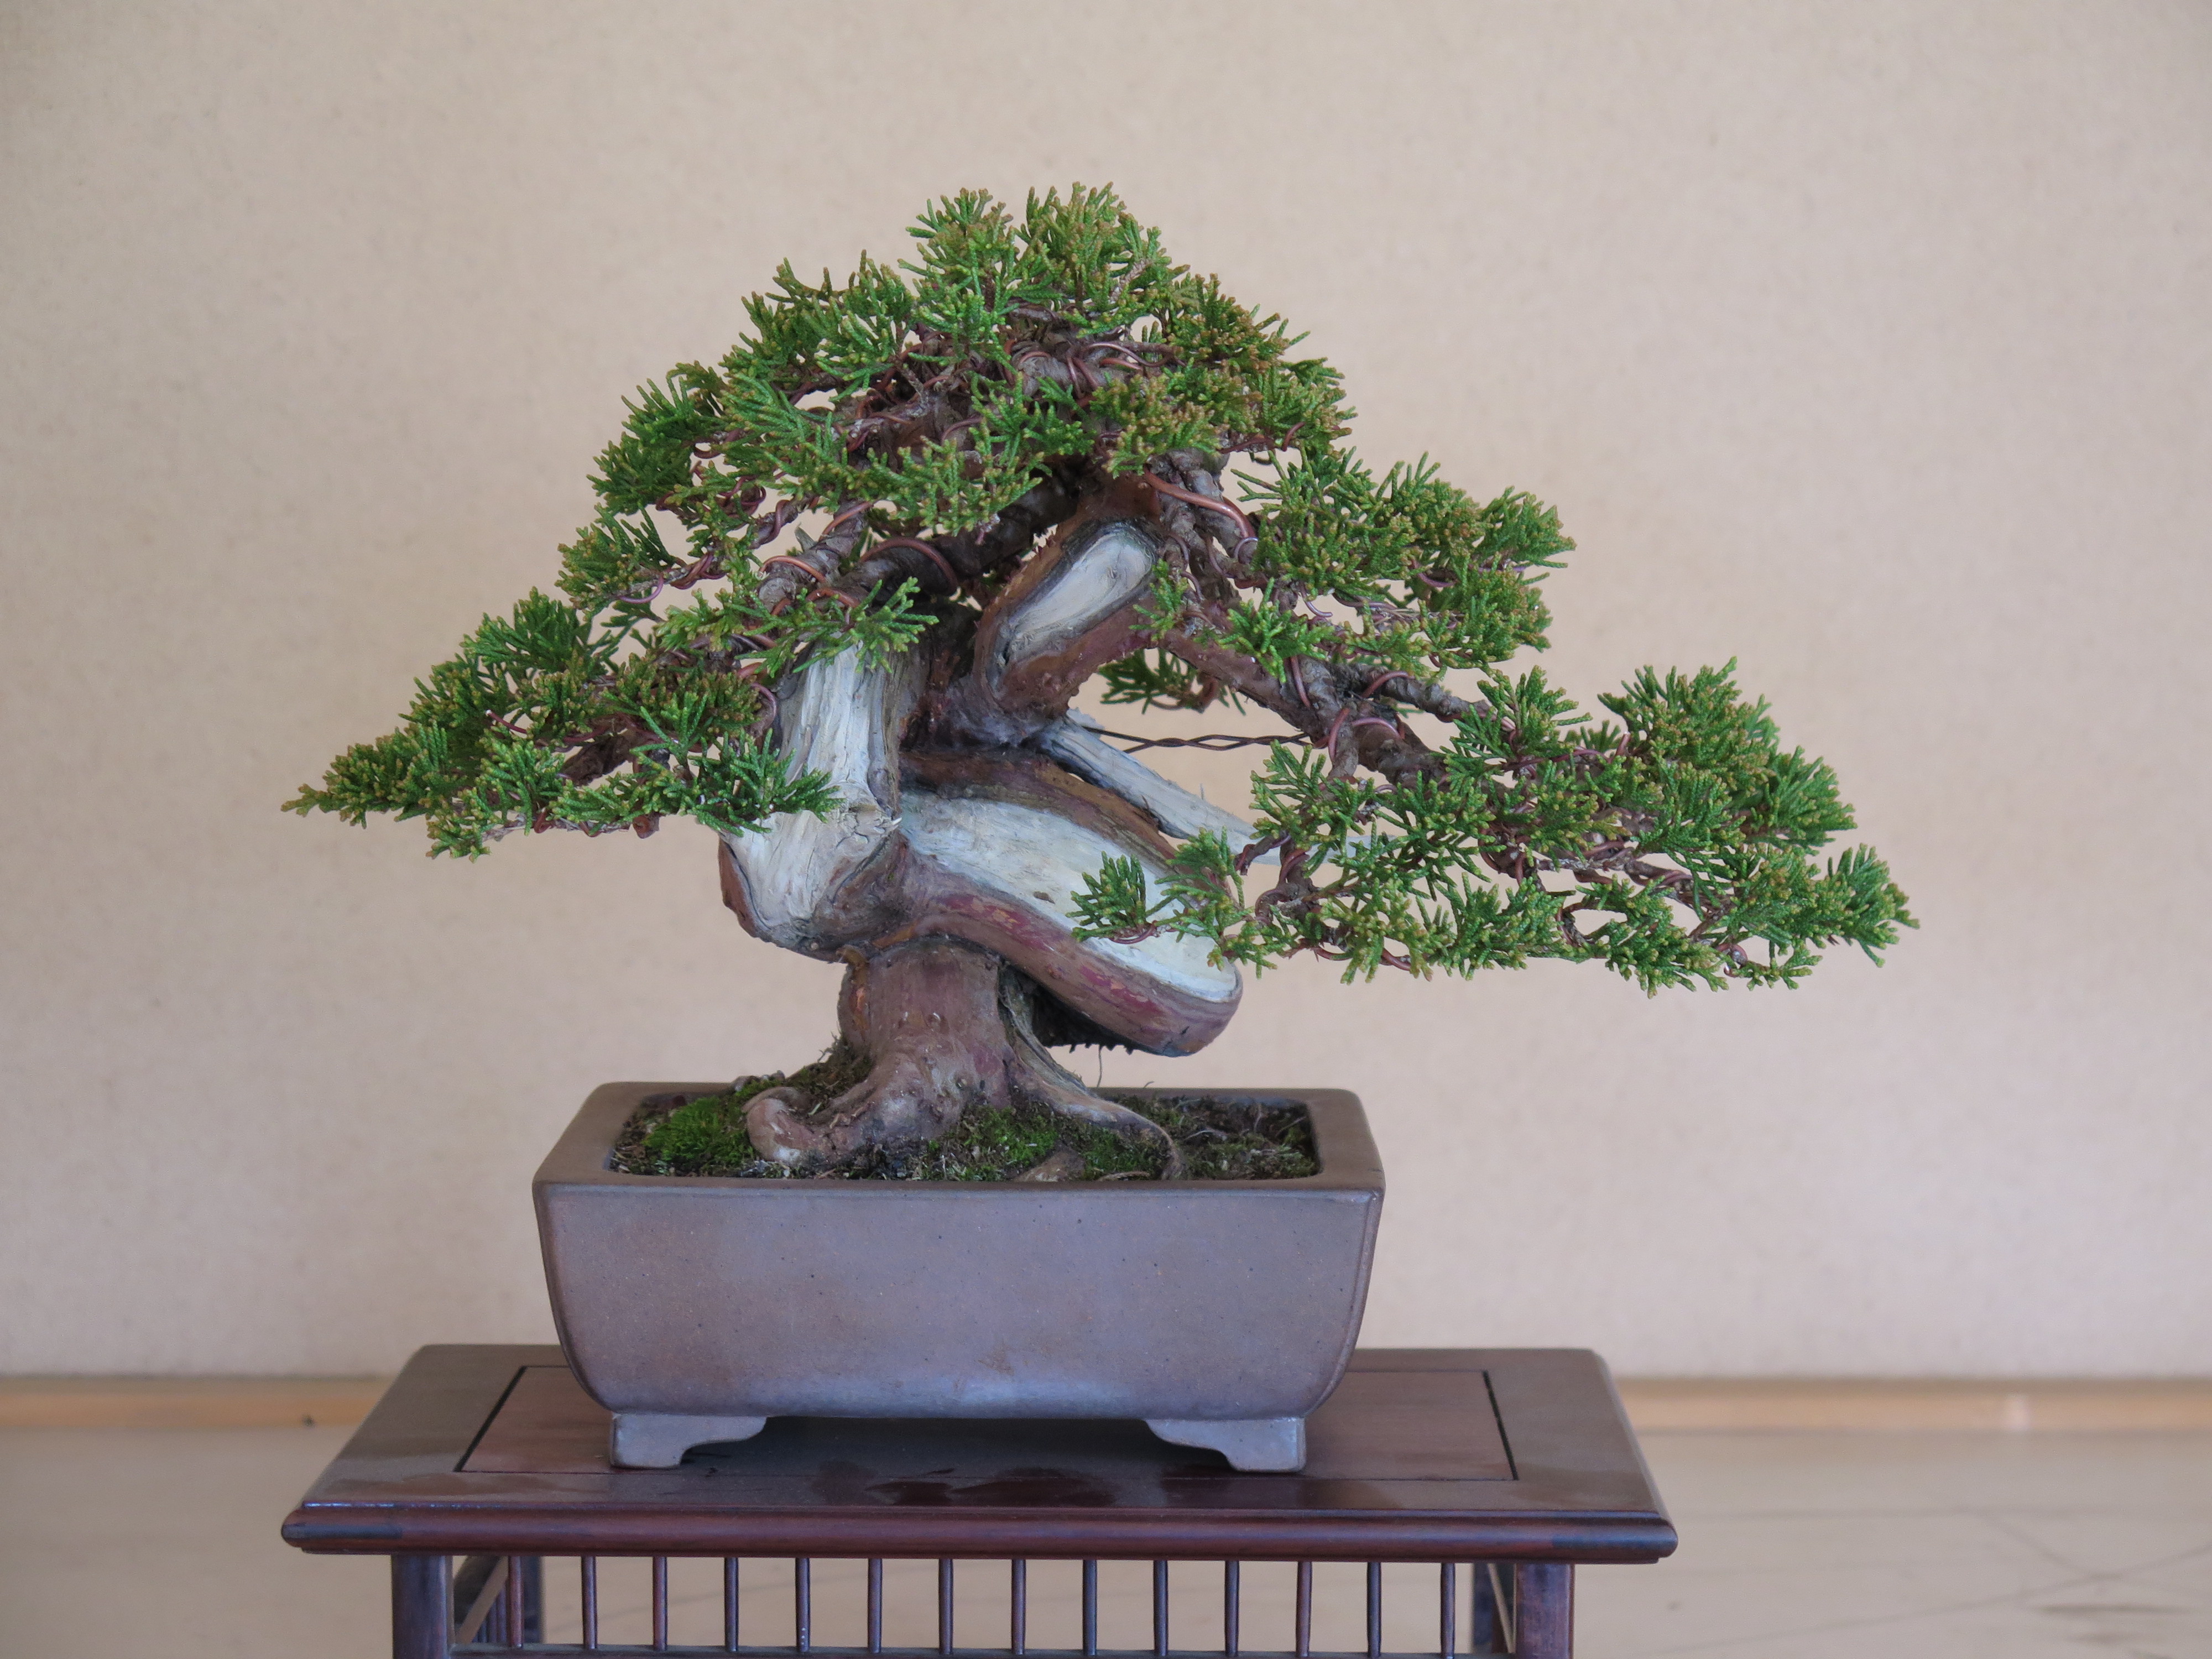
I like growing and working on shohin sized bonsai. This Shimpaku was another that I was lucky enough to style while at Taisho-en, Japan.
It had all the makings of a good bonsai, but had become overgrown and needed to be styled.

This is the small Shimpaku before the work began.
The trunk line had an interesting twist and the shari and live vein had started to contrast with one another nicely.

And this is the tree after styling
This work was really just a wiring exercise. I was able to position most of the foliage into good positions but it really needed a year or twos growth to fill out some of the weaker branches. The foliage was positioned in a way to allow the viewer to see the nice twists in the trunk and shari.
All in all it is a very nice tree that can only improve as it ages. This was definitely a tree I wished I could have put in my suitcase before I left.
