
You are currently browsing the category archive for the ‘Pruning’ category.
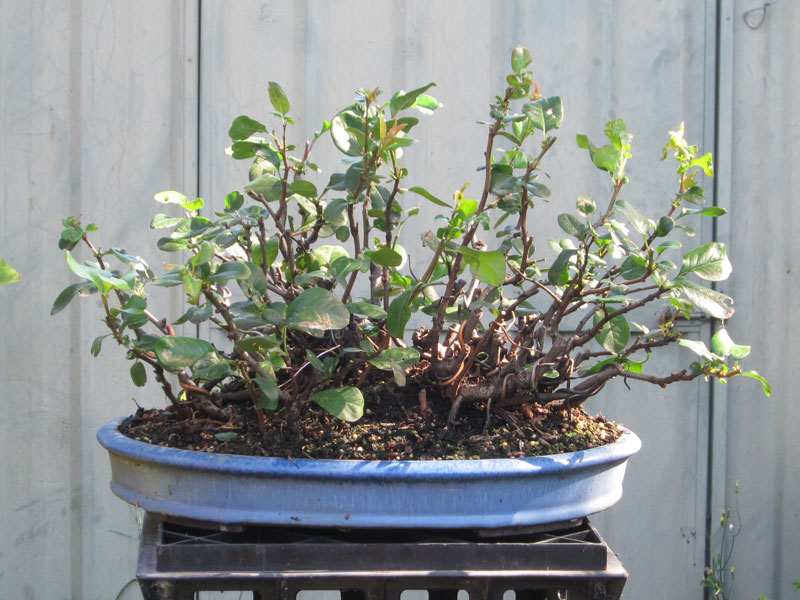
This is one of my trees that was partly neglected over the last couple of years. It’s pruning only really focused on cutting back to the silhouette (due to lack of time), so while the canopy out of leaf looked twiggy and dense, the structure was not great and the beginnings of lumps and bumps were forming where too many shoots emerged from one place.
The time came recently to do some work on this tree and it was pruned back and re-potted.

Above: Pre-work. The tree looks dense and ramified but the beginnings of lumps were forming within the canopy. It was time to cut out some problems.

Above: After a cut back. I think about 50% of the fine twigs were removed. While this is a bit of a set back, with a year of strong growth i think i can probably get 3 or 4 flushes out of it and mostly replace what has been lost, but this time upon better structure.

Above: ….. and a re-pot. Not a dramatic change as its the exact same size, style and make of pot, just in a different colour.
This little tree stands 12cm from the rim of the pot which doesn’t really come across in the pics but it is a tree that really fits in the palm of your hand.
During this growing season i will be working towards rounding out the top of the canopy and increasing the ramification. I will do this via:
- Heavy feeding
- Outer canopy defoliation and cut back
- Selective pruning of twig structure to avoid growing more issues into the tree and;
- Possibly some limited wiring.
I will update again if the above is successful.
This is a maple I have been working on for some years and you might have seen on the blog before (2021 update, and 2013 update).
It came into the workshop recently (where i forgot to take before pics) and I gave it a structural prune. It really needs a full re-wire but overall I am pretty happy with the branch structure and development.

If you compare the tree now to some of the previous posts you can see quite a bit of development but then again i think I first started working this tree in 2013 so 10 years have passed so i would expect some change (and perhaps more development).
It had been somewhat neglected the last little while and particularly last year where it was overdue for re-potting and i ran out of time to do it.

As a result in the heat of summer I had some root issues and the tree suffered some die-back on the nebari. It was not a good result and entirely my fault. Well, lesson learnt and now i will have to spend the next few years healing the scar and will consider wrapping the roots in a towel or cloth to give some sun protection on our hottest parts of the year.
The tree still has a way to go but each time i work on it i can see the improvements. I am looking forward to giving it a full re-wire this Autumn.
Every one needs a project or two in their collection. I really enjoy project trees, that is tree that are undergoing various processes to transform them into a new style, shape or form. The problem is that each year project trees undergo their transformation and then move into ramification/maintenance phases leaving me to find new projects.
Trident maples are one of my favorite species to work on and I really enjoy having one as a project. I always have my eye out for something that has plenty of room for improvement. The tree below is one such tree.

The tree as I received it
The tree was an imported trident maple. It had been brought into the country back in the 90’s when Australia’s border protection was much more flexible in regards to bringing bonsai in.
When I got the tree it had been left to grow out for the last 2 years and as a result there was a fair amount of work required to bring it back to its former glory.

After first cutback.
The first thing I did was cut it back hard to stimulate some back budding. It’s branches were quite old so it didn’t bud out how I had hoped. This lead me to go down the path of approach grafting rather than risk cutting off branches and not get any buds pop. I decided to graft on a new set of branches at the base of all the old branches. In total I grafted 5 branches and left the tree to grow.

The grafted branches have taken.
I also re-potted the tree and found a lump of old akadama in the center of the root ball. I bare rooted and picked all the old soil out of the root-ball. Almost immediately after the re-potting the vigour of the tree improved and I was rewarded with strong growth which helped the approach grafts to take. In the above image you can see the grafts emerging from the underside of each branch.

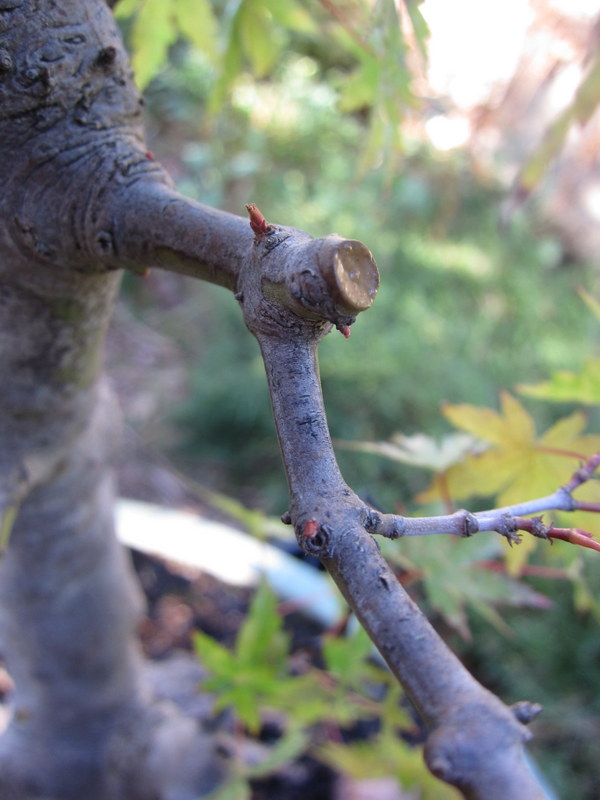
The large branches removed.
This spring I cut off all the large branches as the grafts were now strong enough to take over the sap flow. When I made the cuts I cleaned the wounds up with a knife and then applied cut paste which in my experience helps things heal.

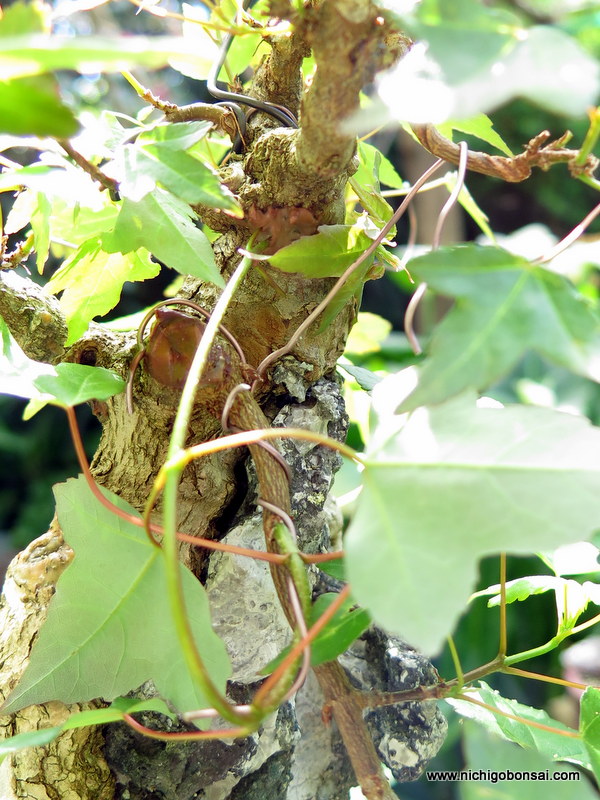
A wound and a grafted branch.
I have left the grafted shoots long and I will let them grow until I am sure that they are strong and well connected to the host trunk. Once I am sure of that (probably in a month or so) I will cut them back to the first internode and then begin growing the branch structure.
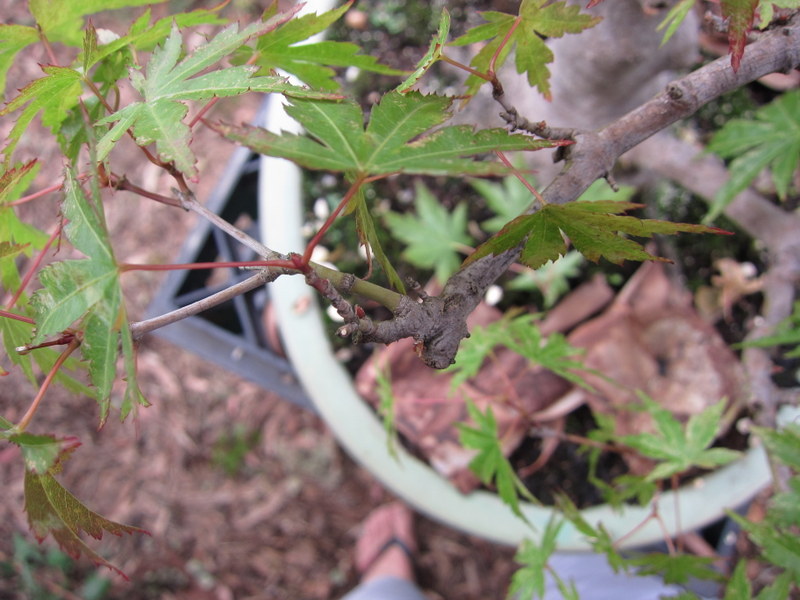
Unfortunately the back branch’s graft didn’t take but as luck would have it this spring a bud has popped right at the base of the branch right where I wanted it. Sometime trees do what you want.

The two leaves are the new bud at the base of the back branch.
Once this shoot is strong enough I will also cut off the old thick back branch above.
This spring I also placed the last graft I need, just below the apex. This should allow me to cut off the last heavy branch on the tree without having to chance whether or not I get a bud where I want.
The shoot on the bottom left is bent up to under the apex where it has been approach grafted into the trunk.
Its been fun replacing the branches on this tree and i am looking forward to this season of growth where i can start to grow the branch structure and form the outline of the bonsai. Hopefully in 5 more years this will be a highly ramified and ready to show bonsai. Time will tell.
I am continuously telling myself I have enough trees and that I need to reduce the collection. Well, that only works so well, much like the tree that is the topic of this post, bonsai keep finding their way into my backyard.

The maple, October 2012.
I saw this maple at a local show last year and while talking with the owner, he let me know that it may be for sale sometime in the future. To cut a long story short, I bought the tree early this year and it has since sat on my benches while I got to know it.
A few things drew me to the tree initially. The tree had age. Old grey bark is a sign that the tree has been around for a long while and cannot be achieved via short cuts. The nebari was another feature that drew me to it as it was really starting to flare nicely at the soil level. This is a really nice feature that can only get better with future work as I develop the rest of the tree.
Since it arrived in the garden, I have fed it, watered it and tried to work out what my plan for its future might be. It has responded well and even survived a large gum tree branch falling onto it. It took two people to lift the branch off but luckily all the trees under it survived with only a couple of small broken branches. Very lucky.
Today I decided that I would start the tree’s re-styling. I first cleaned the nebari and removed the surface moss. For this I used an old tooth bush and clean water. Old tooth brushes really come in handy for this type of work. I then cut off the heavy apex and replaced it with a small branch below.
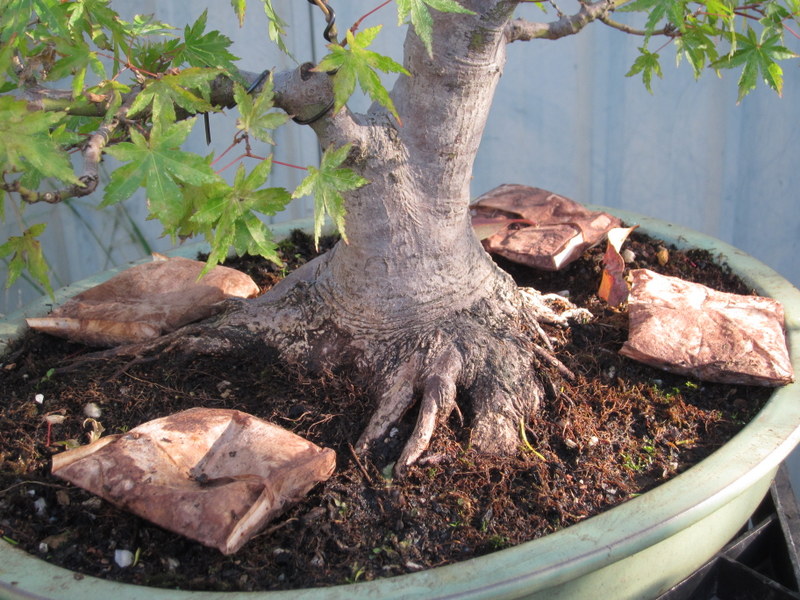
The cleaned nebari

The apex pruned back and a small branch below wired into place.
On a couple of the larger cuts I trialed using two cut pastes at once. First I applied a liquid paste from a tube. I like this type of cut-paste but it tends to soften and wash off during extended periods of rain which is why I applied a second layer of cut-paste putty over the top as a waterproof layer. I also like the putty on it own but I find it sometimes dries out too quickly and or doesn’t seal as well as the liquid tube style pastes. Hopefully this will give me the best of both worlds.

Another double cut-paste pruning cut.
I know there are those out there who don’t believe in the use of cut-paste and are quietly smiling away to them selves at my overkill, but without starting a debate on the issue, I have tried using cut-paste and not using cut-paste and at least where I am living it seems using it gives better results than simply leaving the wound to its own devices.
After removing the apex it was time to address the areas of the old branches that had thick growth at their tips and or sections where too many buds had been allowed to grow and knuckles had formed. When faced with this type of issue the only solution is to cut out the offending growth. It does seem like you are setting the progress of the tree back a little as you are removing some of the visual bulk of the branch but down the track you will end up with a branch with much better structure and a far superior winter image.

Thick twigs at the tips of the branches look heavy and take any idea of grace away from the branch structure.
So I cut out the offending areas. I will re-build the fine tips with the back budding that the pruning will no doubt trigger.
Since the tree had been on a heavy feeding program it has begun to show results. Buds have already started to swell along the branches and the trunk which makes me confident that the pruning will continue to trigger new buds for future ramification. Interestingly some of the buds that woke up along the trunk were almost at soil level and on really old bark.

There are buds at the base of most branches or former branches.

Some buds low down on the trunk on old wood.

Buds at the base of a branch damaged by the falling gum tree branch.

More buds.
It’s easy to prune large branches when you know they will be easily replaced by buds at the base.
I think the tree had previously been on a very low dose and or no dose feeding program. This meant that when I started to flood it with fertiliser it literally started jumping out of its skin (or bark) with back-budding. I imagine next season this will only be amplified once it is re-potted into a fresh mix and the compacted roots get some space and start to run a little.
After correcting a few of the structural issues I had a think about the future style of the tree. I decided that the trunk line would be complimented nicely with a second trunk. As it turned out I had a small branch in just the right position at the base of the first branch to wire up into the new trunk. This will be left to grow free for the next few seasons to thicken and elongate.

A useful branch wired up into its new role as second trunk.
After doing work such as cleaning and structural corrections you get a good idea of the trees faults and features which makes for a nice way to ease into re-styling. In this case it made the decision of changing the front easy. The old front had a root that had grown across the root-ball and fused a long time ago creating a slightly awkward look when viewed from that side. The Back of the tree showed a much nicer nebari and the now left first branch exited the trunk from a much nicer angle. The newly wired up apex gives the appearance of much nicer taper and adds a little movement from this new front as well.

After the work. A little bare for now but the bones are all there to make a very nice tree in the future.
For now the tree will be fed and left alone until re-potting time early next spring. Then after the first flush of spring growth hardens off I plan to fully wire the tree and any new growth that has developed from the buds that are forming now. I am really looking forward to getting into the root-ball and seeing what it looks like under the soil and where I can make improvements. It has the start of a fantastic nebari and it will be fun taking it and the rest of the tree to the next level.
I have a ‘thing’ for clump styles. A few years ago I had the opportunity to purchase a flowering quince and upon seeing its clump form I bought it. Since purchasing it I have styled it a couple of times and experimented with a few different methods of growing it. It flowers profusely and easily but it seems to really resist ramifying, instead always wanting to grow only one bud per branch. This is a problem if you dream of densely ramified clumps.
I started out trying to use defoliation to force some back budding. This worked to a point but the tree quickly weakened and stopped pushing growth and although some back-budding occurred it still was very tip dominant.
I then used hard cutting back to try to stimulate some of the inner buds which worked toa point but again the terminal buds were mainly the only buds to burst.

After the clumps first styling
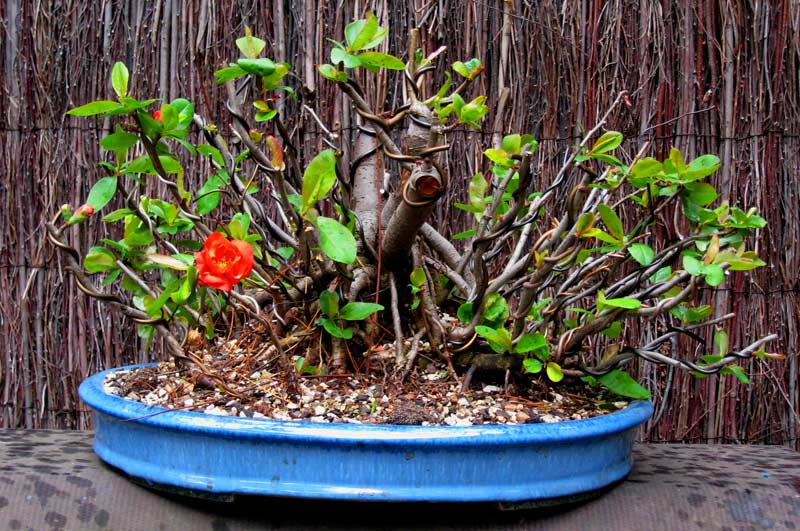
The first budding after styling
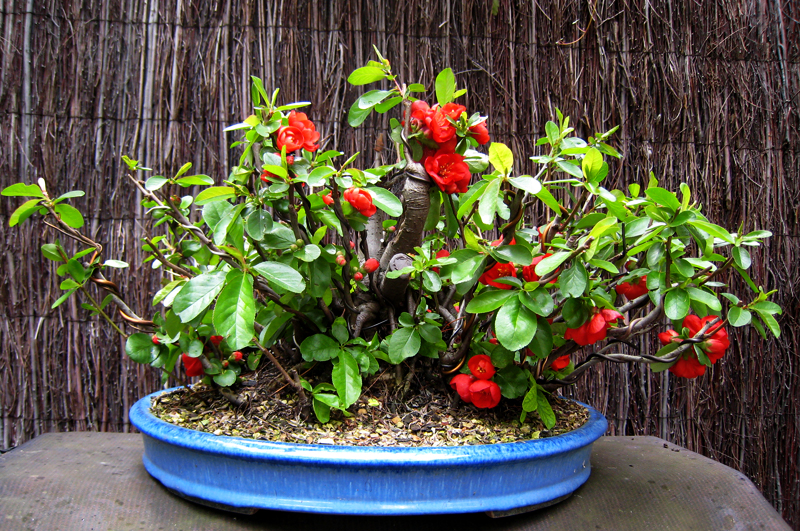
The beginning of a heavy flowering the following year. (now when I am trying to build branches I cut off flower buds)
After a hard cutback.
This year I tried what I am calling partial defoliation. It seems to be working much better. The logic as I see it is that by removing most of the photosynthetic surface area but leaving some leaves to continue providing energy you force a budding but keep the tree much stronger than a full defoliation.
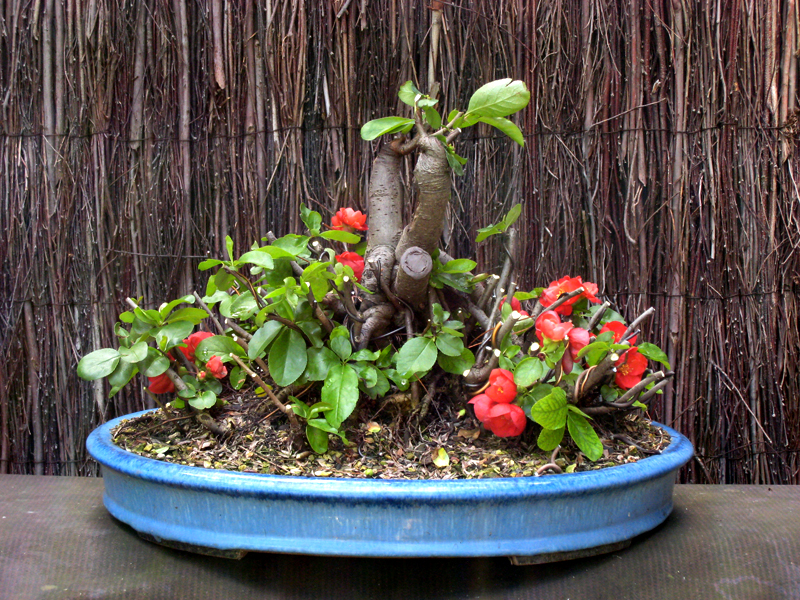
The central trunks became infested with borers so i removed them. This is the quince in full summer leaf.
After the partial defoliation
The basic technique is to remove leaves at each clump of growth down to one leaf. This lets a whole lot of light into the inner buds and keeps sap flowing to the remaining leaves. The results are buds bursting nicely back into the inner canopy.

A clump of leaves

Leaves reduced

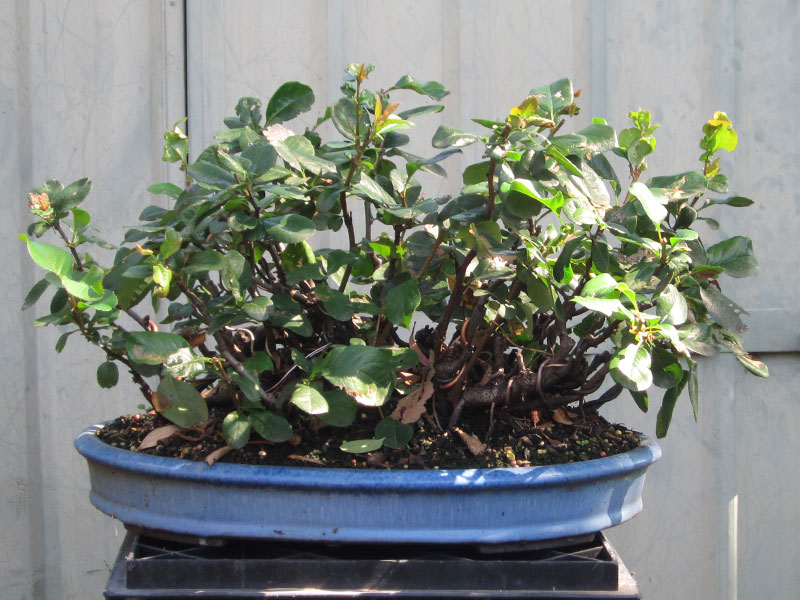
Some of the resulting budding

Some of the resulting budding
Now this tree is a fair way off being exhibited but hopefully with a few more seasons using this technique I will be able to dramatically increase the amount of ramification in this tree and get it into a much more presentable state.
Well, the inevitable happened and another tree has found its way into my collection.
While at a friend’s place I spotted the below corky bark Chinese Elm on his sale benches and decided I could make something of it. It had great taper, nice bark, some interesting movement and only a couple very small scars. Another bonus was it was of a size that would see it make use of several pots I have gathering dust on the shelves at home. For those interested, the tree is from the same grower that produced my other Cork Bark Elm.

The tree as i bought it.
Once I got it home I made a few preparations to set it up for next years growth. I cut off the taper-less apex section of trunk which also removed a lumpy section. I then reduced some of the heavy branches and pruned off any shoots that were not going to become part of the future structure. I think in the next few days I will have a go at bending the first left branch down a touch but we will have to see how that goes.

Ready for springs growth
I will probably re-pot it back into this container this year so I can get some fast growth out of it next season. Once I have the main branches and the start of secondary growth set I will pot it up into a bonsai container where I can start the ramification process. For now all it needs to do is grow, especially the new leader. It needs to really thicken up to continue the line of the trunk. This species is such a strong grower I should have the trunk-line and base branching set after a year.
Winter is a hard time for me and my bonsai. For the most part, when I arrive home from work it is dark and cold. This makes working on my trees something I only tend to do on weekends. That being said I did get motivated one night after work to do some pruning on my Trident Maple (seen here and here).
Tridents grow quite quickly and within a year they can put on a lot of twiggy growth. A lot of this growth is not suitable to build future ramification on so it must be pruned off. Quite often it seems like you are taking two steps forward and one step back but the removal of twigs that are not formed correctly will ultimately make for a better bonsai in the long run.

Before and after pruning. The red lines show approximately where I made cuts.
At this point in this trees life I am looking to start to build fine twigs. Most of the vigorous growth over the last year has helped to form secondary branches but it has grown with internode gaps that are too long for the tips of a branch. As a result I have pruned to remove these long internodes, reduced all branch divisions to two and generally tried to form a better structure within the branch.
A lot of my trees were grown a little too quickly and as a result their branches do not have as good a structure as they might. I am now cutting a fair amount of those branches back and trying to correct the structural problems. One of the main problems I have in my trees is that the branches do not have a main branch line with sub branches but instead have several main lines. This makes the branches look full very quickly but in the long-term you do not get the taper and look you would if the branch was grown otherwise. It all comes back to pruning. Sometimes you have to set a tree back a little in order for it to progress.

The tree before and after. (poor lighting care of my kitchen.)
This tree will be re-potted in the coming months and may also have its branches fine tuned a little with some wire which should then make it ready for the start of spring.
The tree below is a very nice old hinoki (False cypress) that i worked on while i was in Japan. This tree had been shown in Kokufu, so i was very honored to get to work on such a nice tree. (If any one reading this can find it in an old album please let me know what number)
The tree had been grown out without much maintenance for a number of years and as a result the it had grown very dense and had lost some inner branching.

This is the tree after the first branch had been pruned.
My job was to thin out the entire canopy, remove un-needed branches and reduce the remaining branches back to a more manageable structure. This work was intended to stimulate back-budding prior to a future wiring.

The pruning is half done.
As the tree was large, it took me a full day just to prune it from bottom to top.

The pruning is finished.
After the work the structure of the tree started to become apparent. Although it still has a long way to go, it is now easy to imagine it future .
The tree had the most amazing twisting bark that i am sure will add to its chances of one day again being shown in Kokufu.
Unfortunately i was unable to work out what species of Chamaecyparis it was. I am guessing Chamaecyparis obtusa but i am not 100% sure. It had fine foliage that i had not seen before. If anyone reads this and can identify the species from the pics below please add a comment or send me an email.

The foliage up close.
It was a great tree to work on and taught me a lot about pruning. At the start of the process i was concentrating too much on the tip density. Mr. Urushibata spent some time explaining how you often you have to look deep within a branch structure and cut out some secondary branches rather than thinning the tips. It was a concept that like many in bonsai seemed simple enough but was not apparent until someone pointed it out.
