
I am continuously telling myself I have enough trees and that I need to reduce the collection. Well, that only works so well, much like the tree that is the topic of this post, bonsai keep finding their way into my backyard.

The maple, October 2012.
I saw this maple at a local show last year and while talking with the owner, he let me know that it may be for sale sometime in the future. To cut a long story short, I bought the tree early this year and it has since sat on my benches while I got to know it.
A few things drew me to the tree initially. The tree had age. Old grey bark is a sign that the tree has been around for a long while and cannot be achieved via short cuts. The nebari was another feature that drew me to it as it was really starting to flare nicely at the soil level. This is a really nice feature that can only get better with future work as I develop the rest of the tree.
Since it arrived in the garden, I have fed it, watered it and tried to work out what my plan for its future might be. It has responded well and even survived a large gum tree branch falling onto it. It took two people to lift the branch off but luckily all the trees under it survived with only a couple of small broken branches. Very lucky.
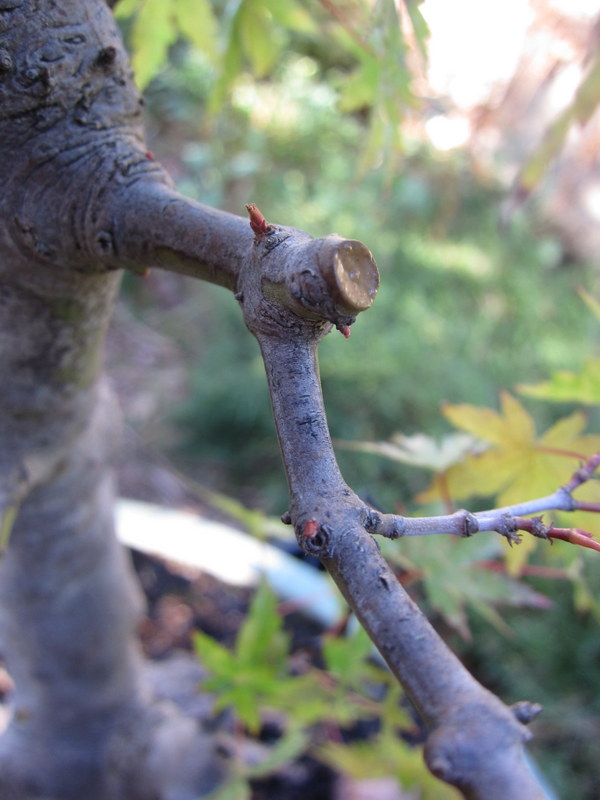
Today I decided that I would start the tree’s re-styling. I first cleaned the nebari and removed the surface moss. For this I used an old tooth bush and clean water. Old tooth brushes really come in handy for this type of work. I then cut off the heavy apex and replaced it with a small branch below.
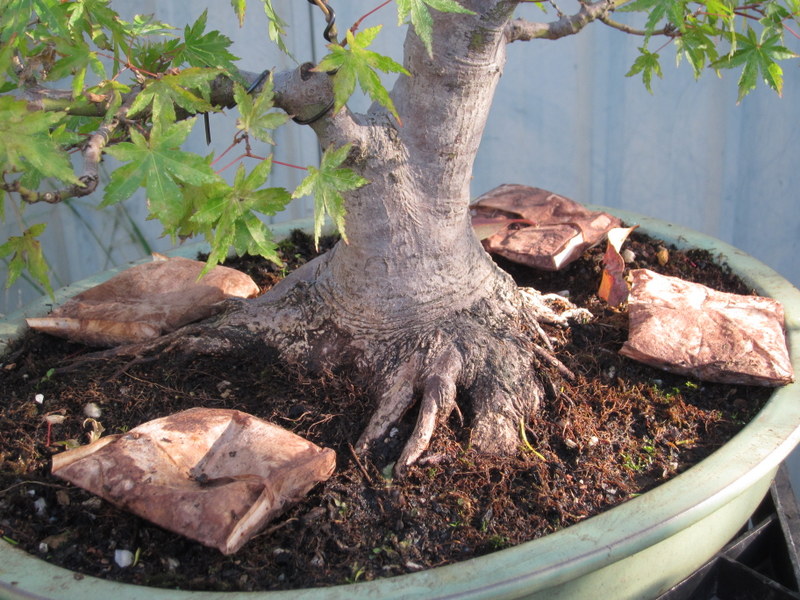
The cleaned nebari

The apex pruned back and a small branch below wired into place.
On a couple of the larger cuts I trialed using two cut pastes at once. First I applied a liquid paste from a tube. I like this type of cut-paste but it tends to soften and wash off during extended periods of rain which is why I applied a second layer of cut-paste putty over the top as a waterproof layer. I also like the putty on it own but I find it sometimes dries out too quickly and or doesn’t seal as well as the liquid tube style pastes. Hopefully this will give me the best of both worlds.

Another double cut-paste pruning cut.
I know there are those out there who don’t believe in the use of cut-paste and are quietly smiling away to them selves at my overkill, but without starting a debate on the issue, I have tried using cut-paste and not using cut-paste and at least where I am living it seems using it gives better results than simply leaving the wound to its own devices.
After removing the apex it was time to address the areas of the old branches that had thick growth at their tips and or sections where too many buds had been allowed to grow and knuckles had formed. When faced with this type of issue the only solution is to cut out the offending growth. It does seem like you are setting the progress of the tree back a little as you are removing some of the visual bulk of the branch but down the track you will end up with a branch with much better structure and a far superior winter image.

Thick twigs at the tips of the branches look heavy and take any idea of grace away from the branch structure.
So I cut out the offending areas. I will re-build the fine tips with the back budding that the pruning will no doubt trigger.
Since the tree had been on a heavy feeding program it has begun to show results. Buds have already started to swell along the branches and the trunk which makes me confident that the pruning will continue to trigger new buds for future ramification. Interestingly some of the buds that woke up along the trunk were almost at soil level and on really old bark.

There are buds at the base of most branches or former branches.

Some buds low down on the trunk on old wood.

Buds at the base of a branch damaged by the falling gum tree branch.

More buds.
It’s easy to prune large branches when you know they will be easily replaced by buds at the base.
I think the tree had previously been on a very low dose and or no dose feeding program. This meant that when I started to flood it with fertiliser it literally started jumping out of its skin (or bark) with back-budding. I imagine next season this will only be amplified once it is re-potted into a fresh mix and the compacted roots get some space and start to run a little.
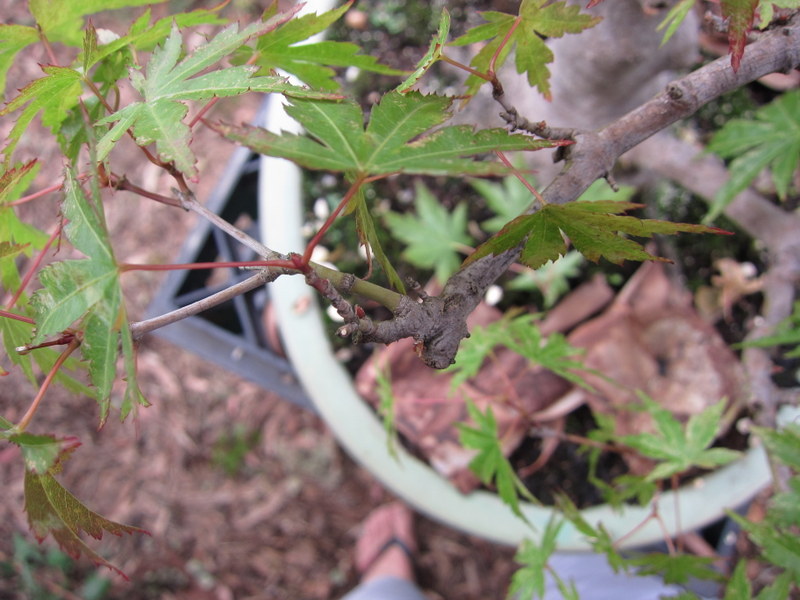
After correcting a few of the structural issues I had a think about the future style of the tree. I decided that the trunk line would be complimented nicely with a second trunk. As it turned out I had a small branch in just the right position at the base of the first branch to wire up into the new trunk. This will be left to grow free for the next few seasons to thicken and elongate.

A useful branch wired up into its new role as second trunk.
After doing work such as cleaning and structural corrections you get a good idea of the trees faults and features which makes for a nice way to ease into re-styling. In this case it made the decision of changing the front easy. The old front had a root that had grown across the root-ball and fused a long time ago creating a slightly awkward look when viewed from that side. The Back of the tree showed a much nicer nebari and the now left first branch exited the trunk from a much nicer angle. The newly wired up apex gives the appearance of much nicer taper and adds a little movement from this new front as well.

After the work. A little bare for now but the bones are all there to make a very nice tree in the future.
For now the tree will be fed and left alone until re-potting time early next spring. Then after the first flush of spring growth hardens off I plan to fully wire the tree and any new growth that has developed from the buds that are forming now. I am really looking forward to getting into the root-ball and seeing what it looks like under the soil and where I can make improvements. It has the start of a fantastic nebari and it will be fun taking it and the rest of the tree to the next level.

4 comments
Comments feed for this article
February 25, 2013 at 11:07 AM
gaycarboys
Very elegant:)
March 4, 2013 at 12:15 PM
Brian McGrath
Hi
It’s me again. Don’t be afraid to get your sulphur dormant oil spray on any new pruning cuts. It will actually help to protect the newly exposed wood although I usually like to let the now bare wood dry a bit before application hope that is helpful to you.
Brian.
July 25, 2021 at 8:00 PM
Project Maple, a few years on…. | Nichigo Bonsai
[…] CLICK HERE […]
October 17, 2023 at 10:44 AM
Project maple – another update. | Nichigo Bonsai
[…] This is a maple I have been working on for some years and you might have seen on the blog before (2021 update, and 2013 update). […]