
You are currently browsing the tag archive for the ‘Trident Maple’ tag.
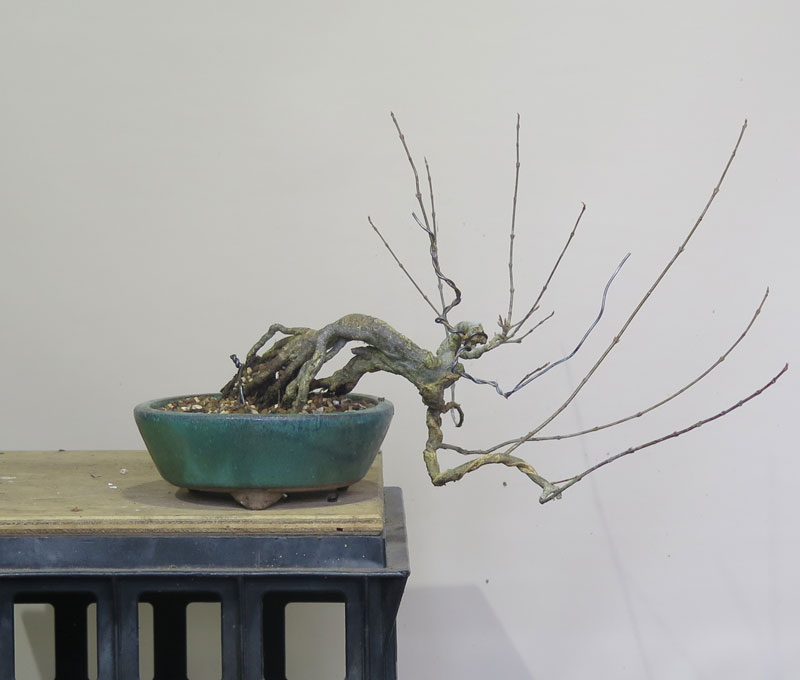
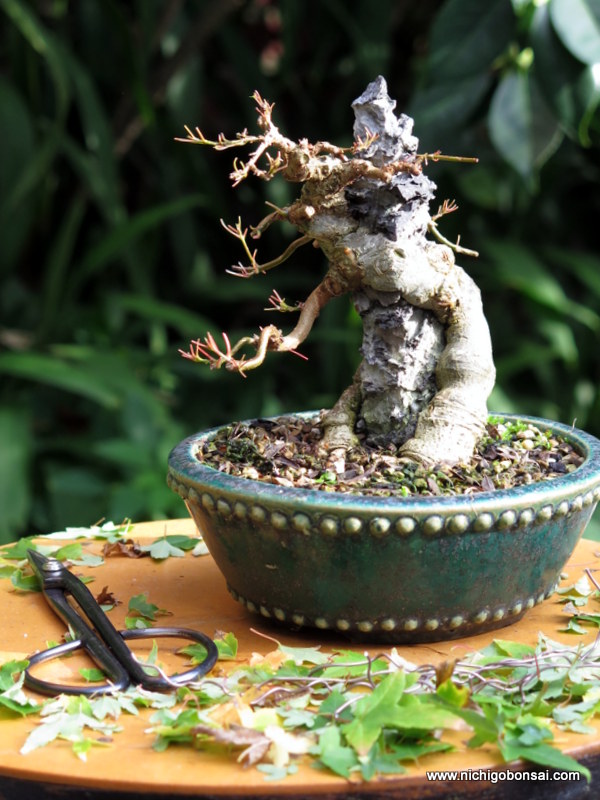
With the first days of summer now under our belts and some solid early spring growth it was time to begin this seasons tasks around the garden. First cab off the rank was this trident which found its way onto my benches recently.
It had been fully wired in winter, most of which had begun to bite in with shoots extending aggressively with an early warmth to spring.
I defoliated the tree and removed the old wire setting it up for its next flush, some new buds and further ramification. Its a very nice tree and I think will develop into something that will always have a space on my benches.


While there is a long way to go with this tree, I think the bones are all in place and you can already get a sense of what the tree might look like in the next 5 years once it has a lot more ramification.
Now I have a sense of where it is heading, I will likely leave a few shoots to run on the lower branches to increase their size a little given how quickly the upper regions are thickening.
Onto the next one!
So I have a number of trees that are very much projects which are finding their ways into bonsai containers for the first time. I thought it was worth posting them as much as a record for myself to catalogue their progress on the blog. They are all fairly rough but have some promise. Enjoy.
A small trident that I inherited from a friend who passed away. It was all much the same as its current form although much longer/larger. I cut it back hard to the interesting base and am slowly re-growing the branching and canopy. 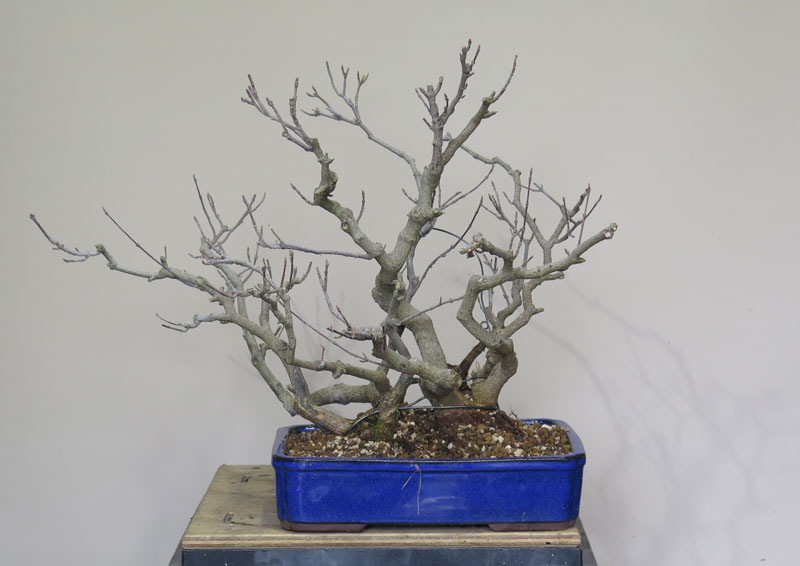
Another inherited tree, this clump is a collection of old branches I air layered from a larger tree that I am in the process of re-growing. Horrible overly bright pot, I know.


The above trident is one i picked up from Neil at Shibui Bonsai. I was attracted to it for the ‘loop the loop’ root on the front of the rock which was a little unusual. I have since been growing the branches and trunk-line to try to have some of this twisty and bendy movement.
You can see where the trunk was originally cut at the first branch. The scar has almost completely healed over and should continue to smooth out over the coming years.
Neil grows some great (if not the best in Australia) root over rock trees and has pretty much perfected the technique to get the tree to tightly clasp the rock. Check out his page (link above) as he often has interesting things for sale as the new ground grown stock is dug and prepared for sale.
So it looks like spring is on it’s way early this year with Trident Maples and Chinese Elms in my garden already swelling their buds. This might not seem all that strange depending on when you are reading this post from but ‘down under’ we are still in July (at time of writing) and I don’t normally even consider repotting until mid to late August and often run into September and beyond.
NOTE: (for those in the northern hemisphere, the months of June, July and August are our winter. For the Americans who don’t have metric winters; a short summary of the above might be that we are 64 ⁄ 79 ths of the way through winter and trees are budding out.)
I was lucky this year that I had a YouTube celebrity come over and help me out.
For those interested, his YouTube channel “Jeff’s Bonsai” can be found HERE.

Jeff is a great guy and we had a great day together and it only cost me a bowl of reheated left overs for his lunch!
I had forgotten how nice it was to have company when doing bonsai. So much of my work is done on my own down the back of the garden in my little shed. I suppose that social isolation generally has only increased with Covid so it was a really nice change to have someone else around lending a hand.
I think together we repotted 12 or 13 trees in half a day or so. I don’t think I could have done half as many in that timeframe, so thankyou Jeff.
The other thing you might notice from the above image is the black mesh screen on top of my green waste bin. This was another idea I got from Jeff (noticed in one of his videos). The night before he arrived I welded up the screen to easily and cleanly get all the old soil into the compost bin without risking the tree or tools falling in. It worked a treat!
As for the trees we re-potted, eventually many of them may make it to the blog but in the mean time a couple you might recognise from older posts are below.


Thanks again to Jeff. With his help we have broken the back of what can often be an overwhelming and desperate race against swelling buds. Hopefully I can trick him into helping again!
While this tree has had a couple of mishaps since I last posted about it, Project Trident 02 has been slowly progressing.
You can read about its beginning HERE.
Since that post, I removed the air layers and have been trying to get as much growth in the grafts I could to help them fuse with the parent trunk. I did have a small failure with the first branch’s graft as i knocked it when moving the tree and broke it.
I re-did that graft and it seems both grafts are growing well now. So well in fact I have decided to go into the next phase of this material’s development.
As I am looking to make a smaller tree I will at some stage have to make a fairly large cut to shorten the main trunk.
The newly taken graft on the left side of the trunk and the re-grafted branch lower on the right.
When making large cuts on bonsai, you should always have some sort of plan as to how you will heal/deal with the resulting wound. My plan with this tree is to heal the cut in phases.
What I plan to do with this tree is make half the cut now, use the growth on the main trunk above the cut to heal it and then sever the remaining half of the trunk. This should leave me with half the scar I would have otherwise .

The first cut.
So I cut through half the trunk with a small saw and then cleaned up this cut with a sharp knife and sealed it all with cut paste.

Cut paste applied.
The idea is that with the main trunk still attached, it will draw sap past the cut site and speed up the healing process. The more growth and sap that moves past a scar, the faster the scar rolls over the wound.
Once this is healed I will cut the other half and heal that side by growing out the branches and new apex of the remaining tree. For the rest of the season I will let the branches grow freely and feed the tree accordingly.

A new back branch.
While I had the tools out I also grafted on a new back branch. With this branch in place the tree will be well on its way towards having its foliage changed to that with much better internode/ leaf quality. I will probably look to graft on one more branch onto and or around the scar that is created when I remove the rest of the main trunk. This should speed up the healing of the final scar.
I will be sure to post some updates as the scar heals.
The blog has taken a bit of a back seat of late. I notice that my last post was from back in July last year! Things have been pretty busy since then with moving to a new city, starting a new job, renovating an old house and having a child all leaving me with very little time for bonsai related work.
That said I have been able to get the tools out from time to time and have been styling customers trees and working on my own trees as time has allowed.
To kick off 2016 and start the blog off a fresh I thought a small photo essay of some grafting I did earlier this spring might be a good way to get things back into gear. The tree in question came from Shibui Bonsai and had just been lifted from the grow beds and showed the results of the early work Neil puts into these trees. It had a good start to build a really nice base upon so i decided to begin that process with some root grafting. Photos below:

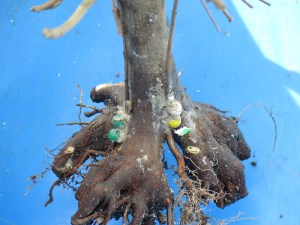
A trident Maple that was field grown with pretty good roots. There were a couple of gaps which I decided could be filled in with some approach grafts. You can see the small trident whips that were selected to be used for the grafts in the background.
A trident Maple that was field grown with pretty good roots. There were a couple of gaps which I decided could be filled in with some approach grafts. You can see the small trident whips that were selected to be used for the grafts in the background.

A trident Maple that was field grown with pretty good roots. There were a couple of gaps which I decided could be filled in with some approach grafts. You can see the small trident whips that were selected to be used for the grafts in the background.
A trident Maple that was field grown with pretty good roots. There were a couple of gaps which I decided could be filled in with some approach grafts. You can see the small trident whips that were selected to be used for the grafts in the background.

A trident Maple that was field grown with pretty good roots. There were a couple of gaps which I decided could be filled in with some approach grafts. You can see the small trident whips that were selected to be used for the grafts in the background.
A trident Maple that was field grown with pretty good roots. There were a couple of gaps which I decided could be filled in with some approach grafts. You can see the small trident whips that were selected to be used for the grafts in the background.
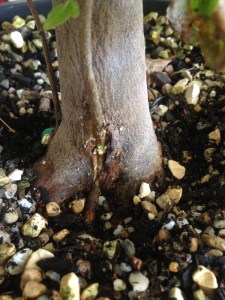
The trident maple below is this years project. I spotted this tree in a friends garden and loved the big gnarly base. I like the base so much that I have just realised that I don’t have a picture of the whole tree, just photos of the base!

Lumpy flared base.
After removing one root, can you see where it came from?
The base has great character but the rest of the tree is tall and directs the eye away from the nebari so I felt I could work on that to improve the tree overall. The other challenge with this trident is that it is a variety with large leaves and long internodes which makes it difficult to make a good canopy, especially on small trees.
I have noticed that other tridents with this growth habit also develop nice bases easily. The down side is that their ramification is course and thick. How can you make use of the base and also have a good foliage canopy?

Approach grafting new foliage.
The answer is to change the foliage. I decided to graft a finer foliage onto the lower section of the trunk so that I can make a shohin sized small tree with a huge powerful base and fine delicate branching.

Seedling being planted in the same pot.
I chose a seedling from a batch that showed good foliage characteristics. That is smaller internodes and compact growth. I planted the seedling into the same pot as the main tree for ease of watering and then grafted the young whip into the main trunk.
I actually grafted it twice into the trunk, once on each side. I bent the seedling into a ‘u’ shape and simple cut a channel in either side of the trunk for the seedling to fit into. One side will become the apex, the other will become the first branch. This way I will have the same foliage on the whole tree once I cut off the main trunk in a year or two.
Even though i am changing the foliage I also wanted to keep the old foliage so i can experiment with it in regards to its base thickening properties. To save the foliage I decided to air layer off the top and the first branch.

The cut made and scraped clean. I actually used some branch cutters to cut a small amount of wood from around the layer site to ensure I got all of the cambian layer.

Sphagnum moss soaked in seaweed extract, all wrapped in strong plastic.
If these layers work, I will probably grow them in pots for a year or two before ground growing them to see if the base flaring/thickening is a genetic trait or just a result of how this tree was grown.
I have noticed that there are tridents that grow good bases and poor ramification and then tridents that do the opposite. Has anyone else noticed this?
I am hoping that I can use cuttings from this tree to grow great bases then graft a good foliage variety on top to finish up the process. Time will tell if this works out or not. If this doesn’t work out I have another seed grown trident that shows similar properties. Fingers crossed.
Every one needs a project or two in their collection. I really enjoy project trees, that is tree that are undergoing various processes to transform them into a new style, shape or form. The problem is that each year project trees undergo their transformation and then move into ramification/maintenance phases leaving me to find new projects.
Trident maples are one of my favorite species to work on and I really enjoy having one as a project. I always have my eye out for something that has plenty of room for improvement. The tree below is one such tree.

The tree as I received it
The tree was an imported trident maple. It had been brought into the country back in the 90’s when Australia’s border protection was much more flexible in regards to bringing bonsai in.
When I got the tree it had been left to grow out for the last 2 years and as a result there was a fair amount of work required to bring it back to its former glory.

After first cutback.
The first thing I did was cut it back hard to stimulate some back budding. It’s branches were quite old so it didn’t bud out how I had hoped. This lead me to go down the path of approach grafting rather than risk cutting off branches and not get any buds pop. I decided to graft on a new set of branches at the base of all the old branches. In total I grafted 5 branches and left the tree to grow.

The grafted branches have taken.
I also re-potted the tree and found a lump of old akadama in the center of the root ball. I bare rooted and picked all the old soil out of the root-ball. Almost immediately after the re-potting the vigour of the tree improved and I was rewarded with strong growth which helped the approach grafts to take. In the above image you can see the grafts emerging from the underside of each branch.

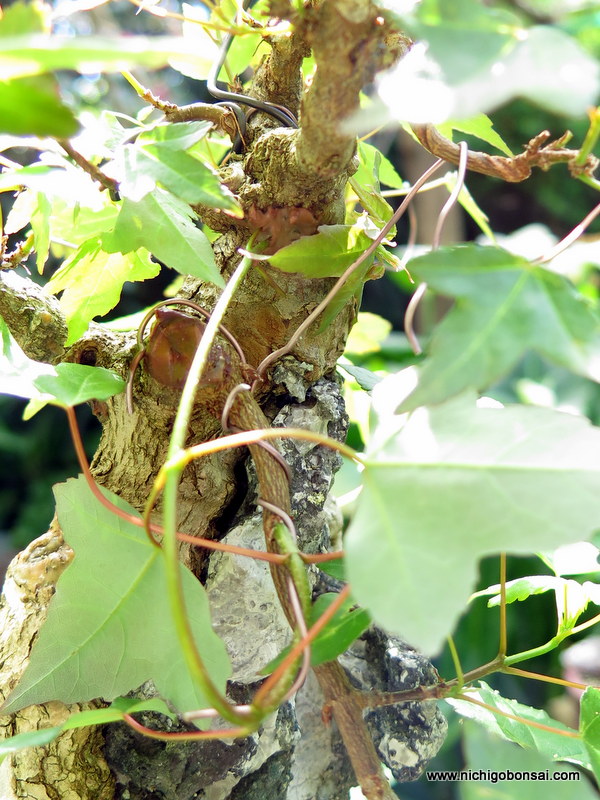
The large branches removed.
This spring I cut off all the large branches as the grafts were now strong enough to take over the sap flow. When I made the cuts I cleaned the wounds up with a knife and then applied cut paste which in my experience helps things heal.

A wound and a grafted branch.
I have left the grafted shoots long and I will let them grow until I am sure that they are strong and well connected to the host trunk. Once I am sure of that (probably in a month or so) I will cut them back to the first internode and then begin growing the branch structure.
Unfortunately the back branch’s graft didn’t take but as luck would have it this spring a bud has popped right at the base of the branch right where I wanted it. Sometime trees do what you want.

The two leaves are the new bud at the base of the back branch.
Once this shoot is strong enough I will also cut off the old thick back branch above.
This spring I also placed the last graft I need, just below the apex. This should allow me to cut off the last heavy branch on the tree without having to chance whether or not I get a bud where I want.
The shoot on the bottom left is bent up to under the apex where it has been approach grafted into the trunk.
Its been fun replacing the branches on this tree and i am looking forward to this season of growth where i can start to grow the branch structure and form the outline of the bonsai. Hopefully in 5 more years this will be a highly ramified and ready to show bonsai. Time will tell.
Well as is often the case, life has been busy and the blog has suffered. I have been able to find some time today to write a string of posts that should be published over the next few weeks.
To kick things off, while going through my photos i found some before and after images of a small tree I have been playing with. The images are just a summer’s growth apart and seeing pictures like this reminds me of how good it is to capture your trees in images to track their developement. This tree I thought hadn’t really changed all that much but looking at the images you can see it has changed a lot from the start of the season.
Picture one shows the tree as I received it. It was imported from japan some time in the 1990’s when regulations were a little less strict and I managed to be in the right place at the right time and picked it up.

This is how I received the tree (although I think for this photo I had just cut off a number of long sacrifice branches that had grown out)
Since it came into my collection I have potted it up and begun to build the branch structure. I had to graft on a branch (Third on the left) but now the basic structure is set and I am looking forward to ramifying it over the coming summer.
As the tree is now, ready for another years development.
Probably next year it could go into a more suitable pot but for now the Koyou pot it is residing in isn’t too bad.
Where to from now? well I want to grow the first branch out a little longer and generally ramify up the tree a whole lot more. Buds are just starting to open and I cant wait to get started.
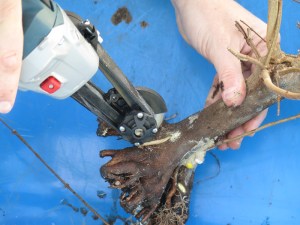
I have been busy re-potting in the last few weeks and finally managed to get around to doing a project tree that I have been growing for a couple of years. When I first acquired the tree I placed 6 or so root grafts onto the trunk. 3 took and 3 failed. Since then I have been meaning to replace the failed grafts but for what ever reason, every time I have had this tree out of its pot I havent been able to do the grafts.

The Arbortech and the faulty nebari in the back ground. You can see the two vertical scars from last attempt.
The first failures were all down to the fact that the channels that accepted the new shoots were too shallow. As the approach grafted seedlings thickened, they simple pushed away from the trunk instead of fusing. I originally cut the channels with a knife and was only able to cut so deep.
This years remedy was the Arbortech! I do very little machine carving but this tool does get a bit of work this time of year as it is excellent for cutting graft channels.
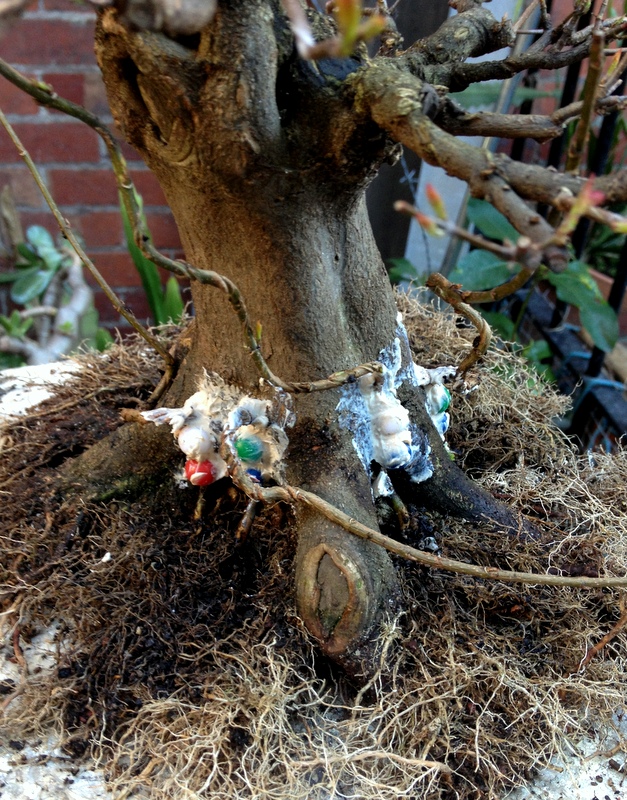
The four new grafts.
The process is dead simple. It is much the same as any other approach graft except instead of using a branch from the same tree you use seedlings as your grafting material.
The basic idea is that you cut a vertical channel in the trunk where you would like some new roots. You then insert a seedling into the channel and adjust it until the seedling’s roots are at the same level as the existing nebari. Then you fix the seedling into the channel (I used big map pins), seal it all up with cut paste and let it grow. Soon enough the seedling will thicken and fuse with the trunk. Cut off the top of the newly grafted seedling and you have new roots where there were previously none. For a better breakdown of the general theory see these two posts. Post 1, Post 2.
This year, the seedlings look a little strange as they are all from the batch of seedlings I bent the year before. Having said that, the bendy little trunks were very useful as I was able to use the first bend to create a good angle for the new roots to leave the trunk from.
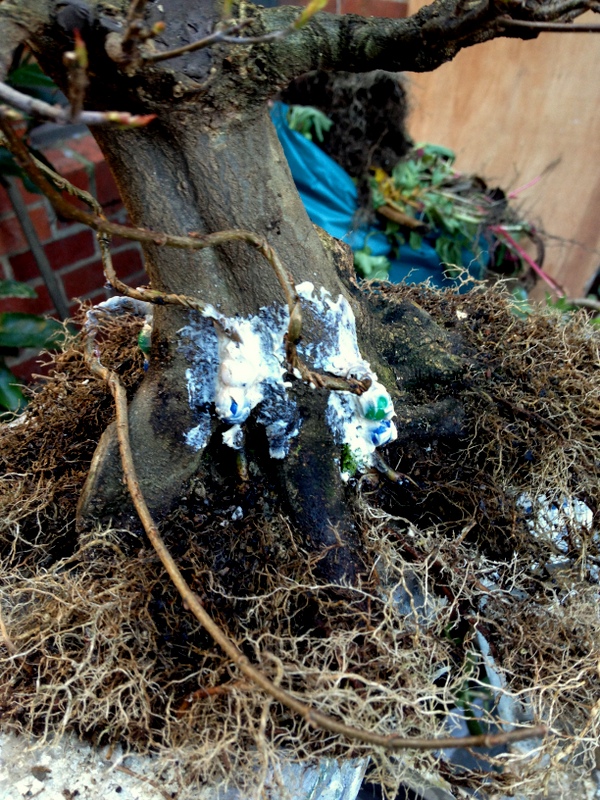
The bendy seedlings are care of a project I started last year.
The new grafts were generously coated in cut paste and then the whole lot was potted back into its training pot.
I imagine that by the end of this rapidly approaching summer the grafts should have taken and I will be able to shorten them back before then some time the following year cutting them flush with the trunk.
Hopefully I remember to take a few pictures along the way.
I often hear people saying they wish they had access to good stock and or that they cant find any stock worth purchasing. Often the journey to find good stock can be difficult but there is definitely good stock available if you know where to look.
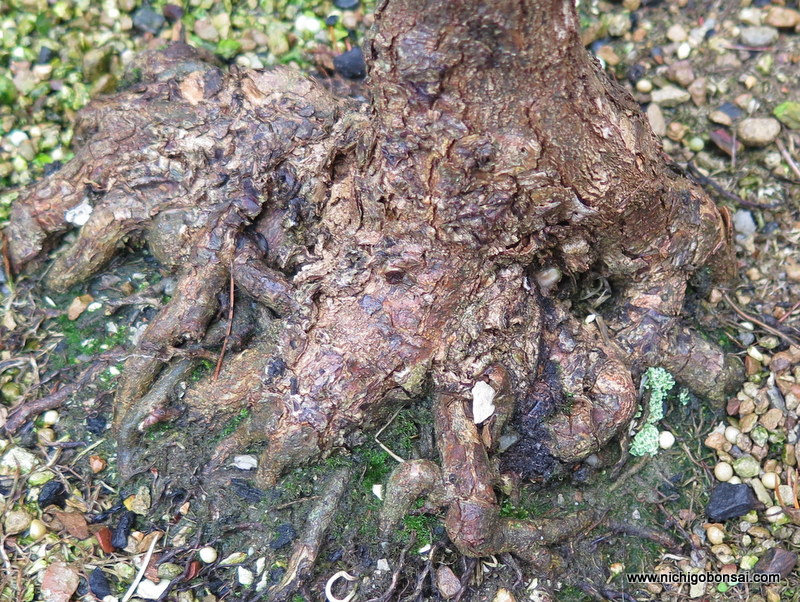
A couple of weekends ago I visited a friend on the outskirts of Melbourne to see how his ground grown stock had progressed this year.
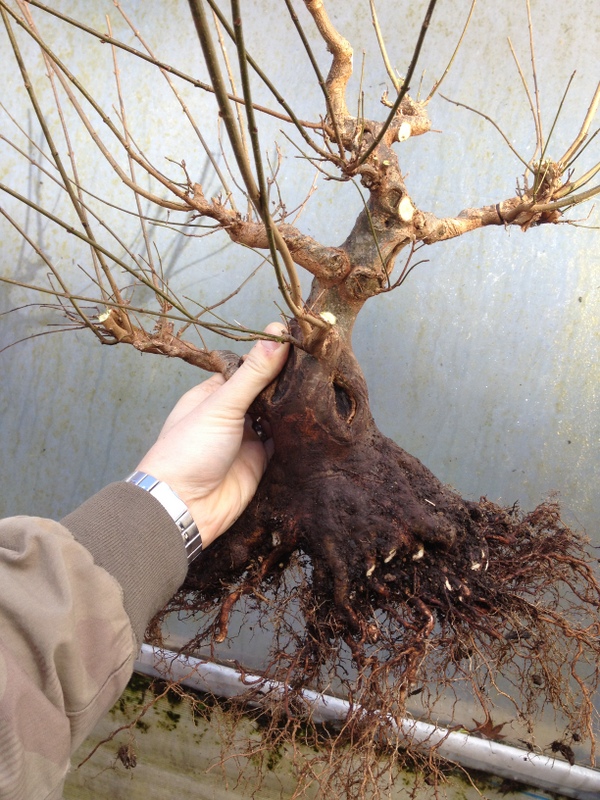
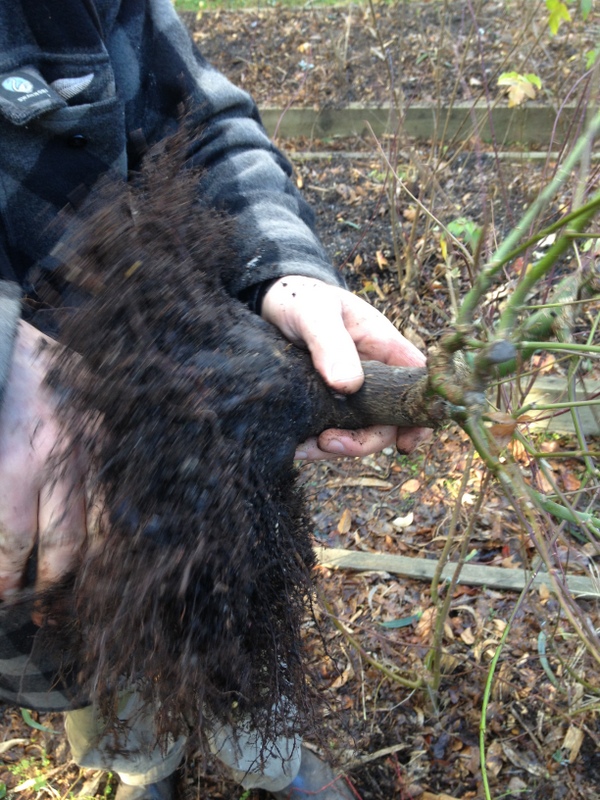
A trident slipped from the grow bed.
As you can see from the above picture, the stock was going very well indeed. There is no real secret about how to produce these results as they are a simple a matter of spending 10 years applying good technique and working the root bases each and every year.

Another great base.
Each year the trees have been dug up and cut back hard to encourage a fine, flat root system. Digging each year coupled with the excellent growing conditions in the grow beds results in good yearly top growth without roots getting too thick and creating faults. This makes for trunks with great base flare and very small scars which in many cases are healed in the ground.

A Japanese maple from the same beds.
When out of the ground, the most important cuts to the roots are in removing those that are downward growing and scarring the base of the trunk to further thicken the base; and with this stock, this has been done with great results. In fact, I was so impressed with the quality of the material I put my name on a couple that might come out of the ground in the next couple of years.
The roots on the underside of the trunk being removed.
For those not willing to spend 5 years working out the techniques and then a further 10 growing trunks luckily this grower also sells some of his stock.
His trident maples are available through Chojo Feature trees in Mount Evelyn. Jeff who runs the place is an extremely nice guy and I am sure could help out those interested in a trunk and or other bonsai related products.
