
You are currently browsing the tag archive for the ‘Styling’ tag.
Life as always is busy but lately things have been flat-out. I have been juggling a two-year old, full-time work, managing our house’s extension, working customer trees, digging/collecting material and also travelling Australia (Perth, Sydney, Canberra, Bendigo, Geelong and Brisbane) as an AABC tutor giving lectures, demonstrations and workshops. As a result the blog has suffered.
Hopefully I can kick start the blog in the coming months. I have a number of posts lined up and I am sure there will be things of interest to share as the growing season heats up.
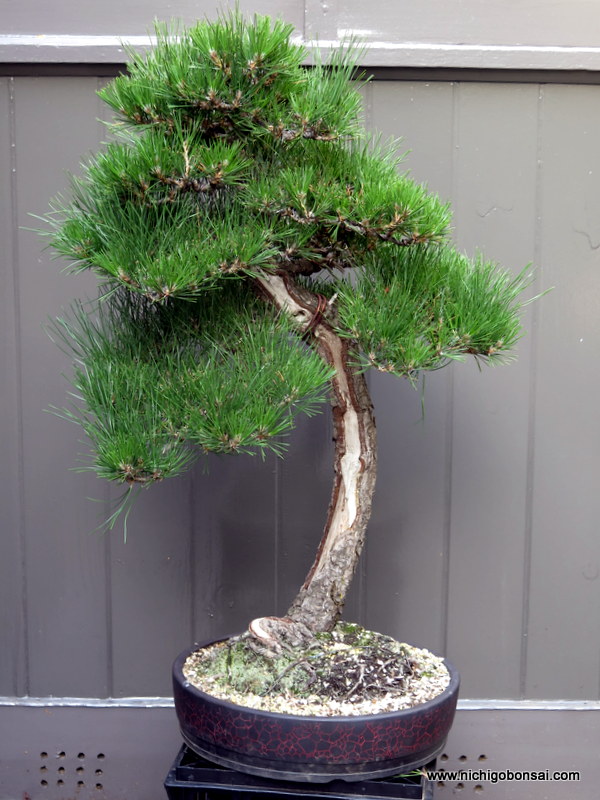
Today’s post is a small red pine that I worked for a good friend towards the start of winter.
It is rare to see red pines in Australia and particularly rare to see ones as good as this one. It underwent a fairly major transformation during the styling which in my opinion has set it up to be one of the best red pines of this size in the country (at least from those I have seen). It still needs a little filling out but it’s bones are set for it to grow into a really nice tree into the future.

The material prior to beginning. Nice colour and full growth which left a lot to work with.

The material prior to beginning. Nice colour and full growth which left a lot to work with.
Most of the work during the styling involved dividing the few branches up into multiple smaller pads that were in better scale and harmony to the size of the tree. Those were then used to accentuate the movement and direction of the trunk line.
There is still a number of areas that need to fill in with further ramification but I think it is certainly off to a great start.
After saying that red pines are rare in Australia my next post will be about another taller tree that is also of very high quality. Until then……..
Just a quick post for today. I was going through some old holiday photos (mainly bonsai pics) and came across a small Japanese White Pine I had worked on in Japan.
I am really getting more and more into shohin sized trees. They are really challenging to grow well yet are easy to handle and take up much less bench space, which is a plus.
The challenge with this tree was to create enough detail in the foliage by means of multiple layers to give the illusion that it was in fact a much larger tree.

Before

After
Of course half the battle is starting with good stock which this little tree certainly falls into the category of.
Hopefully I can start producing some stock similar to this in the coming years.
One of the trees I worked on last year was an informal upright Mugo Pine. I think that it was originally received by its owner as essentially a piece of topiary. He then worked it over a few years into a bonsai form.
I was asked to wire the tree and refine its image.
The tree had a few issues that this round of work has tried to iron out but it will certainly benefit from further refinement as it progresses.
The trees branching was incredibly dense in part due to its previous life as topiary which had lead to a large mass of ramification. It was also compounded by the tendency of Mugo pines to have multiple shoots at each branch tip which further compounded the dense look.

Multiple growing tips on a typical shoot.
My first action was to remove unnecessary sub-branches and take many of the branches back to a much simpler structure which in turn reduced the foliage density. I also reduced the remaining shoots on the tips to two shoots which further reduced the density and allowed for light and air to reach into the inner structure to aid back budding.

Some of the sub-branches removed from the first branch.
After the pruning work the aim of the styling was to break the large pads and masses of foliage into smaller pads to create a higher level of detail and structure.

The tree before the work.
I ended up removing close to 50% of the foliage which lead me to go a little bit easily on any heavy bending. Ultimately i would like to bend the thick first and second branches down a little more than they are currently and work on some of the dead stubs that were left long to die back slowly.

The tree after.
All in all the tree has been improved and is growing nicely into its new form. Perhaps this coming winter it will be ready for a re-visit.
Both my bonsai and personal life have been busy of late. I am fortunate that this year I have been invited to demonstrate and run workshops across Australia for local club, groups and the AABC National Convention. On top of this travel I just begun winter styling of clients trees. It looks like I will have a fairly full book of client trees, workshops and demonstrations that combined with a young child, a house half way through renovations and a full-time job doesn’t leave a lot of time to work my own collections.
Today’s post is actually about a tree I worked on a year ago whilst in japan.
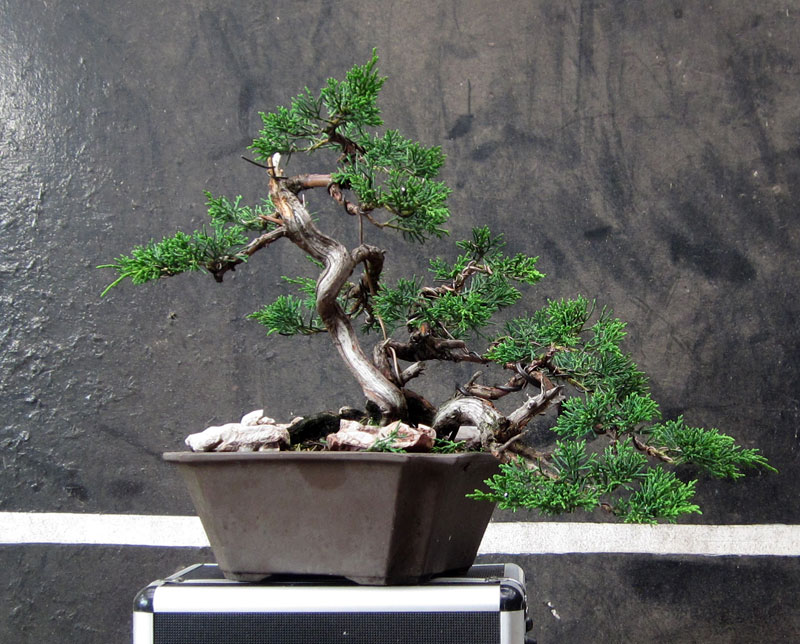
It was a small shimpaku juniper that Oyakata asked me to wire and style prior to taking it to auction the following day to be sold.

Prior to the work
I initially wanted to tilt the tree to the right so that the first bend would come in contact with the soil giving the appearance of a much larger trunk but Oyakata didn’t want to re-pot as the auction was so close and as a result we utilised the existing angle and front.
It turned out to be a fairly straight forward re-style and Oyakata told me it sold well at the auction.
Post work.
Looking back on trees like this it really gives me the incentive to start growing my own material to this standard. I now have a backyard big enough to experiment with a whole lot more stock so I am looking forward to starting this process off this year. Who knows, in ten years time I might have a whole lot of these ready for display………..
Been busy as per usual but I have managed time to fit in a couple of customer trees.
Below is a quick before and after of a black pine that needed teasing out of a sea of needles. A fun tree to style.
Before
The after shot is a little lacking in quality but I am sure you get the idea.

After a day or so work.
As the days get cooler we slowly approach the time of year where I like to style conifers. This year is gearing up to be a big one for bonsai work as I have taken on a number of customers trees to be styled. Following on from the last Black Pine I worked on, I had the opportunity to work on a similar tree.

Before starting the work.
At least it looked similar before the work begun, but soon after the old needles were removed a new set of structural challenged presented themselves to be solved.

Old needles removed and ready for pruning and styling. (slightly rotated)
I decided to rotate the front slightly which brought up the issue of the first branch. That is it was now heading towards the rear of the tree so with the help of a screw in the trunk I was able to bend it forwards. This then set the base of the tree and the rest of the canopy could be built around it. The head was finally lowered and rounded out to create the final image.

After the work.
Again this tree now needs a couple of years to grow into its new shape but even after the couple of weeks that passed between starting the job and finishing, new buds are beginning to form which should see this tree become show-able in the not too distant future.
While in Japan I worked on a number of trees which might make it to future posts.
One such tree was a bunjin style white pine that had been bought by the nursery as part of a larger collection. It had been styled by the previous owner but with far too thin wire so it was up to me to re-wire and find a new style for the tree. Oyakata gave me free rein on the tree and so I set about working.

As the tree began, styled by its previous owner.
So I stripped the old wire, pruned some branches and wired what was left. I then started to place branches and reached a stage where i wanted to cut off some branches that would take the tree past a point of no-return. So I called Oyakata from the garden to make sure he was going to be happy with my decisions.

My styling of the tree.
It turns out what I had done was not to his liking and he proceeded to remake the branches and form a more upright tree.

The tree after Oyakata re-re-styled it.
And so that is how the tree stayed. After all it was not my tree and I certainly did the right thing by asking when I did.
That being said, did I like the end product? No, not really but I wasnt really happy with my version either. I can see why Oyakata styled it the way he did.
It is a little more regular and perhaps in that form is more easily sold (which is the name of the nursery game) and being of fairly low quality comparatively with the rest of the nursery Oyakata was probably hoping to get it sold quickly to make room for something more interesting.
Having said all that what was interesting about the exercise was to see a piece of material transformed into three totally different stylings by three different pairs of hands over the course of the day. Each person who styled it, from the previous owner, to me, finally to Oyakata saw something different in the material and I think it is that difference in how each of us treats our trees that keeps this art interesting and keeps me turning up to demonstrations, shows and events.
Perhaps this material much like all others has no one perfect way to be styled but instead many different forms that play to different tastes.
Things have been pretty busy since I got back from Japan. A new job, a pregnant wife and Autumn’s bonsai work just beginning haven’t left a lot of time for the blog.
On top of this, I have also been doing a fair amount of work on customer’s bonsai and their collections. Some of this work is routine seasonal maintenance, some of it teaching and then some of it is re-styling.

Before any work
One such re-styling I completed recently was the black pine pictured above. For Australia, the black pine had some good age to it and was starting to develop nice bark textures, but it’s canopy had grown into a solid blob over the years. My job was to find the tree within the blob. I had to prune a large number of branches out and define a better branch structure to set the tree up for it’s future. As a result a fair amount was cut off the tree but now the bones have been formed to grow a better structure upon.

After pruning and wiring.
One of the main changes, apart from separating the foliage into layers was to enhance the movement of the tree. This involved shortening the right side and lowering the head to accentuate the left movement of the main branch which made a huge difference to the appearance of the tree.
I think a re-pot into something more suitable and a year or two of candle pruning should see this tree fill into a very nice tree.
As you may or may not be aware, I have recently undergone surgery on my right wrist. Being right-handed, this has put a fair dent in my bonsai plans of late.
A few nights ago after work I decided to do something about it and tried wiring up a small juniper.

Before the work
I have been working on this tree for a few years now, slowly chasing the foliage in closer to the trunk and replacing leggy growth with tighter growth. I decided that it was about due for its first styling so that I could create the bones to grow and fill in the foliage upon.
Considering that my right arm was in a cast I think the wiring went ok. It’s not show ready but it never was going to be. It has a few more years before it is going to be anywhere near presentable.
I really wanted to get some fine sand paper into the bark to reveal the orange / red texture below the outer layers but the cast proved too clumsy. Something to look forward to once the pins from the wrist are removed after the next operation.
The little shimpaku from the front.
I find that when wiring junipers and particularly shimpaku, that preparation is key to a good result. Pruning unwanted growth and thinning what remains so that you end up with an evenly dense canopy not only makes the end result look better but it also makes for more balanced growth and an easier job while wiring.

As seen from the right

and from the back side
All in all I am pretty happy with the results considering that most of the wiring was done one-handed. I guess it just goes to show that interesting trunk movement is half the battle. That being said, the tree is only just beginning its journey as bonsai and should see many future wirings to come.
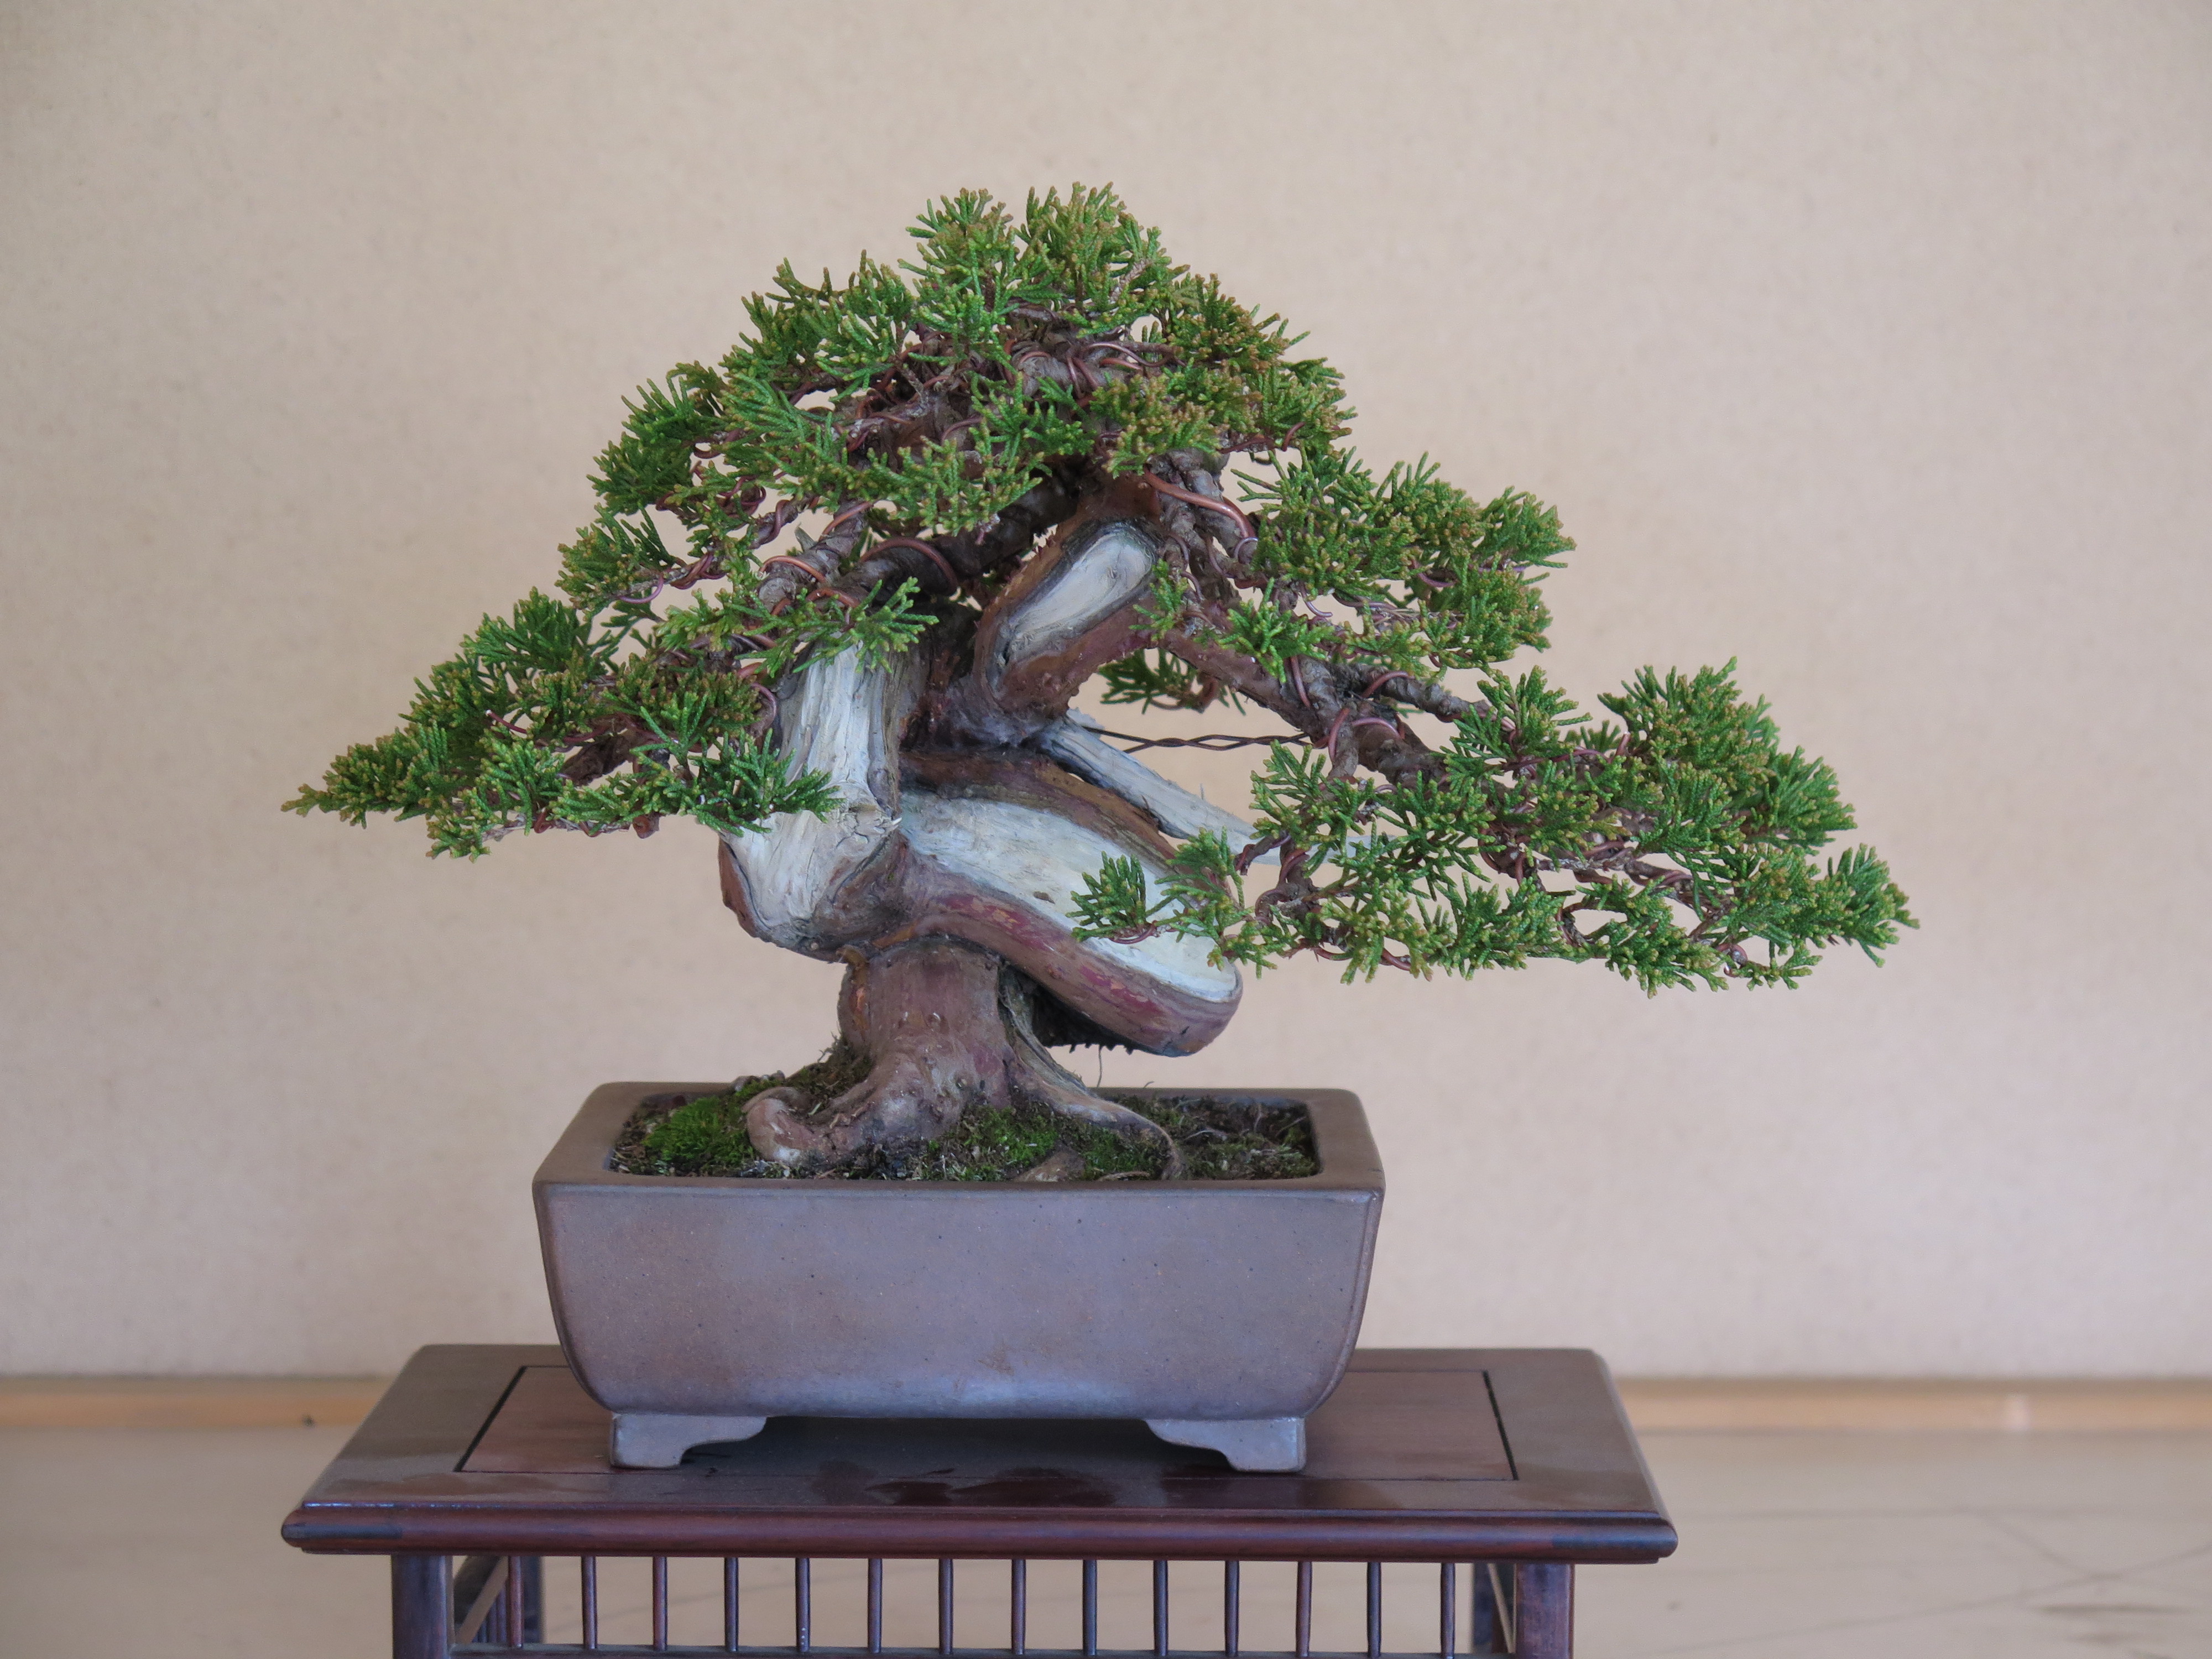
The tree below is one I worked on a couple of years ago. It is a large Shimpaku Juniper that had some great deadwood. When I was working on it, it was in the process of having some new roots grafted onto it. Because of this the styling was kept to just main branches, leaving the tips somewhat free so as not to stress the tree too much.

The tree before any work May 2009. There is a foam box that is holding soil for the grafts at the base. The layer was on the tree so that the deadwood would be brought closer to the soil surface and give the tree a more solid base.

After several hours wiring.
On my latest trip to Japan I re-visited Taisho-en and was reaquainted with this tree. The grafts had been a success and the tree had found a new home in a new bonsai pot.
It’s always nice to see trees you have worked on after some time apart. I get a similar feeling to that of seeing an old friend. When I saw this tree in the nursery I took my time looking over it and revisiting the familiar curves and lines of the trunk and branches.

The tree as of January 2011. The angle of the tree is a little more upright now and the base appears much more solid now it is lower in the pot. If you look closely you can see a tuft of foliage at the base that is still attached to the root graft.
I wonder if we will cross paths again.
