Most years i make fertiliser cakes from a range of ingredients (usually what is cheap or on special when it comes time to buy them) although the cakes that I have previously made have never really lived up to expectations.

For those that have used the fertiliser cakes in Japan I am sure you would have noticed an interesting thing. When the cakes have been on the soil surface for a few days they begin to get a white felt like mould on the underside and begin to omit a pleasant fermenting kind of smell.  When I worked with Mario Komsta, he always got excited when he saw this mould as it was a sign the cake was breaking down and feeding the bonsai.

The cakes I have been using here in Australia have never got the mould that those in Japan got. I put this down to a couple of things. Firstly climate. Japan gets a whole lot of rain over their summer where as here in Australia we are usually hot and dry for most of the summer. The problem I was having with my cakes was that they were drying out and were then hard to re-wet and get them breaking down again. Japan was always so humid over summer that the cakes once wet stayed moist and were able to break down.

To try to combat that this year I am trying using my ingredients loose inside tea bags. The idea is that they will be much easier to re-wet each watering and hopefully break down much more quickly and hence feed my trees better.

Tea bags, for making your own tea blend bags and a pair of scissors I need to re-profile.

I found a cheap supplier of tea bags in the form of a Japanese 100yen shop called ‘Daiso’ which has just opened a couple of stores in Melbourne. $2.80 for 100 bags.

The mix I am using this year is fairly basic:

  • Cottonseed meal – 5 part
  • Blood and bone meal (including trace elements) – 5 part
  • garden lime – 1 parts.

Filled bags.

The process of making the fertiliser bags is fairly easy and mess free. I fill the bags with a large spoon full of my mix and fold the bag shut. The cakes are now pretty much ready to go on the trees,  but I do one more step prior to putting them on my bonsai.

Soaking in fish emulsion.

I soak the filled bags in a fish emulsion solution to fully wet the ingredients and add a bit of extra fish emulsion kick to them.

Bags on the bonsai.

Once on the soil I like to place a small dimple in the top of the bag/mix so that every time I water, a small amount of water pools on the surface of the fertiliser and helps to re-wet it.

Now it’s not the most attractive solution but it does have a few extra benefits out side of easy re-wetting. Firstly because all the ingredients are contained in the tea bag this stops a lot of the loose material clogging up the soil surface and hindering drainage. Then they are also very easy to remove and replace at de-candling time which is also a plus in my book. Possibly the biggest side benifit is there is no smell while making the cakes using this method, and no smell means no complaining neighbors and stinky backyard. Also not having to dry cakes means you can make them early in the season before the weather heats up to drying temps.

I look forward to seeing if i get the white mould and the working fertiliser smell……. fingers crossed!


As I managed to get some time to work on my trees this last weekend,  I though it was a good opportunity to do some grafting before my black pines woke up too much. I like to do grafting on black pines just before they start moving in spring. For bud grafting this is important as once the sap starts to move in a big way any cuts made to hold grafts tend to flood with sap before placing the scion which makes them a little less successful. Approach grafts on the other hand are a little more forgiving but if I can I try to do them around the same time so that the burst of energy that comes with the first flush of candles extending goes into healing the graft site.

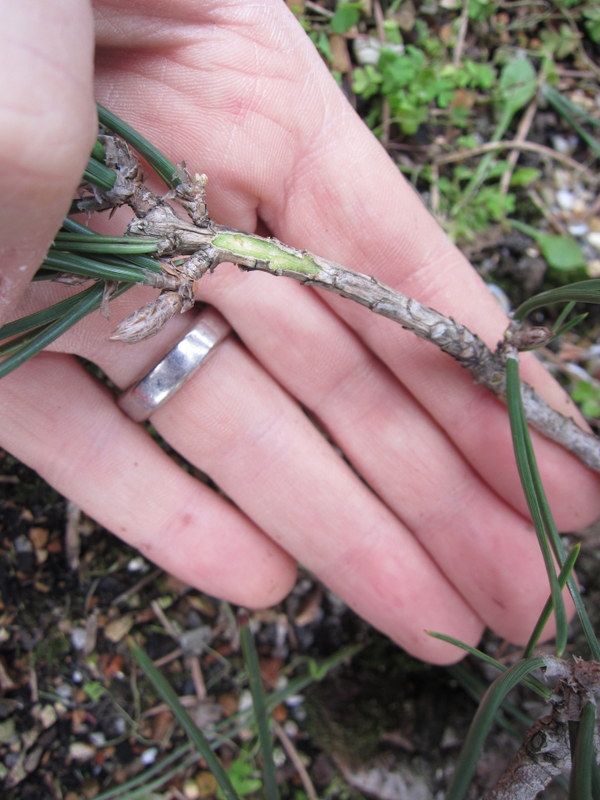
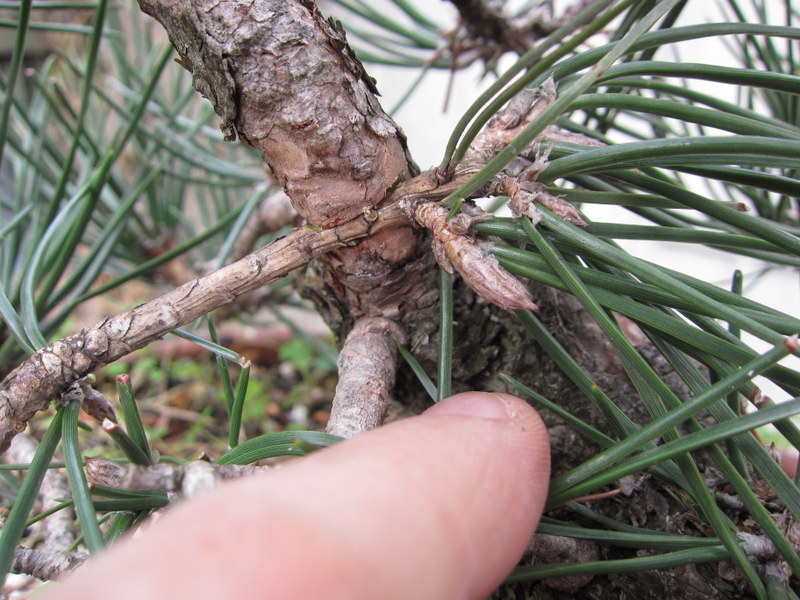
The graft site will be at the base of the thick bare section of trunk.

I have decided to graft this tree as it has a rather large bare section of trunk. If I can graft a new leader to the base of this I can build a much smaller and more compact tree with the new graft’s growth. Obviously this will be a longer term project but I figure why go down a long road just to end up at a mediocre tree. If this graft takes and the tree develops as I imagine it will be a far greater result in the future than had I just persevered with the existing structure.

The start of the process, a cut in the trunk.

The first step is to create a cut for the graft branch to sit inside. I like to make the cut about 1/4 smaller than the branch that is going to be inserted into it. I start by making the cut with a small saw. I try to make the cut so that it is wider at the rear of the cut than at the front edge. usually this takes two cuts, one slightly slanted upwards and a second slightly downwards. This flared cut will help the scion branch to lock into the cut.

Once I have made the first pass with the saw I clean up the cut with a knife so that I have clean and neat surfaces upon which the graft can be placed.

Some bark removed from the graft branch.

Next I remove a small slither of bark from either side of the scion branch. Make sure that you check where to make these cuts prior to getting the knife out as it is important that these cut surfaces line up with the cut surfaces you made with the saw. I usually find that the knife cute that clean up the saw cuts combined with the cuts on the scion branch tend to eliminate the 1/4 under size that was initially cut with the saw.

The graft made.

The Scion branch can now be inserted into the cut in the trunk. The fit should be snug and tight. Small adjustments might be needed to be made to the channel in the trunk to make sure things are all snug. If the channel is on the large side it is best to chock the scion branch so that it contacts firmly with the lower surface of the channel cut. (I use small twigs as chocks.) As sap runs from the roots up, contacting the lower surface will ensure that the graft has a better chance of taking than had it only contacted the upper surface. Either way, the scion should be firmly touching at least one cut surface on the channel in the trunk.

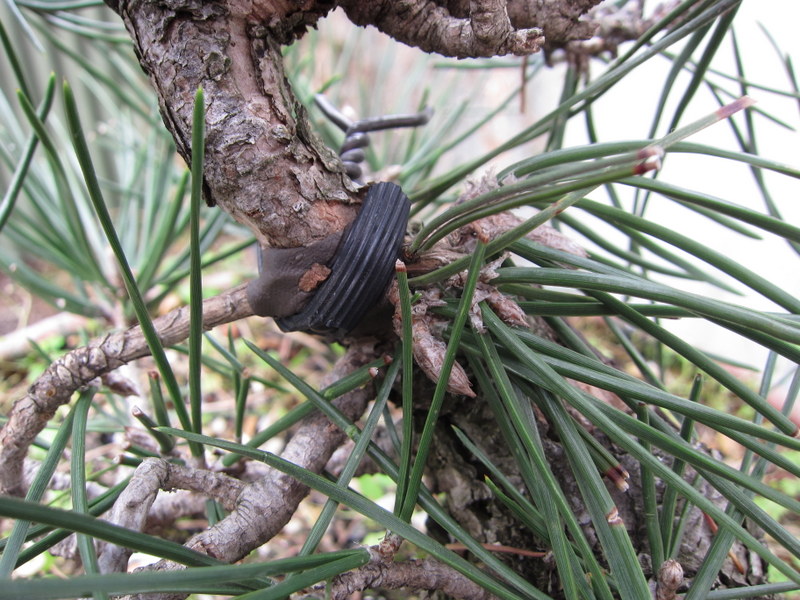
Sealed and held tightly in place.

Finally you simply seal the graft union and hold the scion firmly in place so that it cannot move and disturb the graft before it has had a chance to take.

The speed at which the graft takes will depend on the amount of growth you allow to occur on the scion branch and above the graft site. Obviously the more the trunk and scion branch grow and expand the more chance the graft has of taking. I would hazard a guess that this graft will be taken by the end of this coming seasons growth. Having said that I will probably cut off the growth above it in stages so it may be two seasons before I actually sever the scion branch from its original source.

I had been waiting for my quince to flower for the last few seasons and this year it finally set flower buds. As luck would have it though as they were opening we had a few days of heavy rain which damaged the blooms. I should really have taken the tree inside to avoid the rain but I totally forgot about it until it was too late.

Budding left and rain damaged on the right.

On the bright side at least the quince has begun to flower so hopefully next year it will set more buds and with the ramification I hope to build this season it should make for a better display.


Re-potting this year has been a rushed affair where I have been doing it when ever I have time. Mostly this seems to be under garden lights after work. Spring seems to be a little early this year which hasn’t helped as the schedule has had to be brought forward. Having said that, I have nearly got through all my trees. I have a handful left to do that I hope to get done this coming weekend.

As i have been in a rush there hasn’t been much time (or good light) to take many pics. Most of the re-potting I have been doing has been fairly un-interesting anyway and mainly just renewing of soil and replacing the trees into the pots that they came from.

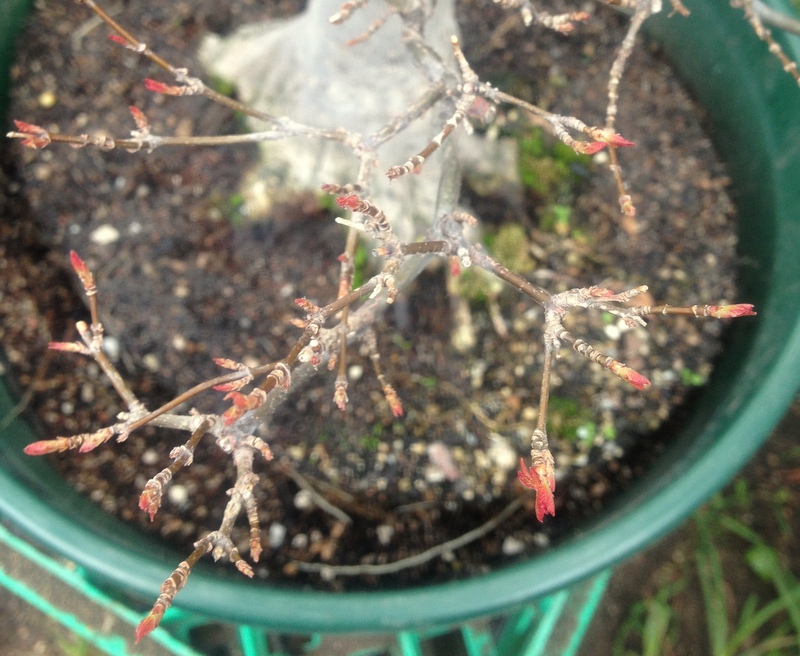
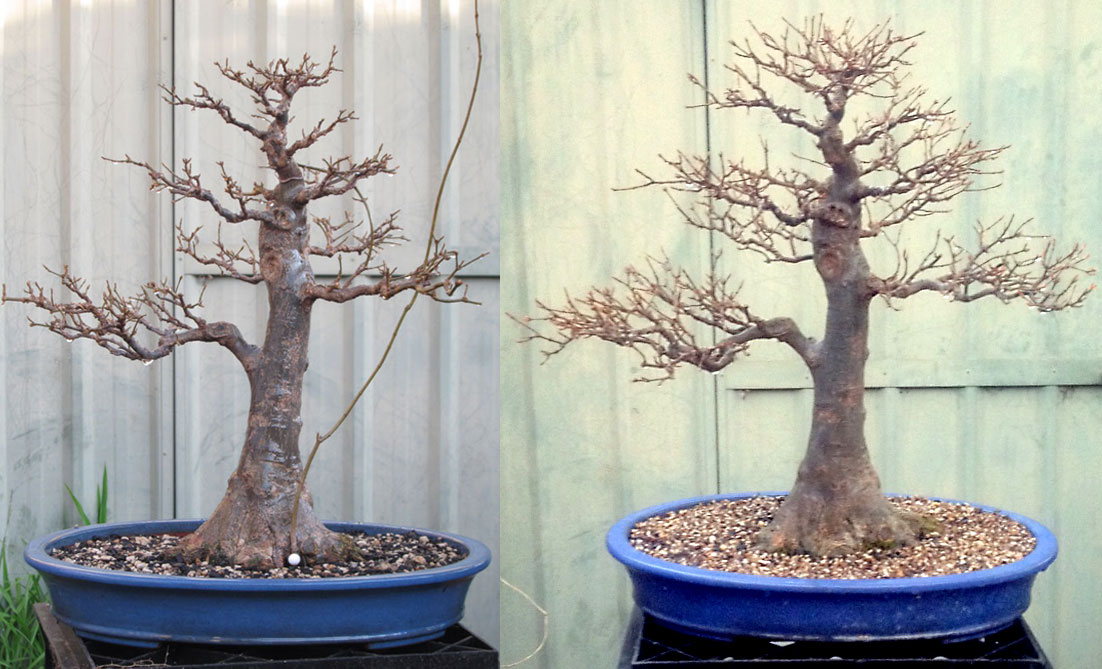
One tree I did get to do during daylight hours was a trident maple. The pics i took were with my phone to see how that would work out and as you will see they are fine in good light (see the buds pic) and not so great when the light was getting low when i had finished re-potting the tree.

Buds starting to move

I talked about this tree with Boon while he was in Melbourne and also Hirotoshi saito. They both thought that the tree should be rotated slightly to the right. I had been tossing up whether or not to do this for some time before speaking to them but their advice made me decide to go ahead and try it. I am glad I did. A small tweak such as this 15 degree turn makes a lot of difference.

Left: the tree in August 2011. Right: the same tree, August 2012.

The reason I had been debating whether or not to make this change lay in the nebari. In the 2011 picture you can see that the nebari’s spread has a somewhat flat side to it which was facing the front. When it was rotated this formed an angle which is a little strange although there are a few good results of this change. First the slight thickening about 2/3rds of the way up disappears and there is more movement in the trunk. Also the branching is better from this new front.

I also tilted the tree forward a little. this moved the root ball a little and raised the soil in the rear of the pot a bit. I will correct this next re-potting once the roots re-establish themselves in the new position. I think i will also try to move the tree a little more to the right, i shifted it a bit this year but having seen the photos i think it could move over some more.

If you are interested in more of the re-potting process you can see the pics from last year HERE.

While digging trees out at Shibui Bonsai I was very aware of the need to stay well hydrated. As a small part of my planning I made sure to bring sufficient liquids to help keep the digging crew’s liquids well replenished.

Bonsai Wine?

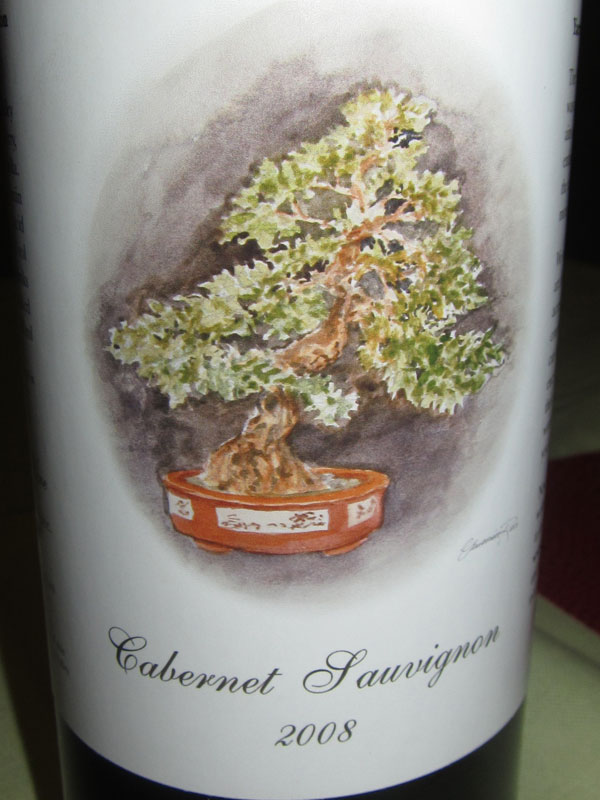
A month or so ago I did a demonstration at one of the local clubs which is located in the Yarra Valley, right in the heart of some of Victoria’s wine country. The Yarra Valley Bonsai society had presented these bottles as a thankyou gift. It turns out, it was their very own wine! Since recieving them, they had been sitting on the mantle piece waiting for the right occasion to drink them. I figured that there was probably no better time to enjoy a bonsai wine then over a bonsai weekend, so I put them into the car when I headed up to Shibui.

Some of you may recognise the tree on the label from the recent AABC convention. It’s a big Banksia owned by one of their members. Keen eyes will also notice it has been mirrored!

The Label.

Is this the only wine around with a bonsai on the label? It must be the only one with an Australian native!

Thanks Yarra Valley Bonsai, the wine was delicious and much appreciated afer the day’s digging.

I have just got back from a weekend at a friends place, Shibui Bonsai.  Shibui Bonsai is located in North east victoria about 3 and a bit hours from Melbourne and specialise in ground grown stock. I try to head up each year to help Neil (the owner) dig a few rows of tree out of the ground. Neil grows a range of species and this year we dug Tridents, Chinese Elm, Japanese black Pine, and Japanese Maple. In some of the other rows Neil had Chinese Quince, Shimpaku and a range of other desirable bonsai species that will probably come out after another season.

Matt swinging a shovel while Neil prunes the dug trees.

Having been up over a number of years now it has been great to see how trees develop over time. As trees are dug and pruned, they are sorted into those that might need to go back in the ground for another year and those that are ready to begin their life as bonsai. The digging went quickly this year as the trees had only been in the ground for a season and as a result didn’t have many large roots. The trident maples had really nice compact root-balls and as did the black pines which was a nice result and should make for them establishing into training pots much more quickly.

A batch of root over rock tridents, root and top pruned waiting to be potted up.

At this time of year Neil likes to dig the trees, prune them and then heal them back into a growing trench where they will happily sit dormant until they are potted up in a few weeks time.

Once potted up they spend around a year re-establishing themselves in the new pot before becoming available for sale.

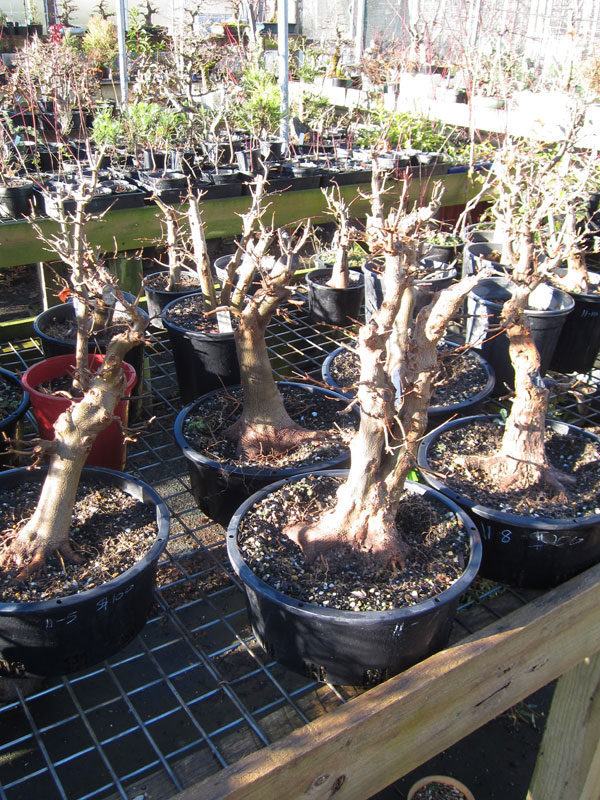
Last years Tridents on the sale benches.

Some larger tridents.

Once we had finished the day’s digging we went for a drive into the local forest to have a look at a few things of interest. We checked out the old gold diggings while looking for native orchids in amongst the leaf litter. I think some of the native orchids would make excellent accents. Neil pointed out a few of the colony forming species as the most suitable and easy to grow. It is illegal to collect them from the wild but luckily they are available from local growers if you can hunt them down. I will definitely be keeping my eyes out for a few in the future.

The beautiful white trunks of the Brittle Gum.

I always enjoy heading up to Neil’s place. It’s a beautiful part of the country and it just happens to have an excellent grower there as well.

If you are interested in visiting Neil’s Nursery I believe you can via prior arrangement. His details are found on his website: http://shibuibonsai.com.au/ For those that can’t make the drive to his place, he does also sell regularly as local club shows and will be at the Bonsai society of victoria’s show this October.


It’s a strange season. Here in Australia we are in the middle of winter, yet in my garden some of my trees think its spring.

Trident Maple budding out.

For what ever reason, my trees seem to be ahead of schedule by a couple of months.

Chinese Elm.

My Chinese Quince dropped its leaves in autumn and almost straight away began to leaf out again and is now almost back in full leaf.

Chinese Quince leafing out.

I guess this means that at least for some trees I will have to move the re-potting window forward a little to keep up with their early movement. I think next year i will re-pot the Chinese Quince as soon as it drops it’s leaves in case it decides to move early again.

Are any other Australians seeing an early spring?

I wonder if these trees leafing out early will make for a big year of growth or if their lack of winter sleep will mean they are weaker than those trees that are taking the full winter sleep? It will be interesting to see what happens this season.

Another point of interest in my garden at this time of year is the ‘Choujubai’ flowering quince which although flowers throughout the year really blooms out in a big way now. It’s a nice splash of colour in amongst the bare deciduous trees. I had been hunting for ‘Choujubai’ in this country for a few years before finding one being grown by a friend. I am really enjoying it even though it is just a piece of stock at the moment. I hope to take a number of root cuttings this spring but perhaps that is the topic of a future post.

Choujubai colour.

I though it about time I updated how the grafts I did back in November were taking. If you look back at THIS post you can see the whole process of how I started this graft.

The graft is beginning to take.

A week or so ago I had to do a demonstration on approach grafting for a local club so I took this tree in as an example and also placed some new grafts onto other areas of its trunk. It was a strange night as we had an earthquake in the middle of my talk. It was a small quake in world standards (5.4 on the Richter scale) but it was the first I had felt. The building shook, doors rattled but it only lasted for about 30 seconds and the talk soon continued. It certainly added an interesting break in the night.

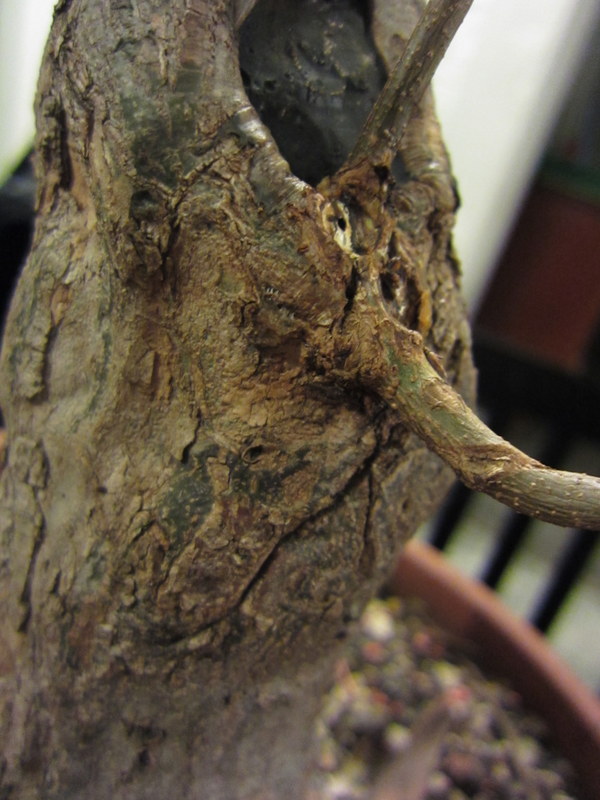
Now that the earth has stopped shaking and im not in front of a meeting group I am able to see how the graft is doing a bit more closely. The graft has begun to take but I think that I will leave it attached to the host branch for at least part of this growing season (ie. next spring). You can see in the above photo that the section after the graft is beginning to grow thicker than the host branch on the other side of the graft. This is a good sign that the grafted branch is beginning to take nutrients from the main trunk. Once it becomes a little thicker I think the union will be much more solid and I will be able to remove the host section of the branch.

I will be doing a whole lot more grafts on this trunk this coming spring so I can begin to build the framework of the branch structure. It really is an easy almost foolproof technique that allows you to get branches where you want quickly. If you have a tree that could benefit from a new branch, give it a go.

Just a small side note, I will be pretty busy for the next few weeks as Hirotoshi Saito is coming to Melbourne to run workshops with various clubs over the next week and a half. I hope to attend as many sessions as possible so will not have a lot of time to update the blog. Hopefully once the workshops are over i will have a bunch of photos from the events to share. For those interested in Hiro’s visit have a look HERE (information about the BSV workshops/ demo and the Ballarat sessions are available in the links section of that page.)


Well, the inevitable happened and another tree has found its way into my collection.

While at a friend’s place I spotted the below corky bark Chinese Elm on his sale benches and decided I could make something of it. It had great taper, nice bark, some interesting movement and only a couple very small scars. Another bonus was it was of a size that would see it make use of several pots I have gathering dust on the shelves at home. For those interested, the tree is from the same grower that produced my other Cork Bark Elm.

The tree as i bought it.

Once I got it home I made a few preparations to set it up for next years growth. I cut off the taper-less apex section of trunk which also removed a lumpy section. I then reduced some of the heavy branches and pruned off any shoots that were not going to become part of the future structure. I think in the next few days I will have a go at bending the first left branch down a touch but we will have to see how that goes.

Ready for springs growth

I will probably re-pot it back into this container this year so I can get some fast growth out of it next season. Once I have the main branches and the start of secondary growth set I will pot it up into a bonsai container where I can start the ramification process. For now all it needs to do is grow, especially the new leader. It needs to really thicken up to continue the line of the trunk. This species is such a strong grower I should have the trunk-line and base branching set after a year.

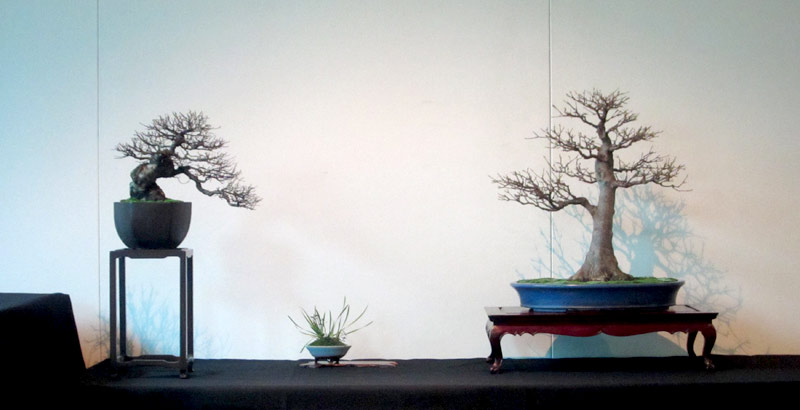
The Display

At the recent AABC convention I displayed two trees. One was a Chinese Elm and the other a Trident Maple.

To get these two trees to this state actually took a whole lot of work and time. I didn’t think it would take so long but it took me roughly 2 weekends to prepare these two trees.

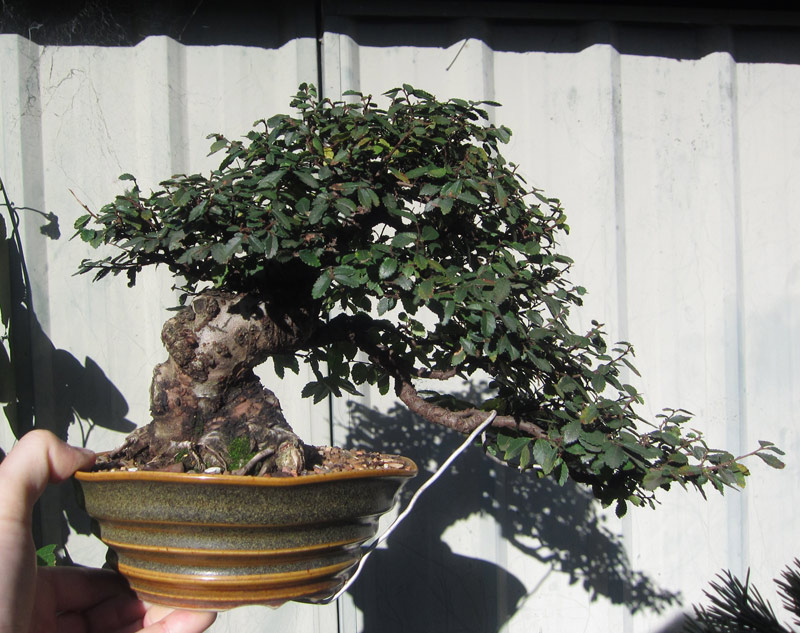
Chinese Elm Pre-work

The Chinese Elm had the following done to it:

  • First, I defoliated. This took a long time. there are A LOT of small leaves on this small tree and they are all difficult to get at with a pair of scissors.
  • Next I cleaned up the trunk and did a basic pruning to refine the outline of the silhouette.
  • Then I had to select a pot for the tree (in this case an old Yamaaki pot) and re-pot the tree.
  • Then I mossed the tree
  • Then oiled the pot.

Chinese Elm as displayed.

The tree came up nicely. It improves each year as it’s canopy becomes denser. I think the new pot is a big improvement over its old container. Looking at the above image, it makes me wish I had a more delicate stand for it, but that can wait.

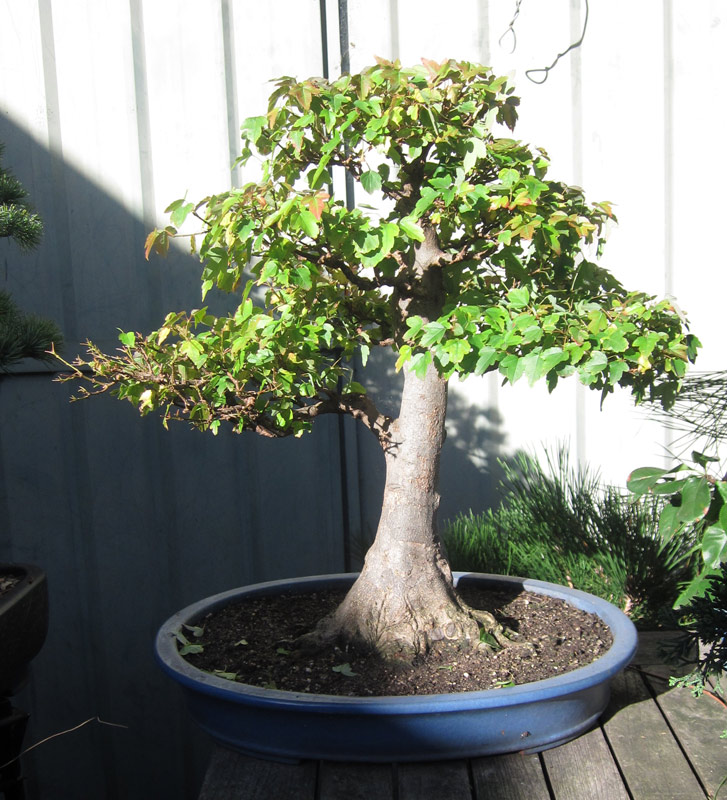
Trident Maple pre-work

Next came the trident Maple. It under went pretty much the same process as the Elm although it was not re-potted. I had considered changing into an antique chinese container but in the end I thought the blue pot was a good match.

This tree took most of a day to moss. The mossing was the easy part and only took a few hours. It was the finding of the moss that took the time. I had to hunt all over the neighborhood to find enough moss. No gutter was spared. Every time I thought I had enough I would go home to start applying it only to find the moss was either not good enough quality of that after trimming out the bad parts I didn’t have near enough to finish the job, so back out onto the streets I would go. I repeated this process several times, each time heading out to further gutters in search of the perfect moss patch. I didn’t find it, instead I had to collect many small pieces from many gutters.


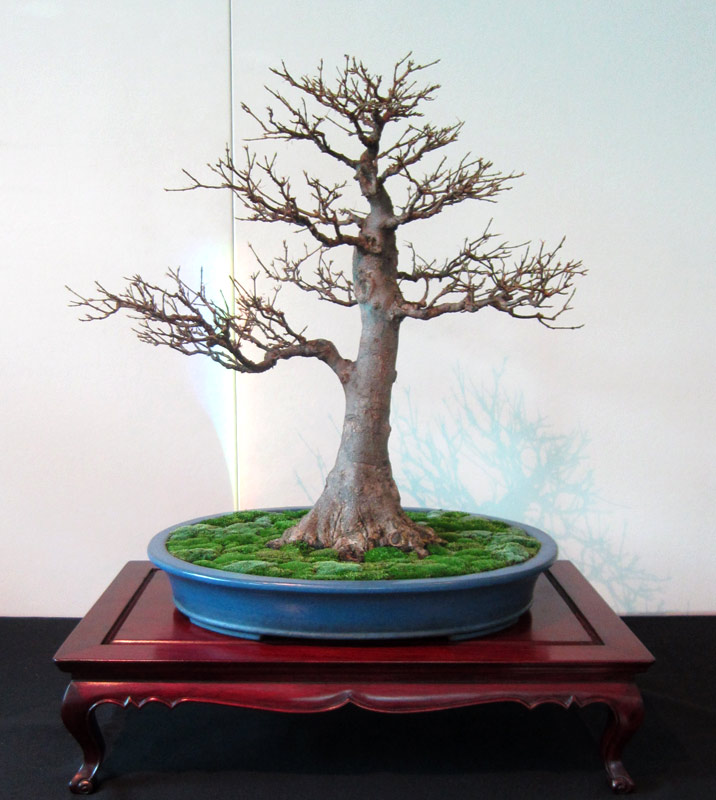
Trident maple as displayed

I finally got the tree mossed and selected the only stand I had that came close to suiting it.

All in all I was pretty happy with how the display ended up but of course like many things in bonsai I saw many areas in which I could improve it.Both trees will look better in a few more years, but when is that not the case?

I guess that is part of the draw of growing bonsai, they are ever-growing, changing and shifting and you are forever adjusting to match the tree’s changing form. Some times you get it right and sometimes you don’t but always if you think about the decisions you are making along the way you will learn something new.


Enter your email address to subscribe to this blog and receive notifications of new posts by email.

Join 689 other subscribers

Contact me

nichigobonsai***gmail.com

Note: to use email address, substitute *** with @