
You are currently browsing the category archive for the ‘Re-potting’ category.
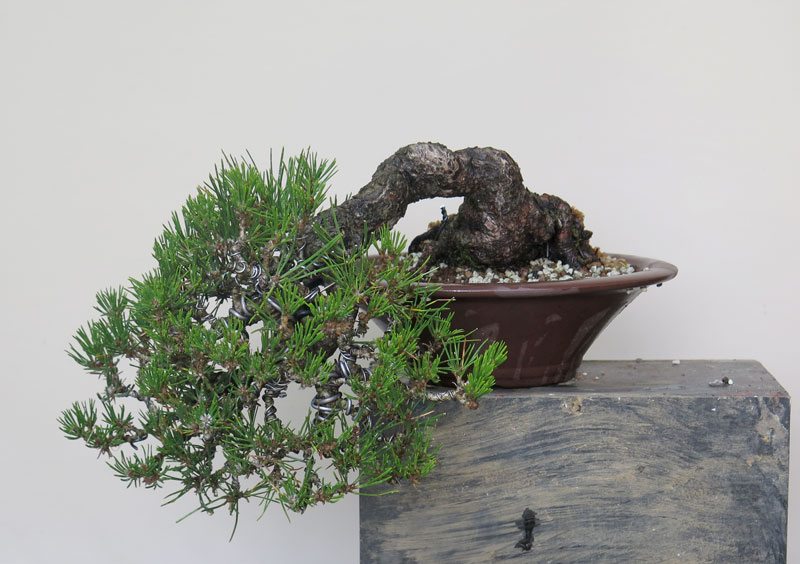
This is one of my trees that was partly neglected over the last couple of years. It’s pruning only really focused on cutting back to the silhouette (due to lack of time), so while the canopy out of leaf looked twiggy and dense, the structure was not great and the beginnings of lumps and bumps were forming where too many shoots emerged from one place.
The time came recently to do some work on this tree and it was pruned back and re-potted.

Above: Pre-work. The tree looks dense and ramified but the beginnings of lumps were forming within the canopy. It was time to cut out some problems.

Above: After a cut back. I think about 50% of the fine twigs were removed. While this is a bit of a set back, with a year of strong growth i think i can probably get 3 or 4 flushes out of it and mostly replace what has been lost, but this time upon better structure.

Above: ….. and a re-pot. Not a dramatic change as its the exact same size, style and make of pot, just in a different colour.
This little tree stands 12cm from the rim of the pot which doesn’t really come across in the pics but it is a tree that really fits in the palm of your hand.
During this growing season i will be working towards rounding out the top of the canopy and increasing the ramification. I will do this via:
- Heavy feeding
- Outer canopy defoliation and cut back
- Selective pruning of twig structure to avoid growing more issues into the tree and;
- Possibly some limited wiring.
I will update again if the above is successful.
I recently was gifted a number of very nice small trees from a close friend. They were all trees we had been working on together and that had got to a pretty nice point in their development.
One of the trees was this black pine.

Above: the tree as i received it.
We had previously worked this tree and during its last re-potting we have moved it into this semi-cascade position from a more upright posture.
After staring at it for a while i started to wonder if i could get some more out of it, so out came the plastic pot and I tested a few new potential angles.

Option 01: Use the rear as the front and tilt the tree. I felt this kind of straightened out the trunk (even if a little lumpy) and elongated it a little so I wasn’t completely convinced.

Option 02: the original front but a slight rotation and a decent tilt to the left. I liked this option as it shortened the trunk a little and added what looked like another bend in the trunk’s length.

Above: I only had a couple of pots available for the re-pot. A flared sided round pot and the original banded round one.
I ended up using the flared pot. I liked the flared side as it helped lighten the visual weight of the pot. It also will give some extra clearance for branches which i may want to place close in to the container.
Above: the tree all potted up. I couldn’t quite get the full rotation and as a result the top section of trunk is a little parallel to the pot edge. While it doesn’t bother me too much at this stage, I will likely try to get this further down in the next re-pot.
Of course with an angle change like this there will always be foliage that needs re-styling.

Above: you can see from the angle of the shoots just how much the angle of the tree has changed.
Surprisingly the roots were fairly easy to adjust to get to suit the new angle, with only a couple of finer ones ending up above the new surface level. For those i dressed them with a layer of sphagnum moss to keep things moist while the slowly adjust to their new position.

Above: Sphagnum moss covering a couple of exposed roots.
All in All a successful re-pot and angle change. Once the tree recovers and grows out, i will start to think about part 2 of this process and restyle and re-shape the foliage mass to suit the new angle.
This year i have gone a little Chojubai crazy with a lot of them on the go. The below tree hasn’t helped bench space matters at all as it has multiplied!

Above: the clump in it’s larger form.
I had originally been growing it as a larger clump but after seeing how it had developed since last re-potting i decided that there were actually two nicer smaller clumps within the mass of trunks.
So i set about breaking it up and finding pots for the two settings.

Above: The two smaller clumps that i split out of the larger planting.
I think both smaller plantings have some great characteristics in their own right and they should continue to develop into interesting trees.
I really love Chojubai and would recommend everyone gets a few into their collections!
I’ve just about finished my re-potting for the next season’s growth. It has gone fairly easily this time around for some reason despite the collection growing in size a little. While I wont be posting every tree, this will be one of a few posts capturing the most interesting re-pots of the year.
The first tree is a new tree to the collection. It’s what we think is a Crabapple. It arrived to me in a very shallow pot, which while it suited the tree, i wasn’t sure it was the best choice in my garden with the often hot summers.
So as a starting point i got it into my mix and a deeper pot. By doing that I now know what baseline i am starting with and if any issues do come up over the growing season i will not be questioning the roots or a soil mix i do not usually use.

Above: The tree sans pot. The hook root on the right of the trunk annoyed me so i took it off. i planted the cut root in another pot to see if if will shoot from a root cutting or not.
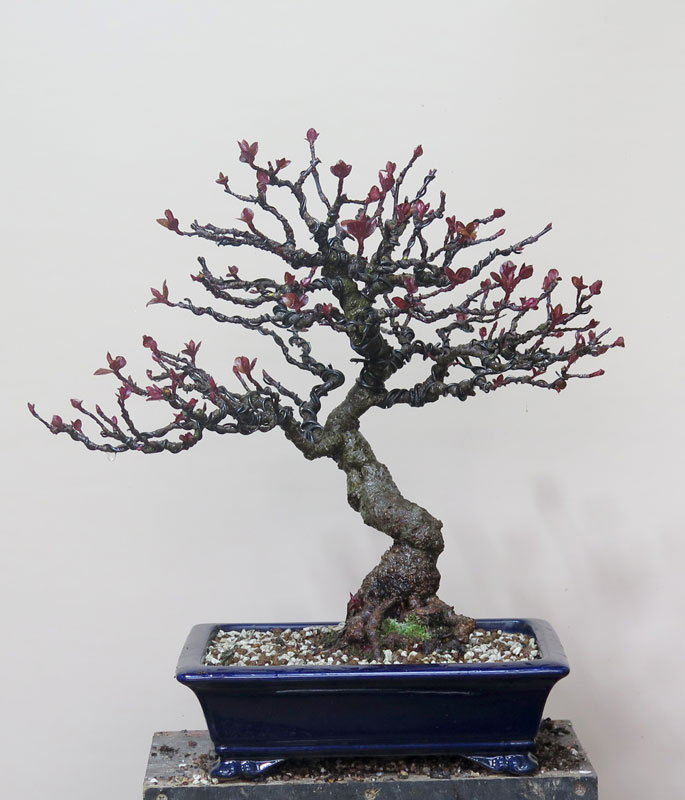
Above: Post re-pot. I ended up going with this navy blue Reiho pot which i liked. It goes well with the fresh red growth but time will tell how it looks when the foliage matures (and maybe turns green?)
As far as i know, the tree has never flowered so i will be doing my best this year to feed it up with some high phosphorus and potassium fertiliser with the hope it sets flower buds next year.
I finally got around to finishing the last round of work on the this tree.
Since i wrote the last update on this tree i have been slowly adjusting some of the deadwood and mulling over various adjustments and future plans.
It really needed an angle change and a better pot. As luck would have it I have just got back from a trip to Japan where I found a pot I thought might work well with this tree.
Upon arriving home, being at the beginning of re-potting season I got straight into getting this tree into its new container. I think it is a good fit. I like the colour, shape and size and it should leave a decent amount of soil available for the tree to grow strongly and fill in over the next season.
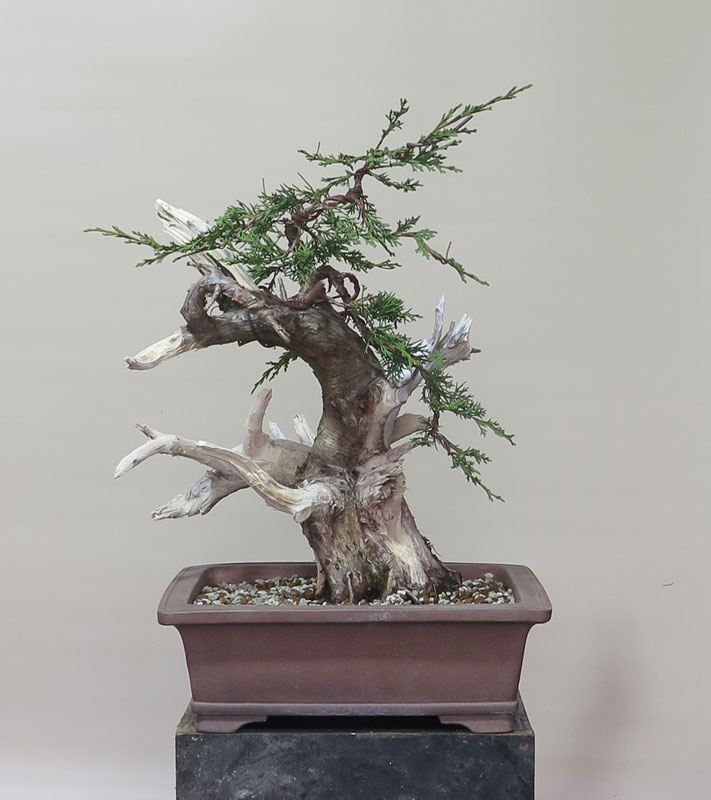
I messed around with fronts and planting angles a fair bit and landed on the above.
It’s so good to have the tree now potted at what is at least very close to the final angle and into a pot that is much nicer proportioned than it’s previous home.
I am glad i re-potted this tree this season as i found a lot of old garden soil in close to the trunk that i was able to remove and replace with bonsai mix. It should set things up for a bright future.
I have a number of other junipers i will be grafting in the next couple of months and will try to get pics as i do. It is a great way to produce bonsai material as you can see from the above tree.
This pine was one I dug (liberated) locally. Essentially a weed in our native forests i was happy to stumble across this one with it’s strange movement and old bark.
It has taken a number of years to get it out of the heavy old clay it grew in and into a better soil mix.
Last year i stripped off the site soil and put it into a shallow bonsai pot (all i had).


This year i put it into a much more suitable container (thanks again Ken). It should be able to stay in here for a few years as it establishes a dense root ball. Once it’s solidly rooted i will hopefully be able to remove the support sticks.
I may post an update once i see if the grafts live or die. The variety of pine is the same as THIS one, so i think i should have a decent chance of grafting success. Fingers crossed.
This is a tree i have been working on for a couple of years.
It was given to me by a good friend (thanks Kris) who was clearing out in preparation for a house move. At the time, it was a mass of foliage and while having some good movement, had been grown as a stock plant with many whips being grown long then later wired and then finally air-layered off as separate trees. It worked really well as a method of producing stock and also did a great job of thickening the trunk on this tree but it was in need of some direction.
I used it as a demo tree at Bonsai Society Victoria in October 2022 for it’s first styling. Unfortunately i don’t have any pics from that time but it underwent a basic program of branch and trunk line selection, reducing it from a huge mass of foliage down to its base structure.
It (and myself) were invited back in June this year (2023) to give it a second pass where i was able to massage things into a much more considered form.

The tree came up pretty well and was a good example to discuss changing the flow or direction of branches as i worked. Towards the end of the demo there was a lot of concern about the chances of ever getting it into a bonsai container as it was in a large growing pot………
Cut to a couple of weeks ago when i finally got around to re-potting it.
Another good friend gave me a pot that he thought would suit it (thanks Ken) and I went about reducing the root mass to a point where they would fit.
I also cut a shari on either side of the trunk to begin forming two live veins that will hopefully make the trunk much more interesting as it continues to develop. I will enlarge these each year until i am happy with them.
It’s a bit of a strange tree but i really like it. The only problem is it hangs down so far below the base of the pot that i will have to weld up a stand for it so it can fit comfortably on my benches.
A quick post to show this little juniper. This re-potting I have stood it up to reveal more of the fantastic trunk-line and will fully re-style it once it settles into the new pot and shows positive signs of growth.

Its a nice little tree that has been with me for a long time. Its not the ideal foliage for shohin as it is much more course than some others and gets ‘shaggy’ quickly. That said with the right amount of work it will be a nice tree.
Its new pot, is one i picked up last time i was in japan and i think suits the tree well. I love its grey tones and always think these colours go well with junipers.
Hopefully in a few months I will share the re-styling with you all. Until then……
This small olive was a gift from a friend who dug this lump of wood when digging a handful of single trunk trees. He thought this one would be right up my alley!
It’s the second year I am growing it. Last year I cut off all the original trunks and branches and let it recover from being ‘flat bottomed’ (essentially cutting it completely off at the roots and growing it like a giant cutting). During this re-potting i was pleased to see a good spread of surface roots all around the base of the cut, allowing for planting it into a very shallow container should I ever want to.
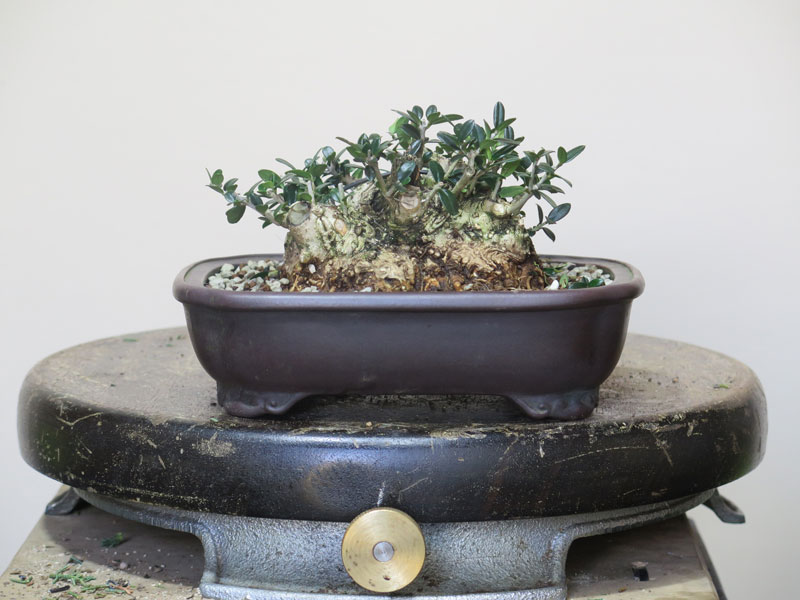
This year I will begin to start building some branch structure and filling it out. I’m starting to think I have a thing for clump style…………
Another quick update for the trees shown in THIS post.
Everything is slowly improving year in year out and I am becoming particularly fond of the one in the Bikou pot. This tree was one of the original Chojubai in the country (a cutting from one of the plants imported in the 90’s).. It belonged to the late Richard Salvado, a friend and proponent of mini and shohin bonsai in Australia at a time when big trees were all the rage.
He originally found chojubai in someone’s backyard, planted as an accent in an imported tree. He took a cutting (which i think out survived the original specimen) and later spread the variety to those who were interested. He was ahead of the curve in regard to the small bonsai craze and its a nice memento of him and his broader influence.


