
You are currently browsing the tag archive for the ‘Australia Bonsai’ tag.
The trident maple below is this years project. I spotted this tree in a friends garden and loved the big gnarly base. I like the base so much that I have just realised that I don’t have a picture of the whole tree, just photos of the base!

Lumpy flared base.
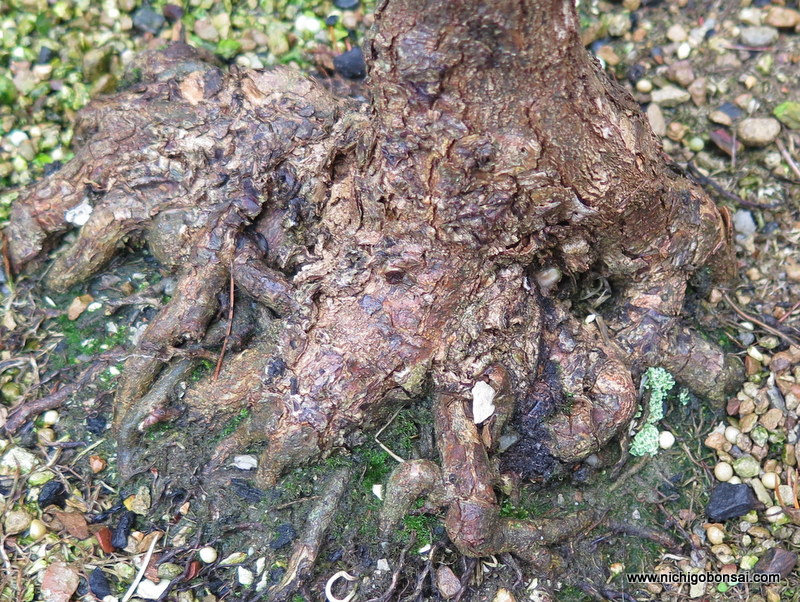
After removing one root, can you see where it came from?
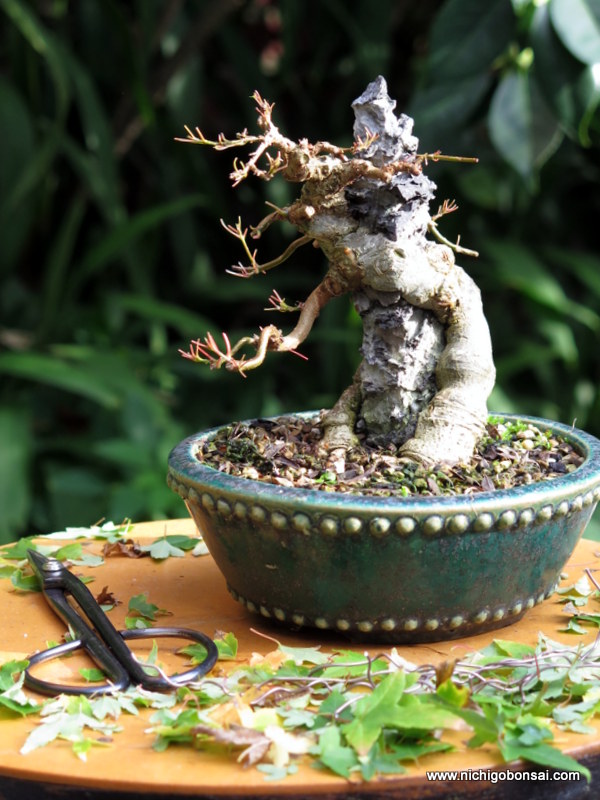
The base has great character but the rest of the tree is tall and directs the eye away from the nebari so I felt I could work on that to improve the tree overall. The other challenge with this trident is that it is a variety with large leaves and long internodes which makes it difficult to make a good canopy, especially on small trees.
I have noticed that other tridents with this growth habit also develop nice bases easily. The down side is that their ramification is course and thick. How can you make use of the base and also have a good foliage canopy?

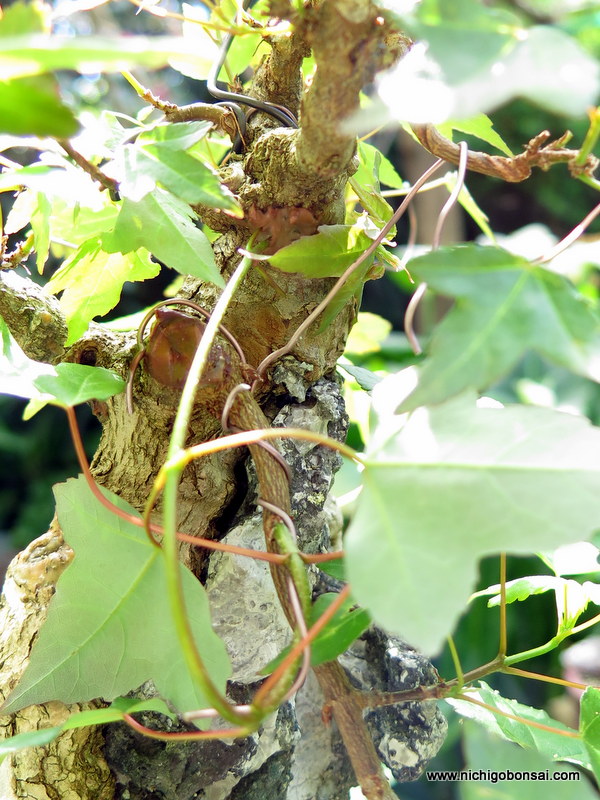
Approach grafting new foliage.
The answer is to change the foliage. I decided to graft a finer foliage onto the lower section of the trunk so that I can make a shohin sized small tree with a huge powerful base and fine delicate branching.

Seedling being planted in the same pot.
I chose a seedling from a batch that showed good foliage characteristics. That is smaller internodes and compact growth. I planted the seedling into the same pot as the main tree for ease of watering and then grafted the young whip into the main trunk.
I actually grafted it twice into the trunk, once on each side. I bent the seedling into a ‘u’ shape and simple cut a channel in either side of the trunk for the seedling to fit into. One side will become the apex, the other will become the first branch. This way I will have the same foliage on the whole tree once I cut off the main trunk in a year or two.
Even though i am changing the foliage I also wanted to keep the old foliage so i can experiment with it in regards to its base thickening properties. To save the foliage I decided to air layer off the top and the first branch.

The cut made and scraped clean. I actually used some branch cutters to cut a small amount of wood from around the layer site to ensure I got all of the cambian layer.

Sphagnum moss soaked in seaweed extract, all wrapped in strong plastic.
If these layers work, I will probably grow them in pots for a year or two before ground growing them to see if the base flaring/thickening is a genetic trait or just a result of how this tree was grown.
I have noticed that there are tridents that grow good bases and poor ramification and then tridents that do the opposite. Has anyone else noticed this?
I am hoping that I can use cuttings from this tree to grow great bases then graft a good foliage variety on top to finish up the process. Time will tell if this works out or not. If this doesn’t work out I have another seed grown trident that shows similar properties. Fingers crossed.
Every one needs a project or two in their collection. I really enjoy project trees, that is tree that are undergoing various processes to transform them into a new style, shape or form. The problem is that each year project trees undergo their transformation and then move into ramification/maintenance phases leaving me to find new projects.
Trident maples are one of my favorite species to work on and I really enjoy having one as a project. I always have my eye out for something that has plenty of room for improvement. The tree below is one such tree.

The tree as I received it
The tree was an imported trident maple. It had been brought into the country back in the 90’s when Australia’s border protection was much more flexible in regards to bringing bonsai in.
When I got the tree it had been left to grow out for the last 2 years and as a result there was a fair amount of work required to bring it back to its former glory.

After first cutback.
The first thing I did was cut it back hard to stimulate some back budding. It’s branches were quite old so it didn’t bud out how I had hoped. This lead me to go down the path of approach grafting rather than risk cutting off branches and not get any buds pop. I decided to graft on a new set of branches at the base of all the old branches. In total I grafted 5 branches and left the tree to grow.

The grafted branches have taken.
I also re-potted the tree and found a lump of old akadama in the center of the root ball. I bare rooted and picked all the old soil out of the root-ball. Almost immediately after the re-potting the vigour of the tree improved and I was rewarded with strong growth which helped the approach grafts to take. In the above image you can see the grafts emerging from the underside of each branch.

The large branches removed.
This spring I cut off all the large branches as the grafts were now strong enough to take over the sap flow. When I made the cuts I cleaned the wounds up with a knife and then applied cut paste which in my experience helps things heal.

A wound and a grafted branch.
I have left the grafted shoots long and I will let them grow until I am sure that they are strong and well connected to the host trunk. Once I am sure of that (probably in a month or so) I will cut them back to the first internode and then begin growing the branch structure.
Unfortunately the back branch’s graft didn’t take but as luck would have it this spring a bud has popped right at the base of the branch right where I wanted it. Sometime trees do what you want.

The two leaves are the new bud at the base of the back branch.
Once this shoot is strong enough I will also cut off the old thick back branch above.
This spring I also placed the last graft I need, just below the apex. This should allow me to cut off the last heavy branch on the tree without having to chance whether or not I get a bud where I want.
The shoot on the bottom left is bent up to under the apex where it has been approach grafted into the trunk.
Its been fun replacing the branches on this tree and i am looking forward to this season of growth where i can start to grow the branch structure and form the outline of the bonsai. Hopefully in 5 more years this will be a highly ramified and ready to show bonsai. Time will tell.
Well as is often the case, life has been busy and the blog has suffered. I have been able to find some time today to write a string of posts that should be published over the next few weeks.
To kick things off, while going through my photos i found some before and after images of a small tree I have been playing with. The images are just a summer’s growth apart and seeing pictures like this reminds me of how good it is to capture your trees in images to track their developement. This tree I thought hadn’t really changed all that much but looking at the images you can see it has changed a lot from the start of the season.
Picture one shows the tree as I received it. It was imported from japan some time in the 1990’s when regulations were a little less strict and I managed to be in the right place at the right time and picked it up.

This is how I received the tree (although I think for this photo I had just cut off a number of long sacrifice branches that had grown out)
Since it came into my collection I have potted it up and begun to build the branch structure. I had to graft on a branch (Third on the left) but now the basic structure is set and I am looking forward to ramifying it over the coming summer.
As the tree is now, ready for another years development.
Probably next year it could go into a more suitable pot but for now the Koyou pot it is residing in isn’t too bad.
Where to from now? well I want to grow the first branch out a little longer and generally ramify up the tree a whole lot more. Buds are just starting to open and I cant wait to get started.
Another customer tree that has undergone needle work, candle selection and re-setting of the pads (tenaoshi). Unfortunately I didn’t realise the camera was in black and white mode for the after picture but you can see the results fairly well despite the lack of colour.

Before, looking bushy and healthy after a season of good growth.

A film noir look at this bunjin tree after the work.
Not a dramatic change, merely some minor tweaks and re-setting of some candles that grew out of the silhouette. Over all a very nice tree that is ready for another year of development.
Tenaoshi (手直し) is a japanese term for a what is a fairly un glamorous but necessary task. The character ‘te’ (手) means hand and ‘naoshi’ (直し) means to fix or repair so together they basically translate to fixing by hand. It’s a very logical description that describes the maintenance task of resetting and fixing the tree after a season’s growth.
As the tree grows often branches slowly lift their tips, and or the wind, passing people and or animals can displace branches despite being wired. To remedy this the artist should as part of their maintenance adjust the wiring and maybe even add some additional wire to new growth. Often this fixing by hand is combined with some light trimming (and needle work in the case of pines).

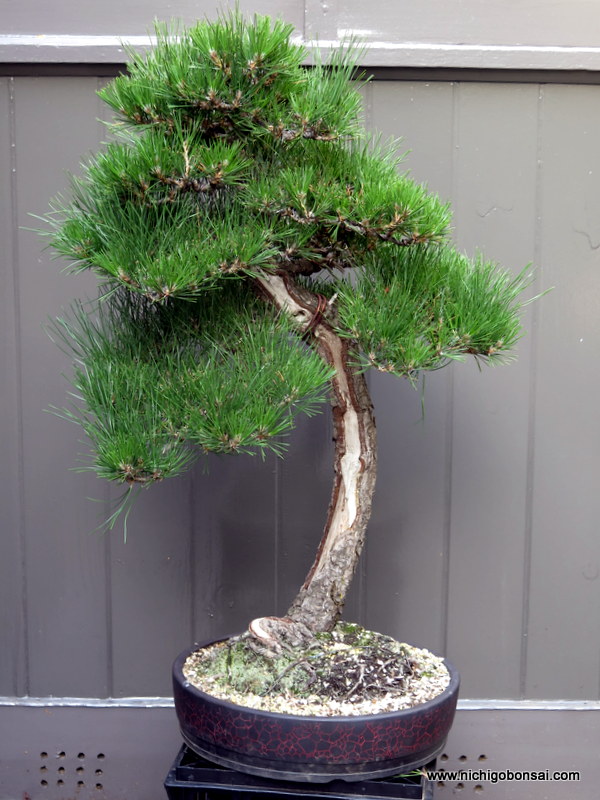
A customer’s white pine after a season’s growth.
As large changes in the before and after images are not really the aim, tenaoshi can seem like a bit of a tiresome task, but it is an important part of any seasonal bonsai routine and your trees will be much the worse for not doing it.

After some trimming, needle work and re-setting of foliage.
So next time you are out in your garden working on your trees, don’t simply wait until the tree needs re-wiring, adjust the wire that is currently on the tree to keep it looking and growing in the best form it can.
Been busy as per usual but I have managed time to fit in a couple of customer trees.
Below is a quick before and after of a black pine that needed teasing out of a sea of needles. A fun tree to style.
Before
The after shot is a little lacking in quality but I am sure you get the idea.

After a day or so work.
As the days get cooler we slowly approach the time of year where I like to style conifers. This year is gearing up to be a big one for bonsai work as I have taken on a number of customers trees to be styled. Following on from the last Black Pine I worked on, I had the opportunity to work on a similar tree.

Before starting the work.
At least it looked similar before the work begun, but soon after the old needles were removed a new set of structural challenged presented themselves to be solved.

Old needles removed and ready for pruning and styling. (slightly rotated)
I decided to rotate the front slightly which brought up the issue of the first branch. That is it was now heading towards the rear of the tree so with the help of a screw in the trunk I was able to bend it forwards. This then set the base of the tree and the rest of the canopy could be built around it. The head was finally lowered and rounded out to create the final image.

After the work.
Again this tree now needs a couple of years to grow into its new shape but even after the couple of weeks that passed between starting the job and finishing, new buds are beginning to form which should see this tree become show-able in the not too distant future.
Things have been pretty busy since I got back from Japan. A new job, a pregnant wife and Autumn’s bonsai work just beginning haven’t left a lot of time for the blog.
On top of this, I have also been doing a fair amount of work on customer’s bonsai and their collections. Some of this work is routine seasonal maintenance, some of it teaching and then some of it is re-styling.

Before any work
One such re-styling I completed recently was the black pine pictured above. For Australia, the black pine had some good age to it and was starting to develop nice bark textures, but it’s canopy had grown into a solid blob over the years. My job was to find the tree within the blob. I had to prune a large number of branches out and define a better branch structure to set the tree up for it’s future. As a result a fair amount was cut off the tree but now the bones have been formed to grow a better structure upon.

After pruning and wiring.
One of the main changes, apart from separating the foliage into layers was to enhance the movement of the tree. This involved shortening the right side and lowering the head to accentuate the left movement of the main branch which made a huge difference to the appearance of the tree.
I think a re-pot into something more suitable and a year or two of candle pruning should see this tree fill into a very nice tree.
I am currently growing two species of Australian deciduous orchids. Both are known as ‘green hoods’ although they vary in habit a little from one another. I think they both show great promise as accent plants as they are interesting without being too bright or showy to take away from a tree they might be exhibited with.
Pterostylis curta is an upright form that sends up flower spines of about 20cm upon which small flowers sit.
Pterostylis curta
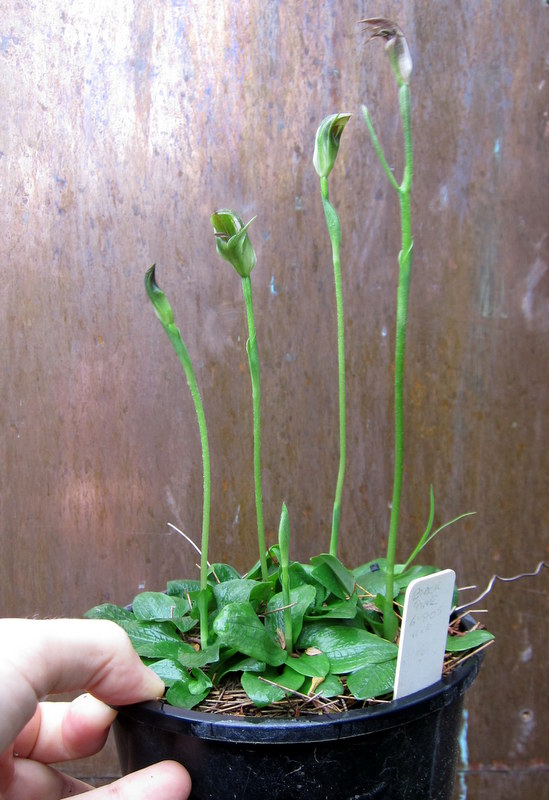
Pterostylis nutans on the other hand sends up slightly shorted spines and has flowers that bow over or nod which is why they are also refered to as the nodding green hoods.

Pterostylis nutans
The best part about these orchids is how easy they are to care for. They are deciduous and require very little water over their growing season and none whilst they are dormant. They also reproduce easily and produce new bulbs each year which you can separate at re-potting time to make new plants. They seem very happy in pot culture which is another plus for the species.

Pterostylis nutans
Potted up they make interesting accents although once this pot fills with a few more tubers it will make for a better display.

Interesting shapes.

Close up they are very pretty.
You often find these orchids available at orchid shows and specialist nurseries, but as they reproduce so easily if you can find someone who has them chances are they will have some spare at re-potting time.
Well worth a look if you are after a native accent.
This year, Bonsai Northwest decided upon holding a winter exhibition. This is a bit of a rarity due to most Victorian shows being held in the spring or autumn. It was great to see many familiar trees out of leaf with the structure bear for all to see. I enjoy seeing trees that i have got to know over the years improve each time i see them come out for a show and this year was no exception.
Unfortunately the moody lighting didn’t translate very well into the photos I took with my cheap camera so I was only able to get a handful of non-blury shots which are below.
Enjoy.
")
")
")

Elm

Trident Maples
")
Japanese Black Pine
")
Trident Maple

Japanese Black Pine
")
Elm
")
A small Chinese Elm?
")
Desert Ash
")
A nice suiseki.
")
Japanese Maple
")
Chinese Elm
")
Chinese Elm ramification
")
Japanese Maple

Elm
