
You are currently browsing the category archive for the ‘Styling’ category.
A number of years ago we visited Onomichi in southern Japan as a bit of a side trip during a family visit to Japan. I fell in love with the town for some reason. While i cant really put my finger on it, something just ‘clicked’. Its ocean setting, industrial history, creative new industries side by side with their traditional counterparts and of course the amazing shimanami kaido (well worth riding the bike trail if you are so inclined), the hilly landscape, querky old buildings, yellow trains etc all played their part I suppose.
While staying there, we walked to the peak of one of the small hills in the area and managed to stumble across this red pine.
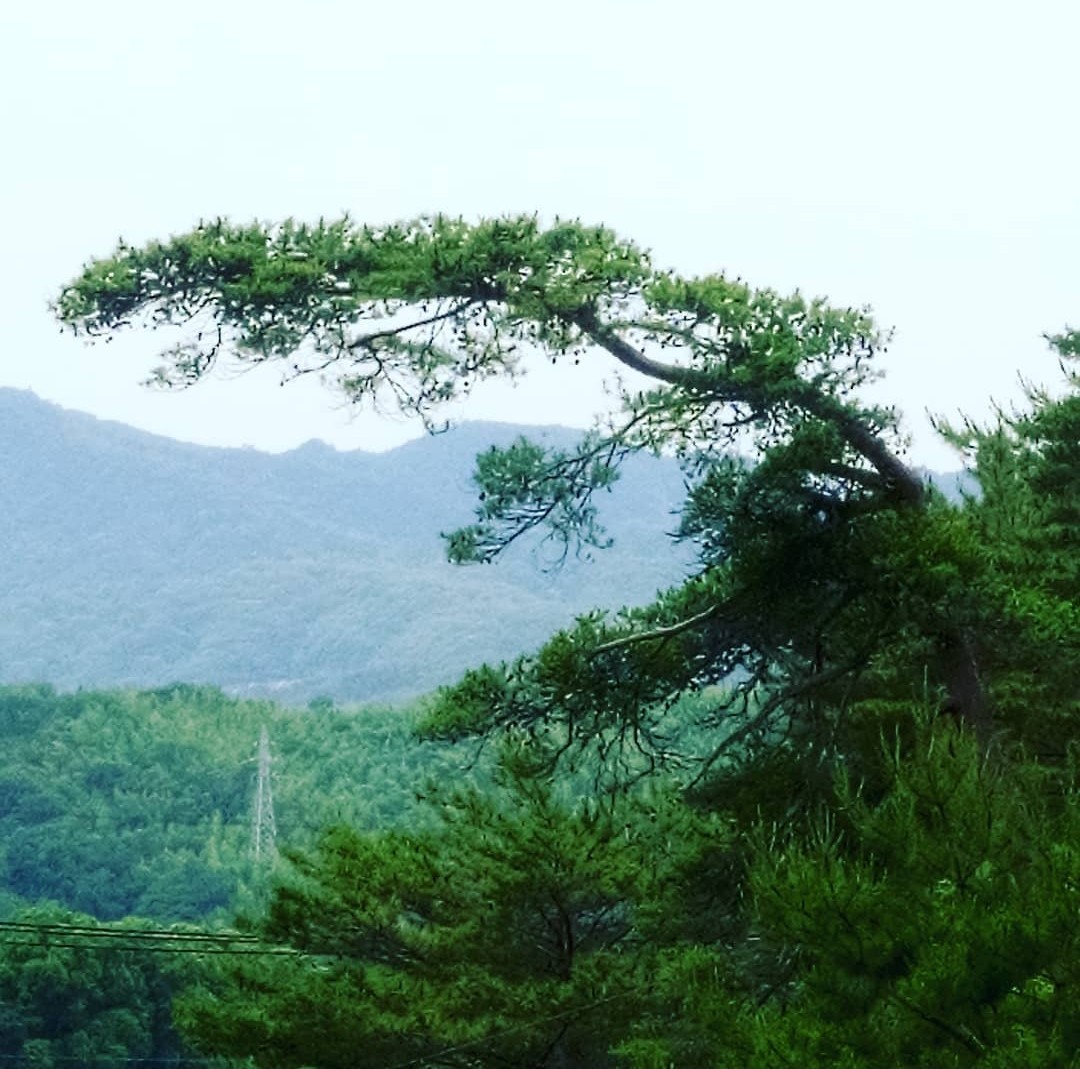
I really liked it, and again, while i cant really put a finger on why i liked it, it again ‘clicked’.
…….Cut to this week, I am looking through some travel pic and stumble upon the above red pine again. As fate would have it I was also trying to think of what to do with one of my black pines.
I had another tree that was styled very similarly and I was never quite sure that my collection was large enough to have two very similarly (and kinda of poorly) styled trees, so I would often catch myself staring at this black pine trying to figure out what i could do with it.
When I came across the Onomichi pine picture I had a light-bulb moment and wondered if i could capture the ‘vibe’ of this pine in the (now desperately needing styling) black pine on the benches.
…….. Now vibe is an interesting concept. Bonsai is a whole lot of different things to a whole lot of different people and that’s OK. In fact i think the myriad of different ideas and approaches is what makes it interesting.
For me, i am not really about making miniaturised, scale models of trees. I think what i like to do is try to capture the feeling of trees and or what my sub-conscious is drawn to in trees. It might be an element of a tree (canopy shape, branch movement, strange feature) a feeling that you get (hugeness, ancient-ness, calmness etc) or just somehow trying to reinterpret the spirit of a tree that i am drawn to. I amso am drawn to graphic shapes in the trees i style which is probably from my Landscape Architecture background. I think in summary I’d call it capturing the ‘Vibe’.
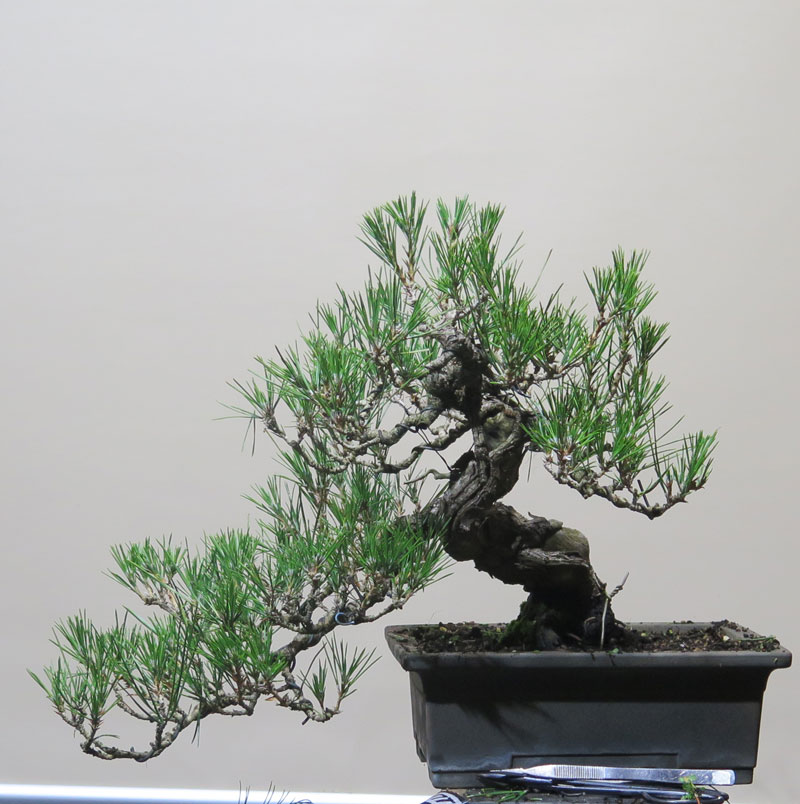
So One night I set myself up in my workshop and set about working towards imparting some of the spirit of the Onomichi pine into my black pine.

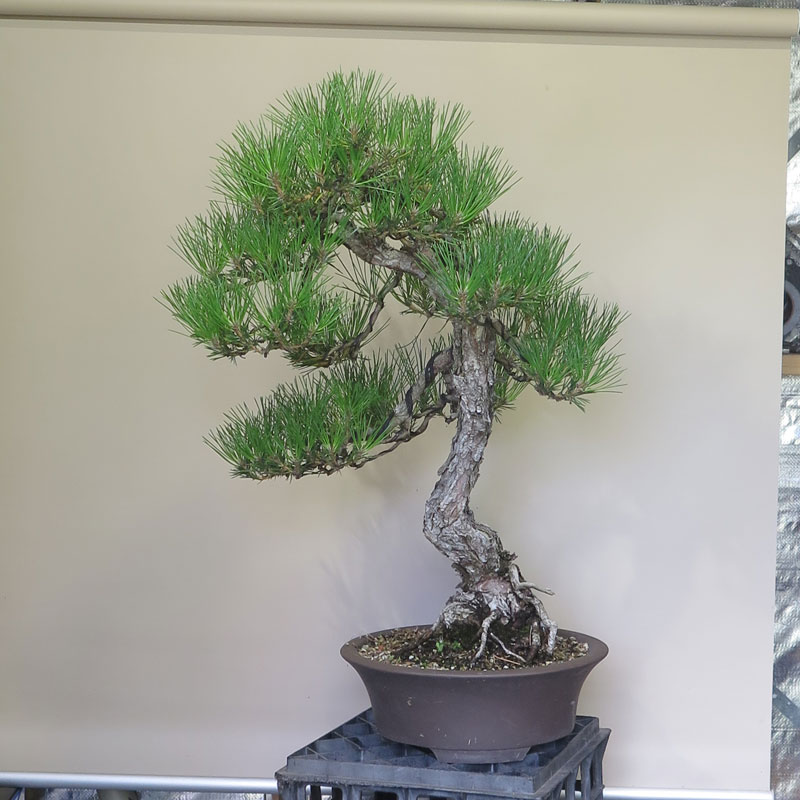
I’d anticipated a restyling at some point and had pruned and thinned back the foliage last autumn. The tree had been let grow freely the previous season and i think the above image reflects how desperately it needed work!
Now it’s probably on the late side of timing regarding styling black pines. We are entering an El’nino weather phase and the growing season has arrived much earlier than usual so i was caught a little off guard. Candles are extending so i had to be super careful when wiring so as not to break any but think I got away with it.
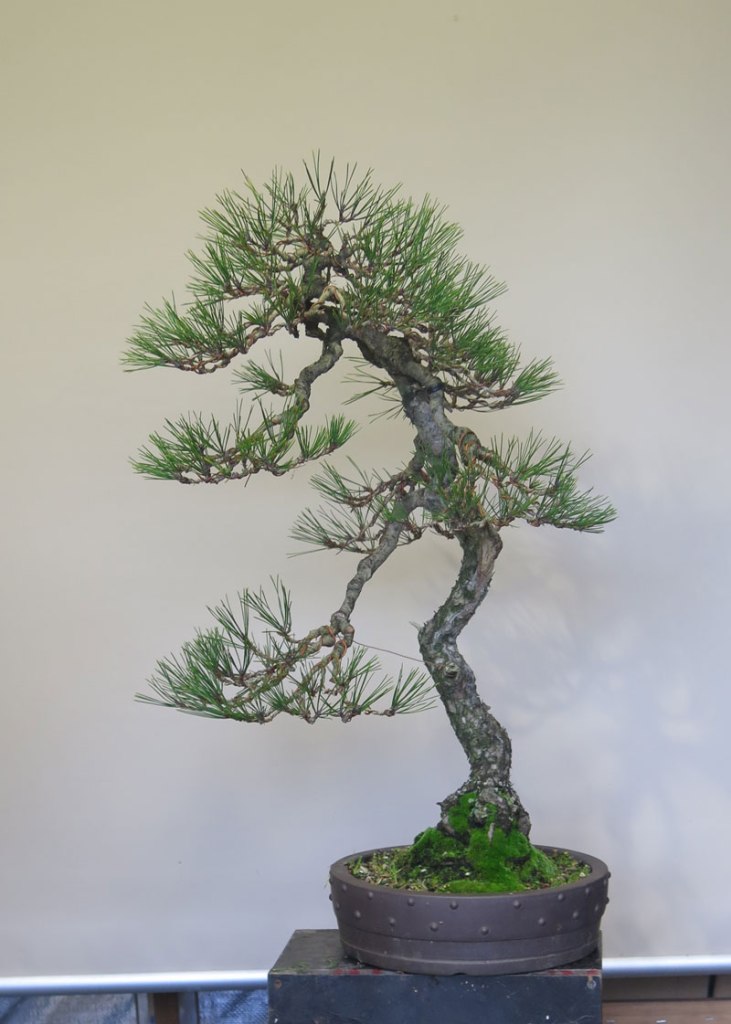
The process was fairly simple, I chucked on some tunes and switched between looking at the original Onomichi pine image and trying to impart some of it’s ‘vibe’ into the black pine. It was a fun exercise although I’m not sure how successful it was. You are always limited by the material in front of you so of course the end result is not a mirror image but it certainly has turned out being styled in a way i wouldn’t normally have approached the tree.

I quite like the end result but something still bothers me about it.
I think I am going to put it in a spot i can look at it each day and try to work out whats not quite right about it and tweak it over a period of the next few weeks (or leave it as is potentially).
It was a good exercise to go through and I’d recommend it for those with favorite trees and bonsai that share the basic structure. I had to actively go against my baseline styling urges in a number of instances and I learned a lot by doing that that will likely be part of my future work.
As far as the tree’s merit as a bonsai…………. the jury is still out…….. It’s certainly a more interesting tree compared to what I started with and the fact it will now trigger memories of a great family holiday and a favorite place I think will cement it place on my benches for many years to come.
It seems a consistent theme is me not updating my blog. Well, it’s been a long time between posts again so figured I should make an update…..
I’ve been fairly active doing various things within the garden and have recently been involved in a local bonsai gathering with some bonsai mates which has spurred my passion for bonsai along again.
During one of these catch up’s I brought along and worked on the tree features in this post. It has featured on the blog before (2012) as per the post below. That said, it has changed quite dramatically since then.
I was never entirely happy with the procumbens foliage on this tree. It could be made to look good but it grew quickly and needed a lot of up-keep to maintain at its best. So I decided to graft it with Itoigawa.
It turns out that this was a long process from which I’ve learnt a few things.
Probably the biggest take away was the size of the scions to use. I had originally used small pieces of scion foliage on the belief they would perspire less and therefore have a higher chance of success. This was the case and they were successful, but they took forever to build up enough strength to grow into something I could think about styling and or cutting the original foliage back to (think several years post graft success).
The next round of grafting I used much larger whips as scions. (probably in the 150-200mm long range.) I found that the extra foliage, almost immediately, built up strength and vigor and as a result could be utilised in much shorter time frames post grafting.
It took me a few years to learn these lessons so the ‘changing of clothes’ process took a lot longer than it might have otherwise. That said, I am now using these learnings on other trees and benefiting from the previous errors. You will see from the image below, I am growing out some whips on this tree to be used as grafts on other stock.
To cut a long story short, I finally got around to doing a structural styling on the new foliage on this tree and I am pretty happy with where it stands. It has a lot of growing to do to fill out and develop secondary and tertiary structure but its now on a good path.

The questions remains though, is this a procumbens juniper (sonare) or an itoigawa?
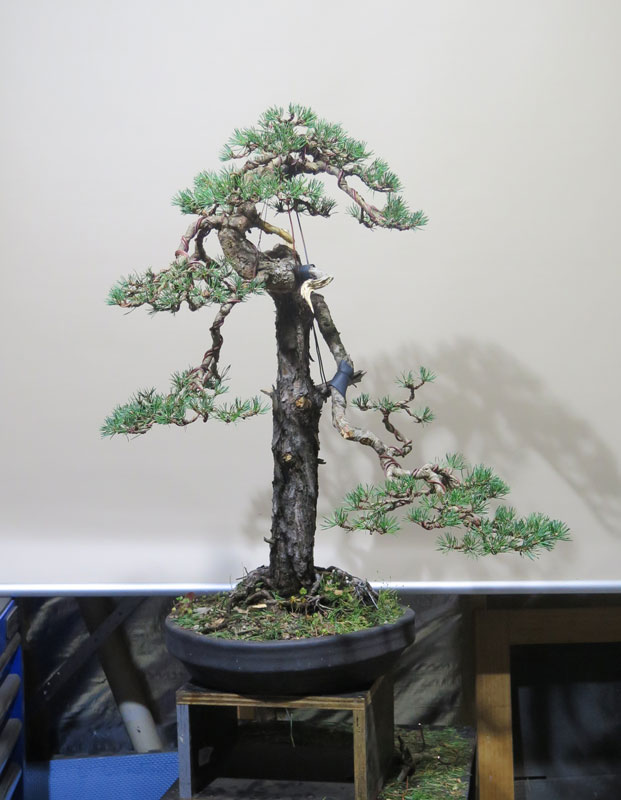
Another tree that has been worked recently was this Japanese Red Pine.
It was a tree that I styled for a friend that later found it way onto my benches. I really love this little tree and enjoy working it and getting lost looking at it.
The tree had a fairly dramatic first styling back around 2016. The before after shots of that work are in the bloc post below:
It was also displayed at the 2018 AABC national convention where it was in great health and form. It’s the last tree you see in the 6 trees I displayed in the below video:
The work this time around was more of a maintenance styling and of course I forgot to take a before image as i got carried away in the work. The tree like many others had suffered with my poor water issues and has lost a few branches and shoots so I had to be a bit creative to fill the gaps once more. That said, I am pretty happy with how it all turned out and I am looking forward to the next couple of years as the tree develops further.
As per my pervious post, this tree is also a little thin in the canopy. That said I am fairly confident that this will fill in nicely this next growing season. It may be due for a repot also this year so I might see what containers I have on hand to mix up the image a little. Pretty sure I have a nanban style pot hidden away somewhere…. I just need to find it.
I don’t grow cedars myself but I have worked a number of nice ones over the years. The tree below is no exception.
It is owned by a good friend of mine who had just got it back after it spent a number of years with someone else. It was a little weak when he got it so he had spent some time letting it gain strength once more…….. which gets us to the below (terrible quality phone pic) image.

I’d love to take all the credit for this tree but really all I did was follow the bones that were there. I compressed the apex a little and moved some things about, all in all I was just bringing out the qualities that already existed.
The tree still has a ways to go but it is covered in buds in all the areas you would want to fill out (like the bottom branch) so I’m pretty confident that even after one year the tree will look full and much more developed.
On a side note, the roots remind me of a hand grabbing at the soil. Try to un-see it.
I’ve been working through some of my trees. Two of which are these black pines that were featured in the below blog post earlier this year:
Those two trees had their yearly needle work done and I now finally got around to wiring them.
Due to my water issues I had let many of my trees grow out (without doing the usual candle work etc) to gain some strength, and as a result their styling looks a little more sparse than it might otherwise. That said, I am happy with the strength they are now displaying and this styling will set them up for the next few years where I will work towards some more back budding and ramification.
Before after’s below:

After needle plucking 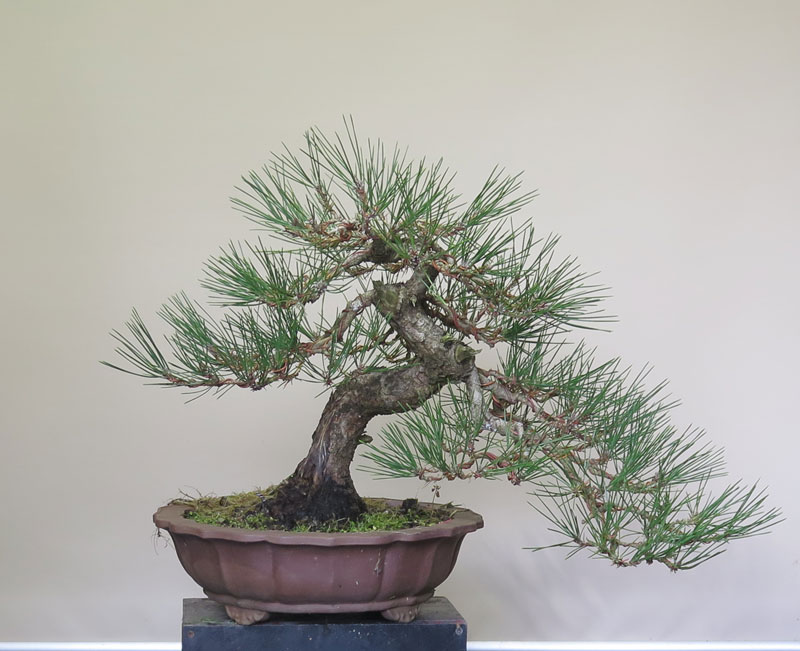
After some wire…..
I discovered on the tree above some significant rot had formed on the left side of the trunk. I dug out what I could but I will have to further investigate / treat it during repotting in the next few months.
Post needle plucking 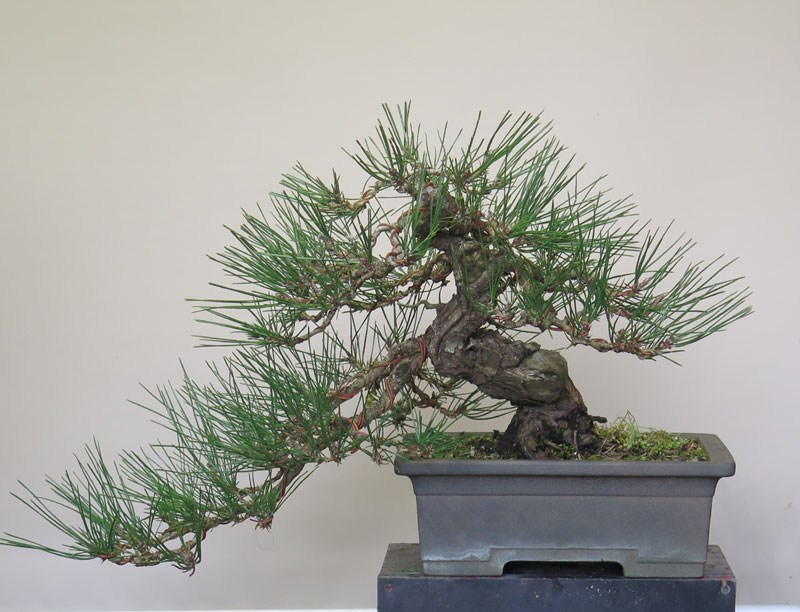
Some wiring later…
This next tree was fairly straight forward, it was wired out and it’s branching spread to allow for the in-fill budding and ramification that I will hopefully build over the next couple of years. With any luck, this tree will fill in fairly quickly and present a dense canopy.
There is something to be said about the different ways in which you might approach styling depending on what stage the material is that you are working on. Trees like the two above, I tend to try to spread things out much more than if I was to style something that was more “finished”. You need to make a guess as to how many future buds and branches you need to make room for. If you style developing material as if it were a display tree (tight, dense branches) you end up having to re-wire almost yearly to re-distribute the branch ramification to make room for the new shoots.
All in all nothing ground breaking with the above two trees but I suppose it tracks the often mundane nature of the slow improvements over the years. Not every styling is a dramatic transformation and in fact the real skill lies in the fine tuning, not the dramatic, which is something I am still trying to perfect……….
I’ve had a spur of motivation lately. In my private life i have changed jobs and am now working a 4 day week. It’s given me the hint of a day a week i can spend on myself and thus far i’ve been dedicating it to Bonsai.
One of the trees that has benefited from this work is a Japanese Maple that i begun work on several years ago. You can read a blog post about it below:
Its been a slow road, mainly due to my lack of attention but I have been slowly removing course growth and re-growing better branching.
It has a long way to go but finally I am beginning to see it growing into its final form.
The upper areas of the tree have a lot of length to add to the branching and there is the start of another trunk (which will be the fourth, shock horror) on the bottom right of the trunk.
That said I am pretty happy with where it is at and with a little more time up my sleeve I hope to get some more mileage out of it this year.

This post will hopefully be the first in a run that i have been preparing and working on. I have a couple of pines left to un-wire before repotting season hits us so i will try to cover off some of that as it happens.
I am thinking that when I repot this tree it will likely get a change of pot to mix things up a little.
Until the next one………
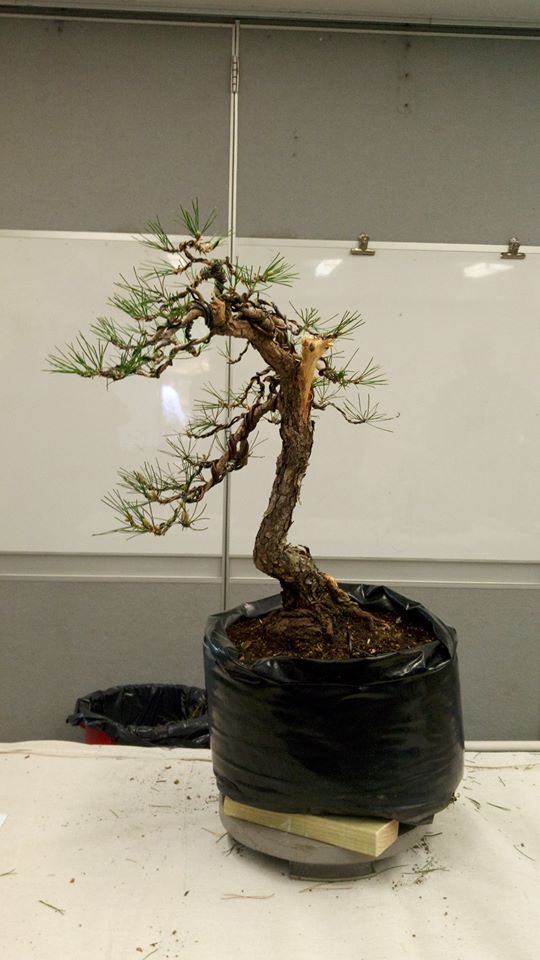
One of the recent trees I worked was the below Pinus sylvestris or Scott’s Pine.
It’s a tree I have gone on a rollercoaster ‘love-hate’ relationship with over a long period of time. The tree was originally owned by a woman in my local bonsai club. From a very early stage she had told me she wanted me to have the tree when it became too big for her to handle.
I had never really loved the tree but I got along really well with the owner and was touched that she wanted me to take on her tree. Each time I saw the tree we talked about it’s future and health. The more I saw the tree the more I liked it and could see a future in it.
Fast forward a while and the tree declined in health and lost some branches. It was brought back to health to a point where it was offered up as demonstration material at a local club. During the demonstration via a visiting tutor, a number of branches were cut off and the tree was styled as a wind swept style. Now the styling was fine enough but I really dislike windswept styled trees, and the styling removed many of the branches apart from those at the upper most section of the trunk. The tree was then again left to grow out and several years later I inherited the tree.
At the time I had no idea what to do with it but wanted to hang onto it due to how much the previous owner had wanted me to have it. So I stared blankly at it each day as I watered it and wondered what to do.
Fast forward a few more years and I was selected to demonstrate at the Australian Association of Bonsai Clubs annual convention (2018) along side Bjorn Bjorholm. I decided that this tree would be a good contender for testing my skills so I began to prepare it and get it strong for the convention.
It was wired and styled as per the images below over the course of an afternoon (having been pre-wired)


I was pretty happy with the outcome given where it started and the tree grew on me a little more.
Fast forward a few years and the health of the tree had gone backwards due to some water issues I later discovered I had (see HERE) .
So I let the tree grow out as I dealt with the the pH problems.
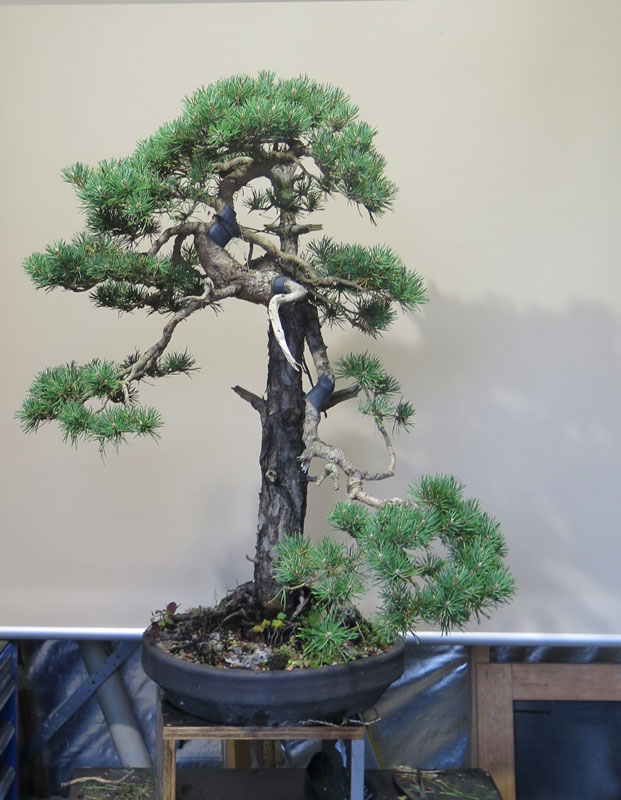
I decided it was time to re-work it and begun to pull old needles and fully re-wire the tree. I also removed a number of branches that may or may not have been required (i cut one off that i didn’t like but probably should have kept in the short term….).

The remaining needles were a little shorter than i would have liked having been somewhat knocked about by my water issues and the overall styling is much more tight than that of the AABC demonstration (which I prefer), but as i see it this tree has a few years to grow out, extend a few branches, develop the ‘second apex’ etc. For this styling I focused on a tighter styling so that it sets a solid structure to then build future stylings upon.

All in all I am happy with where this tree is at and where it is heading. Its certainly a weird tree in the grand scheme of things but it is one of those trees I find myself starring at in the garden against some of the more ‘normal’ bonsai shapes.

The below tree is bonsai i have had on my benches for a number of years. For some reason i hadn’t really worked it much over that time and was putting it off so it could be used as demonstration stock. With covid hitting and my calendar being cleared i thought it made no sense to put it’s styling off any more. I think this tree was last worked in 2012 so it was certainly due for a re-visit.

The work revolved around framing the trunk movement and shortening / compacting the lower branch. Most of that was accomplished with a handful of guy wires and standard wiring.

Not the neatest job on the planet but as the new needles were still a little delicate i left more on than i otherwise might in case i damaged some during the styling. All in all i am pretty happy with the results and will begin hunting a new pot for this coming re-potting season. (probably means i will have to dig through all the boxed up supplies….)
Another in the series of updates i will be posting over the next few weeks. The tree in question in this post is a japanese black pine that was originally a demonstration tree styled as part of the Central Coast bonsai societies Touch of Japan festival back in 2017.
I ended up liking the tree and purchased it post demo.

A year or so later a friend drove it from Sydney back to Victoria where it sat on my benches and it slowly deteriorated. The tree was in a plastic grow bag and on further inspection the root ball consisted of a sticky clay bulk that had been top dressed with good bonsai soil. I had assumed that the bonsai soil went the whole way through the bag but it didn’t and as a result a large percentage of the root mass had rotted off. I did an emergency repot into better soil and a smaller pot and soon the tree showed signs of growth and recovery. The tree continued to gain health and was re-styled as per below:


And now the tree has grown out for a full season without candle pruning to build strength, needles are a touch on the long side but i am happy with the level of back budding and strength the tree is showing considering it was on deaths door a couple of years ago.
Looking at the above image there is certainly room for fine tuning, but i will likely do that towards the end of Autumn / early winter while i am doing pine needlework.
This little lump of wood is something that has been sitting on my benches for a number of years. I’ve been slowly building branch density and roots having arrived in my garden shortly after it was collected.

Chunky Nugget!
With my re-potting supplies delayed due to a Covid19 lock-down I had some spare time and gave it a quick first style. I need to next go through my pots and find something that might fit it when i do get around to re-potting.

It obviously needs a fair amount of more tweaking but I will likely leave that until I get it into a more suitable pot. That said and looking at these photos I can see that the apex is bothering me and will likely need adjusting regardless.
