
You are currently browsing the tag archive for the ‘Needle thinning’ tag.
As the season rolls on I am slowly getting to the end of my needle work which in turn will mark the time to begin preparing the deciduous trees for winter.
The tree below is another that has been slowly developing over the years and with another wiring and another years candle pruning I think it will be close to exhibit-able.
The tree has appeared on the blog before HERE where you can see the progress it has made and the ramification it has gained. It also makes obvious just how much it needs a re-wire.

Before the work

After a the needle plucking.
Yet another of my trees that desperately needs a re-wire, it will have to get into line behind all the others that I plan on doing this winter.
This weekend gone by I got some time to do some needle work on a few more trees. One of which has featured on this blog before. It’s a bit of a strange tree and people either like it, or want to cut off the first branch. I like the first branch and as a result i haven’t cut it off just yet and actually now the tree is filling in a little bit more I am beginning to like it more than I did at first.
Looking a little shaggy
Probably the part of blogging I am enjoying the most is how it has forced me to catalogue my trees as they progress. If you look at this tree 2 years ago HERE you can see that the tree has really improved over that short time. Looking at it day to day on the benches it is easy to lose perspective and feel like the tree is not progressing. It is only when you see a picture from a year or two ago that you realise just how much it has changed.

Needles removed revealing nice, new, short growth.
I am very happy with the progress I have achieved with it over the last couple of years and hopefully if I can keep this momentum up for a few more the tree will be well on the way to being exhibit-able.
I doubt if this tree is ever going to be everyone’s cup of tea but I think that it is now on a path where it will grow into a convincing image.
Its been a good year for growth in my garden which is always a bit of a double edged sword. A good seasons growth means that all your trees will have progressed and built further to their structure, ramification etc. but with lots of growth comes lots of maintenance.
With my pines this work takes longer and longer times. As the trees ramify the number of shoots double each year in turn doubling the time it takes to maintain them. As trees become more dense fingers can no longer reach areas of the branching so tweezers are employed which again can slow things down a little.
Here in Australia we are beginning to slip into autumn and it is time to shoot prune the second flush of growth and do needle work on the pine’s remaining growth.
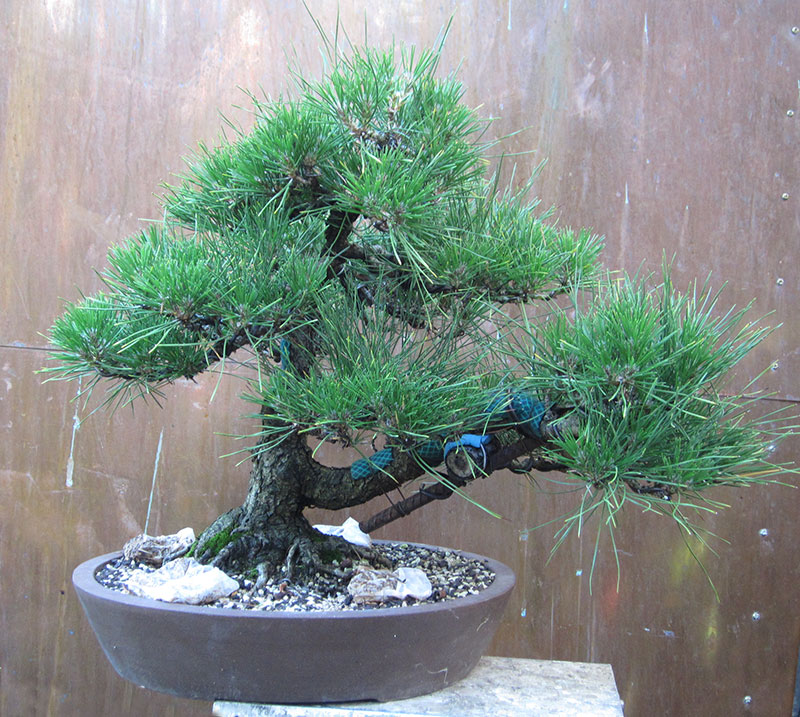
The first tree off the bench was THIS little black pine.

Before the work.
Finally it is beginning to look like it belongs in a bonsai pot. you can see in the before picture how nicely the needle length has come down compared to the long needles attached to candles that were not pruned in spring due to them being weak. These weak candles now have strong buds at their tips getting ready for next springs flush.

After removing old needles.
After a few hours work things begin to look a whole lot neater. The new length of the needles is much more suited to the trees size and over all the tree is beginning to look more in proportion. Next step is a re-wire which I hope to complete some time this winter and then a re-pot into something a bit nicer.
It’s that time of the year again.
It’s a time of the year that I both look forward to and dread. Once you amass a certain number of pines you begin to realise just how much time you need to set aside to give each tree its seasonal maintenance. This year, I have moved house and as a result some of the trees I would have normally have worked on earlier in the month were left until now, so the back log of tasks compounded the time I needed to spend on them. That being said, once I began the work I really enjoyed getting to see just how each tree had been growing over the season. When you thin needles you get to inspect very closely every branch of the tree and evaluate each new bud, needle and twig. You really get to know your trees while doing these tasks.
Why do you thin needles? You should thin needles at this time of year for a few reasons.
- By removing last season needles you let more light and air into the canopy which in turn encourages back-budding.
- By removing some of this seasons needles on strong areas you are able to balance strength across the tree foliage.
- By removing surplus needles you also reduce the amount of places that insects and other pests are able to hide.
I like to think that needle reduction for pines works a little like defoliation does for deciduous trees. I figure that the pine realises it suddenly has less foliage and as a result sets new buds which will grow the following spring to replace the needles that you removed. As pines cannot simply grow new needles they have to throw new buds. Most of these new buds will be dormant buds back within the canopy. These are the buds you want. This back-budding is what will give you foliage to cut back to in the future and which will prevent branches becoming leggy.
This year I have left a few more pairs of needles then I usually may on some trees as I plan to re-pot them come spring and figure they could benefit from the extra strength more needles will provide.

A Formal upright Black Pine in the making. This image was taken prior to beginning needle thinning.

The same tree after thinning. It is still very much in developement but after a few years of work i hope to have a more complete looking tree.

This is another JBP from the same batch as the above pine. It has developed much better than the above pine. It avoided many of the mistakes the other tree had to endure as i was learning. Photo was taken before thinning.

The same tree after thinning. It needs the apex developed but otherwise is on the right track. I am also planning to graft a back branch or two into the upper section this spring which may be the topic of a future post.
I also thinned my large Radiata. I again left more needles on it that i usually might for two reasons. The first reason is because I will be re-potting it this spring and I want it to be strong. The second reason is because I am experimenting with leaving more foliage on it much like you would on a white pine. We will have to see how that works out.

A Radiata branch prior to thinning.

And the same foliage after a light thinning.
