
You are currently browsing the tag archive for the ‘bonsai’ tag.
Wow, looks like almost a year since the last post. Time flys!
I’ve been doing bits an pieces since the last post, in the shed, teaching at clubs and doing the odd demo but for the most part have not been documenting much of it. Life has been pretty busy and typing up blog post is often down the to do list.
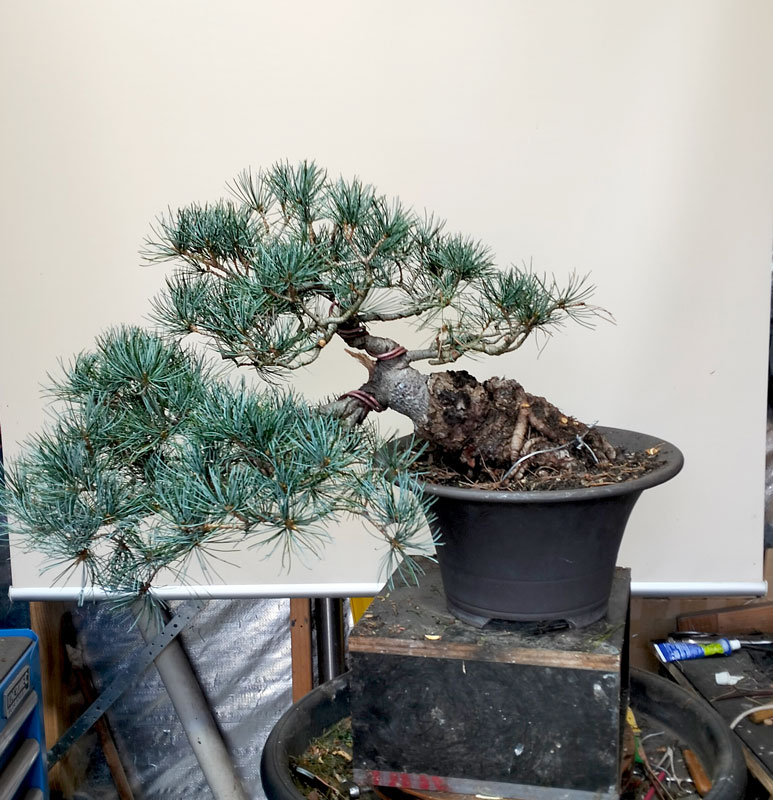
That said, i did remember to take a few (bad) phone pics of the below tree.
The tree in question was one i was gifted and had owned for a while. It was then was passed onto another friend, and then several years later it found it’s way back into my yard.
It started life as a garden nursery tree complete with pretty lumpy graft, leggy growth and circling roots. It was originally given to me as the original owner lived by the ocean and the salt spray was leading to it suffering. I nursed it back to health and cut most of it off, leaving two branches essentially. One became the main branch and the other the head. I tipped it on an angle to make better use of the swollen lower root base and gave it a first styling.
It was shortly after this first styling that i gave it to a friend who grew it here in Ballarat for probably close to 4 or 5 years.
Cut to a few weeks ago when i was visiting him and his collection and the tree ended up coming home with me once more. It had really filled in well and provided a heap of new options to explore so i decided to give it it’s second re-styling.
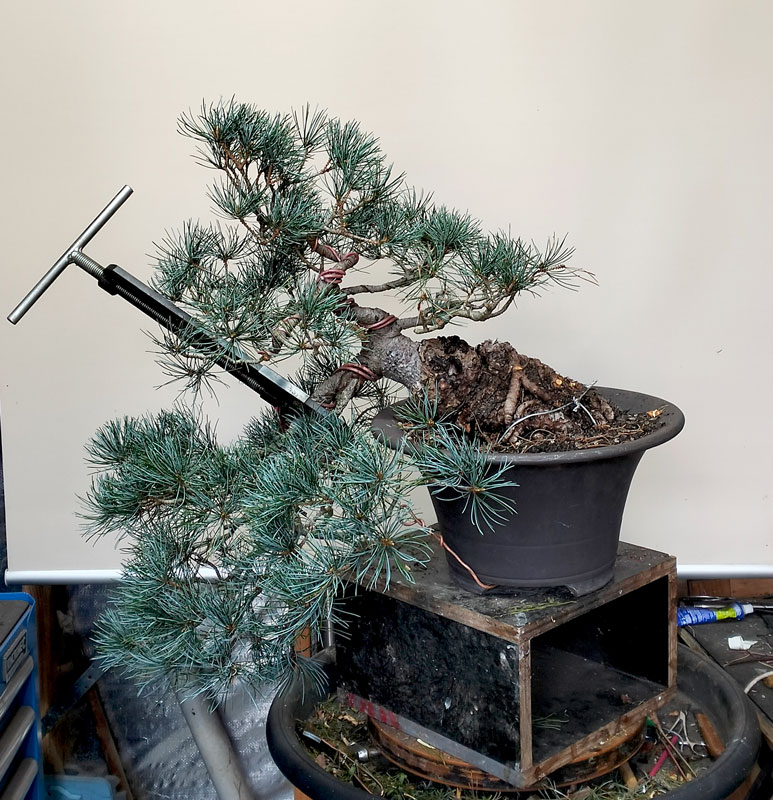
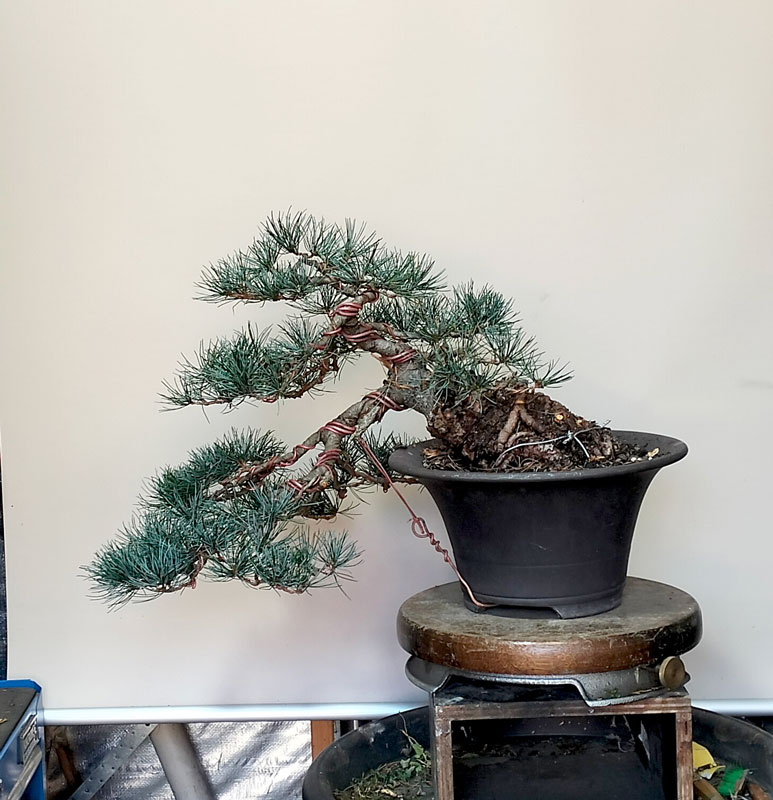
The basic steps i took are shown above, I removed a number of un-needed branches and thinned old needles, then made the major adjustment by pulling the main branch down with the help of a branch bending jack. From there it was just a matter of wiring out the foliage to fit the new style.
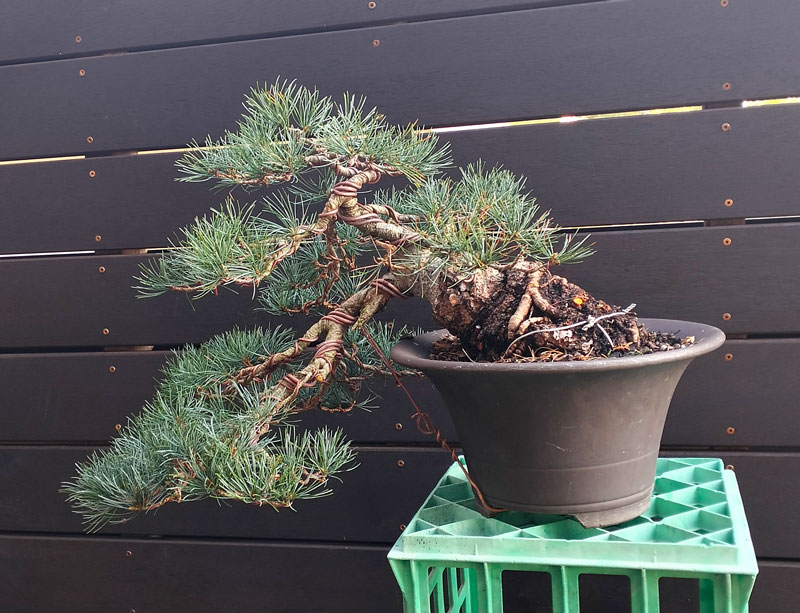
The tree sat on the back deck for a couple of days where i made a few adjustments as i got used to the tree. It had a weak first branch on the right hand side so those shoots got minimal wire but they all got mostly into place.
There is now some filling out to go but i have been feeding to build up the energy over autumn to set up next springs buds and i am expecting i will get much of the filling out i need next season.
All in all i really like this tree, and given it original owner has since passed away i am glad to have this tree back in the yard as a little memento of some good times we spent styling bonsai together. It’s also nice it spend some time with my other friend in between, it’s one of the unique things with bonsai that a tree can travel between many hands, each leaving its mark.
With a new year upon us it marks a good time to change things up a little.
At the start of spring, Evan Marsh put me onto a cheap dosing attachment available from our friendly, faceless multinational hardware chain.

It has been a good addition to the garden so far as it’s ease of use has really upped the regularity of my feeding and all my trees are showing excellent health and growth as a result.
I always liked to think that i fed regularly but when i though back to when my last weekly feed was it was often months ago……. This new dosing attachment makes the process so simple and convenient i have been able to feed as i water and it has kept me to my intended schedules much more easily.
For those interested, THIS is the product in question, the Holman ‘Quickmix’ spray gun.
After the Quickmix discovery, then came the task of deciding what fertiliser to use. I tried some of my usual go to liquid feeds but their paste like consistency clogged some of the jets and just generally didn’t feed out very well in the Quickmix.
So after very little experimentation I have landed on the below system:

The fertiliser itself is intended for Hydroponics so has a good spectrum of nutrients and minerals but requires some preparation prior to use. It is a 2 part system where you need to mix a ratio of the crystals and water into 2 parts prior to combining the two into the Qickmix before you feed. It is my understanding that some of the minerals will re-crystalise if you leave the 2 parts mixed for any period of time so best to mix the two prior to feeding.
To use the Quick mix i add about 5mm of each 2 part solution tot he Quickmix and top up the bottle with water. Then i simply water using the gun. The gun has some adjustment for the dosing rate but as i have lower pressure from my water tank’s pump i just use the maximum rate. (more details about the dosing rates on the Holman website)
I have made my pre-mixed solutions in 2x 500mm bottles. I have been feeding each week and have so far used less than a 1/4 from each bottle. This stuff goes a long way! For $25 i think i will get several years worth of feeding done so i cant complain on the value side of things. All in all i am very happy with the system thus far. This combined with a slow release seems to be covering all the feed needs i have for now.

Just a quick update on how this tree is developing. It was in the workshop recently for a cleanup (mainly as an excuse to play with THIS).
It is proving to be both a really useful and fun tool to use around the collection. It’s an amazingly quick way to clean up deadwood, remove built up muck, staining and compact dirt from trunks and roots and even stones. Ive had trident maples with dark staining on their lower trunks for years, this is the first season they are clean!! Its a tool that is well worth the investment if you have similar tasks in your own trees.

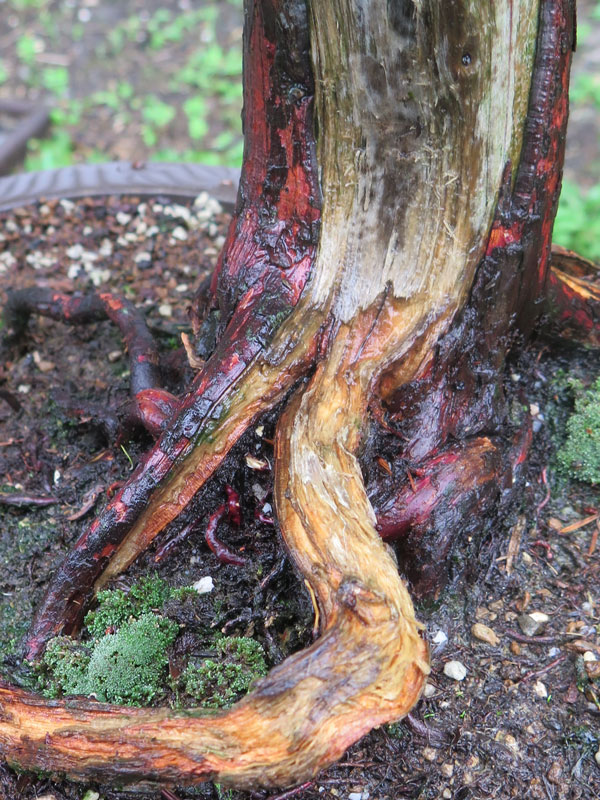
The above comparison shows what 2 minutes can do with one of these tools. You can probably also see that it has removed a lot of the rotten, punky deadwood in the process leaving behind the harder heartwood which has saved another task. All i will need to do is a final hand clean and we are ready for a new coat of lime sulphur.
I am going to also give this ‘Alchohol & Resin’ wood hardener a go this year and see how that works in some of the more prone to rot areas.
As for the tree itself, it is building momentum and developing quickly now and i am contemplating on displaying it at a local show mid next year if it continues to go from strength to strength and i can get all the foliage as developed as the lower first branches pads are.
Its an interesting tree to look at over time as per the images below:
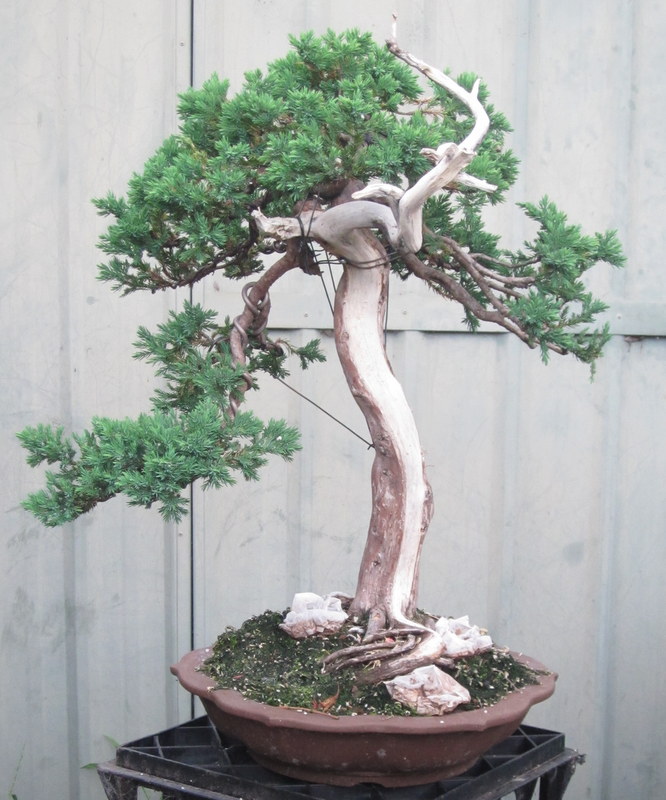


So back to the work, after a good cleaning the shari and deadwood was re-limesulphured and the bark somewhat cleaned up. Its growing into a nice tree.

While I had the tree on the bench i also thinned and shaped the live veins a little on the rear of the tree to further define them and ideally encourage them to ‘plump up’. Afterwards I gave the shari areas and jins a good fresh coat of lime sulphur and added some moss while I waited for things to dry. As I was applying the moss i also pulled and tied down the root on the left side that was hovering above the soil surface which I think was an easy improvement to make.

Next time this tree is on the bench I need to remove and likely re-wire the foliage and branching, but I am going to wait for things to fill in a little more before I do that, maybe next month’s task.
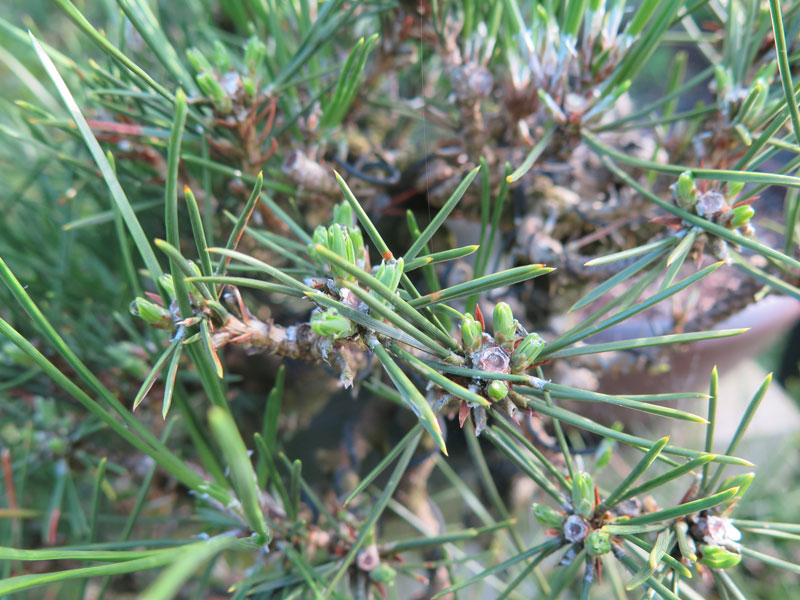
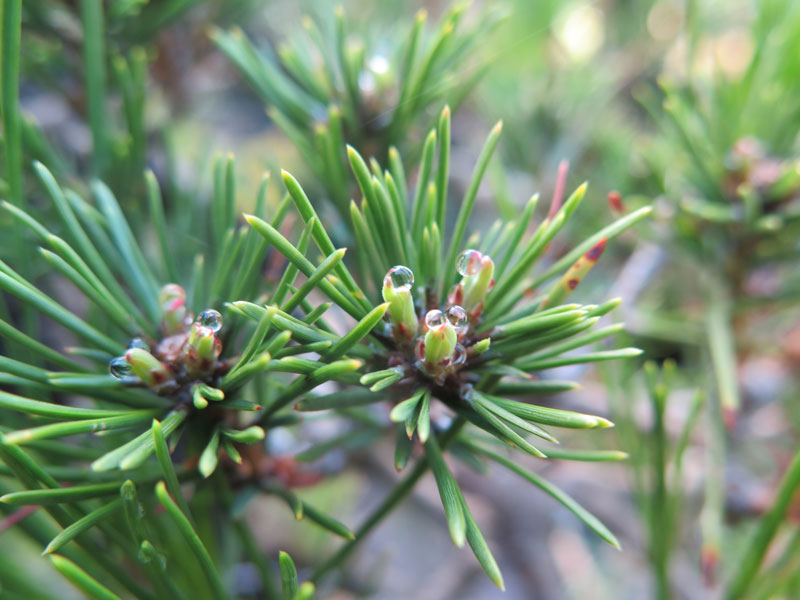
This year i finally feel like my pines are thriving after a long period of mediocre growth. This bad growth was due to a number of factors including:
- water pH Issues – Solved by moving to rain water.
- soil mix – I have recently moved to Akadama, Pumice and Scoria and believe this is a good improvement.
- fertiliser regime – This year i am using a two part hydroponic fertiliser and am applying weekly, and;
- strange seasonal variation – We have been in an ‘El-nina’ phase which resulted in cool wet years which even threw my tomato crops off kilter amongst other things
Most of the pines have been grown out last year and skipped de-candling to build their strength and from the below pics you can see they are responding well this year.

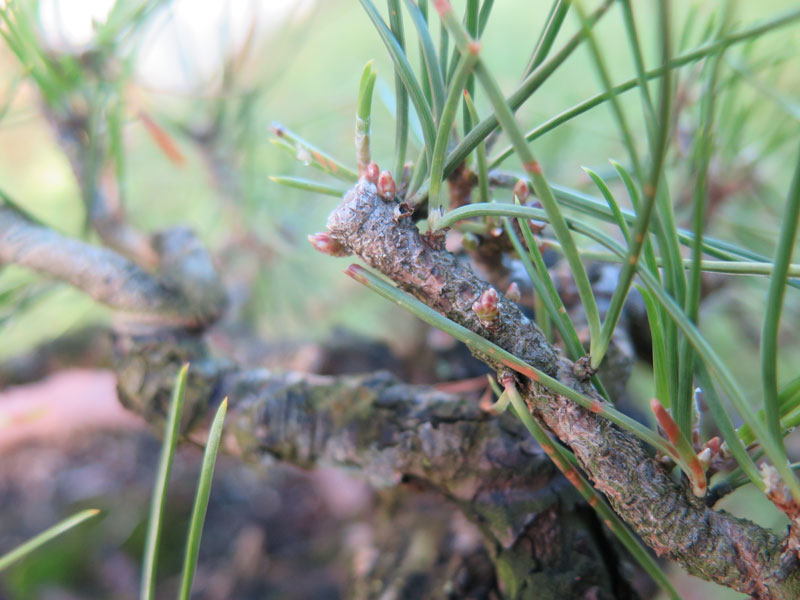

The Radiata is a fairly new addition to my garden after not having one for a while. I am treating it more like a Japanese White pine in regards to foliage management and so far am seeing good results. The process is essentially:
- Grow out the spring flush.
- once it stops extending, prune back leaving some of the new candle’s growth.
- New shoots form and grow out
- Thin needles
- Prune back new shoots to two and reduce length as per Step 2.
- Repeat.
I am guessing i will get 2 or 3 flushes per year using this method. So far needles have not come down in size much but as i build more canopy i assume this will slowly reduce the length.
I probably also need to play around with feeding timing but at the moment i am focused on building branching so am feeding heavily. A post for another day.
With some down time over the Christmas holidays, I finally got around to re-styling THIS TREE. It had been growing mostly untouched for a couple of years and had well and truly outgrown its former style.

As it had been left to grow a lot of the growth had become leggy and a lack of routine thinning had left fewer amounts of interior growth than i would have liked.
To get started, I began by pruning. I thinned and removed heavy and unneeded branching, upward and downward growing sub branches, thinned the foliage and generally cleaned up the structure.

As I worked I also started to play around with new front angles and didn’t mind it from a slightly counter clockwise rotated position.

I began to wire as I pruned so i could get a better sense of what branches I needed and what could be cut off. All was going well until i made an error. I wasn’t paying enough attention and when I cut off one of the branches in the top of the tree it was difficult to see from my angle that there were two branches in the branch cutters jaws…….. and as a result, i cut the key branch on the right side off.


Well, what was done was done so I continued wiring and worked a front that was much closer to the original. I was pretty annoyed with myself but there wasn’t a whole lot I could do. All in all everything was not lost but i was kicking myself for making such an avoidable mistake.

The ‘finished’ result is a good place to be for now. The styling is pretty sparse due to how much foliage and branching i removed but the trunk and deadwood are now very much more prominent.

You can probably see that the wiring I applied is only on major branches and sub branches. As this is a restyling, I will need to develop the foliage over the next 12 months or so to fill in and tighten up to this new style, so I didn’t bother fine wiring and hence the slightly scrappy appearance.

As the canopy fills in i think i will further fine tune the front. As you can see from the above image that original front is not bad but i still think i prefer the one i ended up with that is slightly rotated anticlockwise. We will see if this changes as i grow some of the branches and get some more width to things (something that i wouldn’t have to wait for if i hadn’t cut off that key branch!)
It is interesting comparing this and my other small Kishu to the itoigawa i have. It is certainly more difficult keeping these kishu small and compact compared to the itoigawa. That said, the branching stays much finer on these so i guess you have to take the good with the bad.
Next post might be an update on one of my itoigawa trees…. we will see.
